From level 51 you receive exactly 1 point per level on Vantoria. The planner uses the same formula as the game server.
VANTORIA WIKI
Knowledge base for Vantoria.net. Choose a category from the sidebar or use search.
Lore
Discover the world and story behind Vantoria.
What is Vantoria?
Welcome to Vantoria
Vantoria is an evolution server based on the Tibia 15.25 client, featuring many exciting updates. Our goal is to provide a unique and immersive experience for all players. Explore new features, face powerful monsters, and dive into epic quests!
What Can We Offer?
- Frequent Updates: Stay up to date with regular content releases and bug fixes.
- Attention to Detail: Report any map issues or typos - we listen and improve constantly!
- Active Community: Join our Discord to share ideas and get help.
- Fair Item Store: Most store items are also available via quests, trades, or events.
Our Systems
- Dungeon System: Randomly generated dungeons full of loot and danger.
- Boss System: Fight RL Tibia bosses with custom mechanics and loot.
- Autoloot System: Automatically collect dropped items from monsters.
- Task System: Complete hunting tasks and earn tokens to fight task bosses.
Map and Missions
Our map is carefully crafted - no lazy square additions, just detailed and meaningful zones. Each area offers a different challenge or story. If you love exploring, youll love Vantoria.
VIP
Enjoy powerful benefits across your entire account!
VIP - Enhance Your Gaming Experience
Gain powerful advantages across your entire account!
| Bonus | Effect |
|---|---|
| Experience Boost | +15% experience rate |
| Skill Training Speed | +5% faster |
| Loot Bonus | +10% extra loot |
| Account-wide | Valid for all characters |
| Instant Activation | Activated upon purchase |
VIP players also receive 3 exclusive mounts:

Savanna Ostrich

Coral Rhea

Eventide Nandu
Commands
Verified commands registered for normal players.
Player Commands
This list is generated from commands currently registered for normal players. Staff-only commands are not included.
General
!commands — shows the in-game command list.!serverinfo — displays server rates and settings.!time — shows the current server time.!online — lists players currently online.!fps — toggles the lightweight FPS mode.!frags — shows your unjustified kills.!randomoutfit — changes to a random available outfit.!r — rotates the item in front of your character.!checkvip / !vip — checks VIP status.Supplies and Systems
!aol — buys an Amulet of Loss.!bless — buys available blessings.!bp — buys a backpack.!food — buys food.!flask — manages empty potion flasks.!refill — refills supported supplies.!reward — opens the exercise reward selection.!autoloot — configures automatic looting.!chain — configures chain-combat behaviour.!shared — shows party shared-experience status.!promotion — buys your vocation promotion when eligible.!hiddenshop — reopens the supported hidden NPC sell list.Bank and Houses
!balance — checks your bank balance.!deposit amount — deposits gold.!withdraw amount — withdraws gold.!transfer amount, player — transfers gold to another player.!buyhouse — buys the house you are standing in front of.!sellhouse player — starts a house transfer.!leavehouse — gives up your current house.Guild and War
!createguild name / !joinguild name — creates or joins a guild.!invite player / !kick player — manages members.!leave / !disband — leaves or disbands a guild.!promote player / !demote player — changes guild rank.!passleader player — transfers guild leadership.!nick player, nick — assigns a guild nickname.!setmotd text / !setrankname — updates guild information.!war — manages guild war actions.World Boost
Global experience events.
World Boost
| Item | World Boost |
|---|---|
| Effect | Activates a 60-minute EXP 50% event for all players. |
| Activation Methods |
|
| Description | You can activate the global 50% EXP event by using a World Boost Key or by collecting 500 Task Tokens. If using tokens, you can contribute any amount between 1 and 100 at once until the goal is reached. The boost lasts 60 minutes for everyone online! |
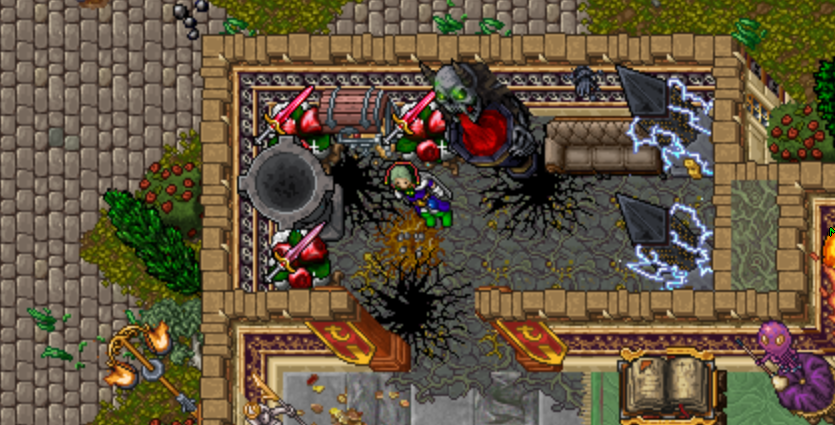
Visual overview of world boost
Double EXP
Get additional experience while hunting.
DOUBLE EXP SYSTEM
While hunting monsters, you have a certain chance that a special tile will appear nearby. This tile will be marked with an arrow and the text x2 EXP.
When you step on this tile, you will receive a temporary experience boost:
- Bonus: Double experience points for all kills.
- Duration: 120 seconds.
- Notification: You will see the message: "You have received x2 experience for the next 120 seconds. Type !exp to see the remaining time."
Make sure to watch for the arrow indicator during hunts to maximize your EXP gain!
Tip: Use the !exp command anytime to check how much time remains on your x2 EXP boost.
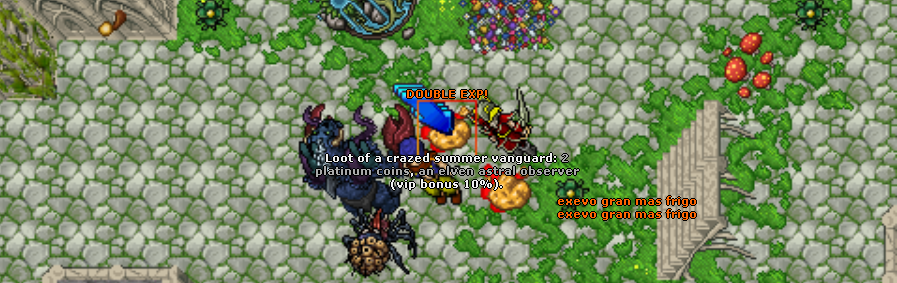
Visual overview of Double Exp
Daily Rewards
Receive daily rewards.
Daily Rewards
Log in daily to claim special rewards that help you progress faster and maximize your hunting potential.
| Day | Reward | Amount | Description |
|---|---|---|---|
| Day 1 | Exercise Weapons | 4,000 uses | Train your skills faster with extra exercise weapon uses. |
| Day 2 | Prey Cards | 5 cards | Use Prey Cards to reroll or unlock additional prey slots for better hunting bonuses. |
| Day 3 | Gold Tokens | 5 tokens | Trade Gold Tokens for valuable items or services in the in-game store. |
| Day 4 | Stamina Extension | 1x | Boost your stamina, allowing you to hunt longer with increased efficiency. |
| Day 5 | Prey Cards | 10 cards | Even more cards to help you optimize your hunting targets and loot chances. |
| Day 6 | Exercise Weapons | 6,000 uses | A huge boost to your skill training, saving time and resources. |
| Day 7 | EXP Boost | 1 hour | Gain extra experience for an hour to level up faster during hunts. |
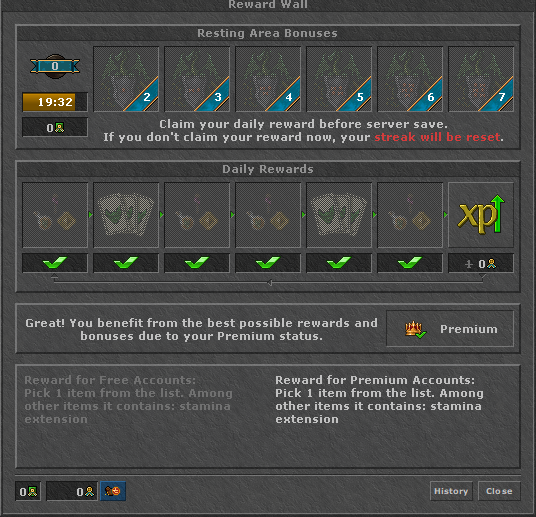
Visual overview of Daily Rewards
Perks System
Enhance your character with bonuses.
SkillSystem - Perks
The SkillSystem is an advanced character progression system that allows players to earn and spend points on various perks, which boost damage, experience gained, and elemental resistances. Points are automatically granted based on the player's level, and you can invest them to upgrade your chosen skills.
Using Statues in the Depot
Instead of using commands, players can upgrade their perks by interacting with special statues located in the depot. These statues provide a user-friendly interface for upgrading perks directly, making it easier to manage your character's bonuses.
Additionally, there is a reset statue that players can use to reset all perk bonuses and refund spent points, allowing you to reallocate your skill points as you wish. Bonus percentages will be immediately removed from your character upon reset.
How Are Perk Points Earned?
Points are awarded for reaching specific level ranges as follows:
| Player Level Range | Points per 50 Levels |
|---|---|
| 50 - 200 | 2 points |
| 201 - 500 | 3 points |
| 501 - 1000 | 4 points |
| 1001 - 1500 | 6 points |
| 1501 - 2000 | 8 points |
| 2001 - 2500 | 9 points |
| 2501 - 9999+ | 10 points |
The total points depend on your player level and update automatically. You spend these points to upgrade perks, and available points are calculated by subtracting spent points from total earned.
Available Perks and Their Effects
| Extra Damage | Increases the overall damage dealt by your character by 0.2% for each perk level. |
|---|---|
| Extra Experience | Increases experience gained from hunting by 0.5% per perk level. |
| Physical Resistance | Reduces incoming physical damage by 1% per perk level. (Shows in Character Window) |
| Fire Resistance | Reduces incoming fire damage by 1% per perk level. (Shows in Character Window) |
| Energy Resistance | Reduces incoming energy damage by 1% per perk level. (Shows in Character Window) |
| Earth Resistance | Reduces incoming earth damage by 1% per perk level. (Shows in Character Window) |
| Ice Resistance | Reduces incoming ice damage by 1% per perk level. (Shows in Character Window) |
| Holy Resistance | Reduces incoming holy damage by 1% per perk level. (Shows in Character Window) |
| Death Resistance | Reduces incoming death damage by 1% per perk level. (Shows in Character Window) |
How to Upgrade Perks?
Perks are upgraded by spending points earned from leveling up. Each upgrade costs an increasing amount of points depending on the current perk level, making higher levels more expensive. The maximum level for each perk is 20.
Summary
The SkillSystem offers players a way to customize their character's growth by investing in specific perks, allowing for more strategic customization, damage boost, defensive attributes, or faster experience gain. This system makes gameplay more engaging and lets you tailor your playstyle to your preferences.
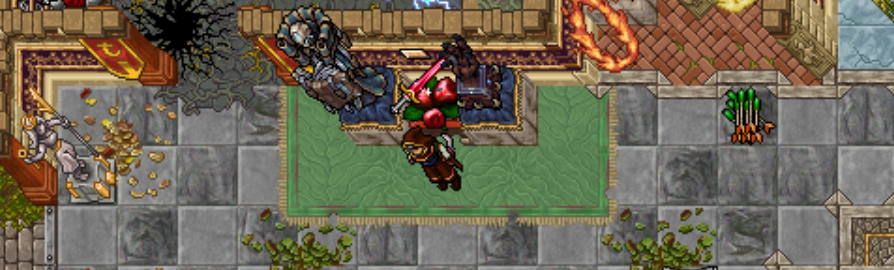
Visual overview of Perks System
Roulette
Play roulette and try your luck.
Casino Roulette
Required Item

Casino Token
You need 1 Casino Token to perform one roulette spin.
You need 1 Casino Token to perform one roulette spin.
How does it work?
Insert 1 Casino Token, pull the roulette lever and wait until the spin animation ends. You will receive one random reward. Every spin consumes your token.
Rewards
| Item | Amount | Chance | Rarity |
|---|---|---|---|
 Prey Cards
|
1-2 | 3.0% | RARE |
 Forge Crystal
|
1-5 | 3.0% | RARE |
 Addon Cloth
|
1-5 | 8.0% | UNCOMMON |
 Stamina Refill
|
1 | 2.0% | LEGENDARY |
 Crystal Coins
|
10-30 | 100.0% | COMMON |
 Chalice Bag
|
1 | 0.5% | LEGENDARY |
 Mount Token
|
1-3 | 8.0% | UNCOMMON |
 Reroll Token
|
1 | 3.0% | RARE |
 World Boost Key
|
1 | 1.0% | LEGENDARY |
 Gold Token
|
5-10 | 55.0% | COMMON |
 Duplex
|
1-3 | 27.5% | COMMON |
 Strike Enhancement
|
1-3 | 16.5% | COMMON |
 Bestiary Betterment
|
1-3 | 36.5% | COMMON |
 Tibia Coins
|
1-10 | 15.0% | UNCOMMON |
 Exalted Core
|
1-3 | 15.2% | COMMON |
 fire boots vantoria
|
1 | 3.0% | RARE |
 ice boots vantoria
|
1 | 3.0% | RARE |
 death boots vantoria
|
1 | 3.0% | RARE |
 holy boots vantoria
|
1 | 3.0% | RARE |
Monsters
List of beasts and where to find them.
Vantoria Creatures Encyclopedia
Discover creatures available across Vantoria. Monsters are grouped by experience value, helping you choose where to hunt next.
Current Vantoria progression balance
Base HP and EXP values after the progression update. Active stages, boosts and party bonuses may change the final experience received.
Norcferatu Abomination: 80 000 HP, no EXP. It cannot be pushed and serves as a combat wall that must be defeated.
Level 500 progression
Entry solo hunting after the early EVO zones.
| Monster | HP | EXP |
|---|---|---|
| Lion Hydra | 14 500 | 15 500 |
| Bluebeak | 13 000 | 14 200 |
| Crusader | 16 000 | 16 800 |
| Headwalker | 13 800 | 15 000 |
Library-style hunting
Balanced near the difficulty and efficiency of the Library family.
| Monster | HP | EXP |
|---|---|---|
| Dark Knowledge | 20 000 | 14 500 |
| Half Dead Savant | 18 500 | 14 800 |
| Death Squid | 19 500 | 16 200 |
Rotten Blood — level 800+
Solo-friendly base values with room for stronger team pulls.
| Monster | HP | EXP |
|---|---|---|
| Bloated Man-Maggot | 20 000 | 42 000 |
| Converter | 19 000 | 33 500 |
| Darklight Construct | 19 000 | 40 800 |
| Darklight Emitter | 18 000 | 32 500 |
| Darklight Matter | 20 000 | 35 000 |
| Darklight Source | 20 000 | 42 000 |
| Darklight Striker | 19 000 | 33 500 |
| Meandering Mushroom | 18 000 | 32 500 |
| Mycobiontic Beetle | 19 000 | 34 000 |
| Oozing Carcass | 18 000 | 32 500 |
| Oozing Corpus | 19 000 | 40 200 |
| Rotten Man-Maggot | 19 000 | 41 400 |
| Sopping Carcass | 20 000 | 42 600 |
| Sopping Corpus | 20 000 | 35 500 |
| Walking Pillar | 20 000 | 45 600 |
| Wandering Pillar | 20 000 | 44 400 |
| Noxious Ripptor | 25 000 | 30 500 |
| Shaburak Demon | 24 000 | 34 800 |
Elemental Island — level 1200+
Designed for current solo progression into the elemental storyline.
| Monster | HP | EXP |
|---|---|---|
| Inferthrasher | 25 000 | 72 500 |
| Pyrovex | 22 000 | 70 000 |
| Blazebane | 23 000 | 72 500 |
| Tiger Of Death | 24 000 | 75 000 |
| Celestial Warrior | 27 000 | 80 000 |
| Angelic Warrior | 28 000 | 82 500 |
The Riftforge — level 2000+
High-level solo monsters unlocked after completing the Elemental storyline and defeating The Primordial Titan.
| Monster | HP | EXP |
|---|---|---|
| Sandworm | 30 000 | 108 000 |
| Liquid Flame | 28 000 | 102 600 |
| Iron Giant | 34 000 | 118 800 |
| Byblos | 32 000 | 110 700 |
| Aevis Killer | 29 000 | 105 300 |
Elemental bosses
Party encounters. Each player must deal direct damage and remain inside the arena; the matching Core is granted after three credited kills of that boss.
| Monster | HP | EXP |
|---|---|---|
| Elemental of Fire | 1 250 000 | 1 200 000 |
| Elemental of Ice | 1 250 000 | 1 200 000 |
| Elemental of Earth | 1 350 000 | 1 200 000 |
| Elemental of Energy | 1 200 000 | 1 200 000 |
| Elemental of Holy | 1 300 000 | 1 200 000 |
Recommended Hunting Spots 600+
This section helps players choose where to hunt after the balance update. Each entry represents one hunting area, shows a representative monster icon, suggested level range, recommended vocations and the current HP/EXP values.

Candy Lands
600-700Best for: Sorcerers, druids and paladins; mages can pull wider packs.
A mixed sweet-themed hunting area. Goggle Cake and Candy Floss Elemental are the lighter entry monsters, while Candy Horror and Nibblemaw are better for AoE hunting.
| Monster | HP | EXP |
|---|---|---|
| Goggle Cake | 6800 | 7800 |
| Candy Floss Elemental | 7000 | 8200 |
| Candy Horror | 14000 | 16600 |
| Nibblemaw | 13200 | 15500 |

Inkborn Desert
600+Best for: All vocations, especially solo players and paladins.
A clean entry area with scattered monsters. Lion Hydra and Bluebeak are lighter targets, while Crusader and Headwalker make the spawn more stable for solo progression.
| Monster | HP | EXP |
|---|---|---|
| Lion Hydra | 14 500 | 15 500 |
| Bluebeak | 13 000 | 14 200 |
| Crusader | 16 000 | 16 800 |
| Headwalker | 13 800 | 15 000 |

Norcferatu Fortress
600-650Best for: Knights, paladins, monks and mixed solo/duo hunting.
One larger fortress-style spawn with several monster types. Varg and Dworc are lighter enemies, Gloom Maw fills the middle, and Orclops/Heartless have reduced burst damage.
| Monster | HP | EXP |
|---|---|---|
| Varg | 8000 | 8800 |
| Norcferatu Nightweaver | 8800 | 9800 |
| Norcferatu Heartless | 9000 | 10300 |
| Gloom Maw | 10500 | 12500 |
| Orclops Bloodbreaker | 11500 | 13500 |
| Dworc Shadowstalker | 9800 | 11200 |

Frozen Quara
650-700Best for: Paladins and AoE mages.
A ranged and magic-friendly spawn. Quaras have solid EXP/HP and lower burst, making the area playable for paladins and mobile mages.
| Monster | HP | EXP |
|---|---|---|
| Quara Raider | 13000 | 16200 |
| Quara Looter | 11800 | 15000 |

Foam Hall
700+Best for: Sorcerers and druids looking for a safer magic spawn.
A simpler single-creature hunting area for testing damage and sustain. Foam Stalker has reduced burst, making it a safer mage option.
| Monster | HP | EXP |
|---|---|---|
| Foam Stalker | 13000 | 16000 |

Jungle Hunt
700+Best for: Mixed hunting, paladins and mages with movement.
Undertaker, Sulphur Spouter and Nighthunter still hit hard, but their damage is less random after the balance pass and the EXP reward is better.
| Monster | HP | EXP |
|---|---|---|
| Undertaker | 17500 | 20500 |
| Sulphur Spouter | 17000 | 20000 |
| Nighthunter | 16000 | 19000 |

Rootthing Grove
750+Best for: Druids and sorcerers for AoE; knights and monks can focus Nutshells.
One plant-themed spawn. Amber Shaper gives the highest EXP in this group, Bug Tracker is better for mages or mixed hunting, and Nutshell suits frontline vocations.
| Monster | HP | EXP |
|---|---|---|
| Rootthing Bug Tracker | 14500 | 18500 |
| Rootthing Nutshell | 15500 | 19500 |
| Rootthing Amber Shaper | 16500 | 21000 |

Inferniarch Castle
750-800+Best for: Strong solo or duo characters with solid equipment.
A single Inferniarch area with easier and harder sections. Sineater is the lightest monster, while Brinebrute remains the elite target with the highest reward.
| Monster | HP | EXP |
|---|---|---|
| Sineater Inferniarch | 10500 | 13000 |
| Gorger Inferniarch | 12000 | 15000 |
| Broodrider Inferniarch | 12500 | 15600 |
| Hellhunter Inferniarch | 13500 | 16800 |
| Spellreaper Inferniarch | 14000 | 17200 |
| Brinebrute Inferniarch | 22000 | 27500 |

Primal Jungle
750+Best for: Knights and monks as frontline; paladins can pull more carefully.
One primal hunting area with heavy monsters spread across the spawn. The highest bursts were reduced and EXP was improved to make the risk worthwhile.
| Monster | HP | EXP |
|---|---|---|
| Hulking Prehemoth | 18000 | 22500 |
| Emerald Tortoise | 18000 | 22500 |
| Gorerilla | 17000 | 21000 |
| Gore Horn | 18000 | 22000 |
| Sabretooth | 16000 | 19800 |
Starter 54 monsters

Penguin
EXP: 1
HP: 33
Weak: Energy
Resist: Ice

Rat
EXP: 5
HP: 20
Weak: Ice, Death
Resist: Earth, Holy

Badger
EXP: 5
HP: 23

Snake
EXP: 10
HP: 15
Weak: Fire, Ice
Resist: Energy, Earth

Bat
EXP: 10
HP: 30
Weak: Earth

Truffle Cook
EXP: 13
HP: 54
Weak: Ice, Holy
Resist: Earth, Fire, Death

Fox
EXP: 15
HP: 22
Weak: Fire
Resist: Earth, Holy

Truffle
EXP: 15
HP: 70
Weak: Fire, Ice, Holy
Resist: Earth, Death

Wolf
EXP: 18
HP: 25
Weak: Ice, Death
Resist: Holy

Bug
EXP: 18
HP: 29
Weak: Fire

Fruit Drop
EXP: 18
HP: 63
Weak: Fire
Resist: Physical, Earth, Holy, Death

Sugar Cube
EXP: 19
HP: 28
Weak: Energy, Fire
Resist: Earth, Ice

Sandcrawler
EXP: 20
HP: 30
Weak: Fire

Winter Wolf
EXP: 20
HP: 30
Weak: Energy, Death
Resist: Fire, Ice, Holy

Spit Nettle
EXP: 20
HP: 150
Weak: Fire
Resist: Ice
Immune: Energy, Earth

Cream Blob
EXP: 21
HP: 76
Weak: Fire, Death
Resist: Earth, Ice, Holy

Poison Spider
EXP: 22
HP: 26
Weak: Fire
Immune: Earth

Gingerbread Man
EXP: 22
HP: 85
Weak: Fire
Resist: Physical, Earth, Holy, Death

Bear
EXP: 23
HP: 80
Weak: Ice, Death
Resist: Holy

Wasp
EXP: 24
HP: 35
Weak: Fire
Immune: Earth

Swamp Troll
EXP: 25
HP: 55
Weak: Fire
Resist: Earth

Orc
EXP: 25
HP: 70
Weak: Earth, Death
Resist: Energy, Holy

Polar Bear
EXP: 28
HP: 85
Weak: Energy, Death
Resist: Fire, Ice

Crab
EXP: 30
HP: 55
Weak: Energy, Fire
Resist: Ice
Immune: Earth, Drown

Cobra
EXP: 30
HP: 65
Weak: Fire
Immune: Earth

Essence of Darkness
EXP: 30
HP: 1 000
Resist: Fire, Holy
Immune: Physical, Energy, Earth

Centipede
EXP: 34
HP: 70
Weak: Fire
Resist: Energy, Ice
Immune: Earth

Skeleton
EXP: 35
HP: 50
Weak: Holy
Immune: Life, Drown, Death

Orc Spearman
EXP: 38
HP: 105
Weak: Earth, Death
Resist: Energy, Holy

Rotworm
EXP: 40
HP: 65

Chakoya Tribewarden
EXP: 40
HP: 68
Weak: Energy, Death
Resist: Fire, Holy
Immune: Ice

chocolate blob
EXP: 40
HP: 75
Weak: Earth, Death
Resist: Energy, Holy

Tiger
EXP: 40
HP: 75
Weak: Ice, Death

Wafer Paper Butterfly
EXP: 40
HP: 75
Weak: Earth, Death
Resist: Energy, Holy

Crocodile
EXP: 40
HP: 105
Weak: Physical, Energy, Fire
Resist: Earth, Ice

Elf
EXP: 42
HP: 100
Weak: Death
Resist: Holy

Scorpion
EXP: 45
HP: 45
Weak: Fire, Ice
Resist: Energy
Immune: Earth

Jailer
EXP: 45
HP: 65

Swampling
EXP: 45
HP: 80

Minotaur
EXP: 50
HP: 100
Weak: Ice, Death
Resist: Fire, Holy

Orc Warrior
EXP: 50
HP: 125
Weak: Earth, Death
Resist: Energy, Holy

War Wolf
EXP: 55
HP: 140
Weak: Ice, Death
Resist: Earth, Holy

Amazon
EXP: 60
HP: 110
Weak: Physical, Death

Nomad
EXP: 60
HP: 160
Weak: Physical, Ice, Death
Resist: Fire, Holy

Minotaur Archer
EXP: 65
HP: 100
Weak: Ice, Death
Resist: Fire, Holy

Bandit
EXP: 65
HP: 245
Weak: Physical, Death

Poacher
EXP: 70
HP: 90

Carrion Worm
EXP: 70
HP: 145
Weak: Fire, Ice
Resist: Energy, Earth

Gloom Wolf
EXP: 70
HP: 200
Weak: Fire, Ice, Holy
Resist: Earth, Death

Ghoul
EXP: 85
HP: 100
Weak: Holy
Resist: Energy, Earth, Ice
Immune: Life, Drown, Death

Valkyrie
EXP: 85
HP: 190
Weak: Physical, Death
Resist: Fire, Ice, Holy

Mole
EXP: 100
HP: 200
Weak: Fire, Holy
Resist: Physical, Energy, Earth, Death

Rift Invader
EXP: 100
HP: 6 250
Weak: Holy
Resist: Ice

Enthralled Demon
EXP: 100
HP: 8 200
Weak: Ice, Holy
Immune: Death
Low EXP 42 monsters

Rorc
EXP: 105
HP: 260
Weak: Earth, Death
Resist: Energy, Holy

Orc Shaman
EXP: 110
HP: 115
Weak: Earth, Death
Resist: Energy, Holy

Orc Rider
EXP: 110
HP: 180
Weak: Earth, Death
Resist: Energy, Holy

Tarantula
EXP: 120
HP: 225
Weak: Fire, Ice
Resist: Energy
Immune: Earth

Scarab
EXP: 120
HP: 320
Weak: Fire
Resist: Physical, Energy, Ice
Immune: Earth

Hunter
EXP: 150
HP: 150
Weak: Physical
Resist: Holy

Minotaur Mage
EXP: 150
HP: 155
Weak: Ice, Death
Resist: Energy, Earth, Holy

Mummy
EXP: 150
HP: 240
Weak: Holy
Resist: Ice
Immune: Earth, Life, Drown

Gargoyle
EXP: 150
HP: 250
Weak: Fire
Resist: Physical, Death
Immune: Earth, Life

Carniphila
EXP: 150
HP: 255
Weak: Fire
Resist: Energy, Ice
Immune: Earth

Cyclops
EXP: 150
HP: 260
Weak: Earth, Death
Resist: Energy, Holy

Minotaur Guard
EXP: 160
HP: 185
Weak: Ice, Death
Resist: Fire, Holy

Blood Crab
EXP: 160
HP: 290
Weak: Energy, Fire
Resist: Physical
Immune: Earth, Drown, Ice

Elephant
EXP: 160
HP: 320
Weak: Energy
Resist: Physical, Ice

Dragon Hatchling
EXP: 185
HP: 380
Weak: Energy, Ice
Resist: Earth
Immune: Fire

Orc Berserker
EXP: 195
HP: 210
Weak: Earth, Death
Resist: Energy, Holy

Monk
EXP: 200
HP: 240
Weak: Physical
Resist: Holy, Death

Cyclops Drone
EXP: 200
HP: 325
Weak: Earth, Death
Resist: Energy, Ice, Holy

Quara Constrictor Scout
EXP: 200
HP: 450
Weak: Energy, Earth
Immune: Fire, Life, Drown

Flying Book
EXP: 200
HP: 500
Resist: Physical, Energy, Earth, Fire

Fire Elemental
EXP: 220
HP: 280
Weak: Ice
Immune: Fire, Life, Death

Frozen Minion
EXP: 230
HP: 2 200

Demon Skeleton
EXP: 240
HP: 400
Weak: Holy
Immune: Earth, Fire, Life

Cyclops Smith
EXP: 255
HP: 435
Weak: Earth, Death
Resist: Energy, Fire, Holy

Orc Leader
EXP: 270
HP: 450
Weak: Earth, Death
Resist: Energy, Holy
Immune: Fire

Zombie
EXP: 280
HP: 500
Resist: Fire
Immune: Energy, Earth, Life

Vampire
EXP: 305
HP: 475
Weak: Fire, Holy
Resist: Physical
Immune: Earth, Life, Drown

Haunted Treeling
EXP: 310
HP: 450
Weak: Fire
Resist: Ice, Holy, Death
Immune: Earth

Guilt
EXP: 320
HP: 2 000
Immune: Physical, Energy, Earth

Swarmer
EXP: 350
HP: 460
Weak: Fire, Ice
Resist: Energy
Immune: Earth

Quara Constrictor
EXP: 380
HP: 450
Weak: Energy, Earth
Immune: Fire, Life, Drown

Quara Predator Scout
EXP: 400
HP: 890
Weak: Energy, Earth
Immune: Fire, Life, Drown

Efreet
EXP: 410
HP: 550
Weak: Ice, Holy
Resist: Energy, Earth, Fire, Death

Priestess
EXP: 420
HP: 390
Weak: Physical, Holy
Resist: Earth, Fire, Death

Mutated Rat
EXP: 450
HP: 550
Weak: Fire
Resist: Holy
Immune: Earth, Life, Drown

Pooka
EXP: 500
HP: 500
Weak: Energy
Resist: Earth, Fire, Ice, Holy

Enlightened of the Cult
EXP: 500
HP: 700
Weak: Physical, Energy, Death
Resist: Ice, Holy

Nightstalker
EXP: 500
HP: 700
Weak: Physical, Energy, Death
Resist: Ice, Holy

Stonerefiner
EXP: 500
HP: 800
Weak: Physical, Fire, Ice
Resist: Earth

Shadow Fiend
EXP: 500
HP: 3 200
Weak: Energy, Fire
Medium EXP 63 monsters

Energy Elemental
EXP: 550
HP: 500
Weak: Earth
Resist: Physical, Holy, Death
Immune: Energy, Fire, Life

Bonebeast
EXP: 580
HP: 515
Weak: Fire, Holy
Immune: Earth, Life, Drown

Necromancer
EXP: 580
HP: 580
Weak: Physical, Fire, Holy
Resist: Energy, Ice, Death
Immune: Earth, Drown

Twisted Pooka
EXP: 600
HP: 700
Weak: Energy, Holy
Resist: Physical, Earth, Fire, Ice

Quara Mantassin
EXP: 600
HP: 800
Weak: Energy, Earth
Immune: Fire, Life, Drown

Ogre Shaman
EXP: 625
HP: 800
Weak: Holy
Resist: Energy, Fire, Ice
Immune: Earth, Death

Dragon Lord Hatchling
EXP: 645
HP: 750
Weak: Energy, Ice
Resist: Earth
Immune: Fire

Water Elemental
EXP: 650
HP: 550
Weak: Energy
Resist: Physical, Holy, Death
Immune: Earth, Fire, Life

Insectoid Worker
EXP: 650
HP: 950
Weak: Energy, Fire, Ice
Resist: Physical
Immune: Earth

Orc Warlord
EXP: 670
HP: 950
Weak: Earth, Death
Resist: Energy, Fire, Holy

Sandstone Scorpion
EXP: 680
HP: 900
Weak: Energy, Ice, Holy
Resist: Earth, Fire

Glooth Blob
EXP: 700
HP: 750
Weak: Energy, Fire
Resist: Ice
Immune: Earth, Death

Pixie
EXP: 700
HP: 770
Weak: Physical, Fire, Ice
Resist: Earth, Holy, Death

Swan Maiden
EXP: 700
HP: 800
Weak: Physical, Fire
Resist: Earth, Holy, Death

Hibernal Moth
EXP: 700
HP: 850
Weak: Fire
Resist: Ice

Dragon
EXP: 700
HP: 1 000
Weak: Ice
Resist: Energy, Earth
Immune: Fire

Ancient Scarab
EXP: 720
HP: 1 000
Weak: Fire, Ice
Resist: Physical, Energy
Immune: Earth

Frost Dragon Hatchling
EXP: 745
HP: 800
Weak: Energy
Immune: Earth, Fire, Life

Rot Elemental
EXP: 750
HP: 850
Weak: Energy
Resist: Physical, Ice, Holy, Death
Immune: Earth

Mutated Bat
EXP: 750
HP: 900
Immune: Earth, Drown, Death

Mutated Tiger
EXP: 750
HP: 1 100
Weak: Death
Resist: Energy, Earth, Fire, Ice

Faun
EXP: 800
HP: 900
Weak: Energy, Fire
Resist: Physical, Earth, Holy, Death

Undead Gladiator
EXP: 800
HP: 1 000
Weak: Earth, Death
Resist: Energy, Fire, Holy

Quara Hydromancer Scout
EXP: 800
HP: 1 100
Weak: Energy, Earth
Immune: Fire, Life, Drown

Vampire Viscount
EXP: 800
HP: 1 200
Weak: Fire, Holy
Resist: Physical, Ice
Immune: Earth, Death

Bog Raider
EXP: 800
HP: 1 300
Weak: Physical, Energy, Ice, Holy
Resist: Earth, Fire, Death

Waspoid
EXP: 830
HP: 1 100
Weak: Physical, Fire, Holy
Resist: Energy, Death
Immune: Earth

Nymph
EXP: 850
HP: 900
Weak: Physical
Resist: Earth, Holy, Death

Cult Believer
EXP: 850
HP: 975
Resist: Energy, Earth, Fire, Ice

Blood Priest
EXP: 900
HP: 820
Weak: Physical, Fire, Holy
Resist: Energy, Ice, Death
Immune: Earth, Drown

Lich
EXP: 900
HP: 880
Weak: Holy
Resist: Energy
Immune: Earth, Life, Death

Banshee
EXP: 900
HP: 1 000
Weak: Holy
Immune: Earth, Fire, Life

Vicious Squire
EXP: 900
HP: 1 000
Weak: Death
Resist: Physical, Energy, Earth, Fire

Dark Faun
EXP: 900
HP: 1 100
Weak: Energy, Fire, Holy
Resist: Physical, Earth, Death

Mooh'Tah Warrior
EXP: 900
HP: 1 200
Resist: Physical, Energy, Earth, Fire

Crystal Spider
EXP: 900
HP: 1 250
Weak: Energy
Resist: Earth
Immune: Fire, Ice

Giant Spider
EXP: 900
HP: 1 300
Weak: Fire
Resist: Energy, Ice
Immune: Earth

Boogy
EXP: 950
HP: 1 300
Resist: Physical, Earth, Ice, Holy

Ogre Savage
EXP: 950
HP: 1 400
Weak: Energy
Resist: Fire, Ice, Holy, Death
Immune: Earth

Braindeath
EXP: 985
HP: 1 225
Weak: Fire, Holy
Resist: Physical, Energy, Ice
Immune: Earth, Death

Cult Enforcer
EXP: 1 000
HP: 1 150
Resist: Physical

Weakened Frazzlemaw
EXP: 1 000
HP: 1 200
Weak: Holy
Resist: Physical, Energy, Earth, Fire

Crawler
EXP: 1 000
HP: 1 450
Weak: Fire, Ice, Holy
Resist: Death
Immune: Earth

Blood Beast
EXP: 1 000
HP: 1 600
Weak: Fire
Resist: Energy
Immune: Earth

Gryphon
EXP: 1 000
HP: 3 200

Vampire Bride
EXP: 1 050
HP: 1 200
Weak: Fire, Holy
Resist: Energy, Earth, Drown, Ice
Immune: Death

Enfeebled Silencer
EXP: 1 100
HP: 1 100
Weak: Holy
Resist: Physical, Energy, Earth, Fire

Lizard Legionnaire
EXP: 1 100
HP: 1 400
Weak: Ice
Resist: Fire
Immune: Earth

Spitter
EXP: 1 100
HP: 1 500
Weak: Energy, Ice
Resist: Fire, Death
Immune: Earth

Lost Husher
EXP: 1 100
HP: 1 600
Weak: Holy
Resist: Physical, Energy, Fire, Death
Immune: Earth

Cult Scholar
EXP: 1 100
HP: 1 650
Resist: Physical, Energy, Earth, Fire

Rift Worm
EXP: 1 195
HP: 2 800
Weak: Earth, Fire, Ice, Holy

Hero
EXP: 1 200
HP: 1 400
Weak: Death
Resist: Physical, Energy, Earth, Fire

Renegade Knight
EXP: 1 200
HP: 1 450
Weak: Death
Resist: Physical, Energy, Earth, Fire

Vicious Manbat
EXP: 1 200
HP: 1 700
Weak: Fire, Holy
Resist: Physical, Energy, Ice
Immune: Earth, Death

Infected Weeper
EXP: 1 200
HP: 3 000
Weak: Fire, Ice
Resist: Physical, Energy, Death
Immune: Earth

Metal Gargoyle
EXP: 1 278
HP: 2 100
Weak: Energy, Ice
Resist: Physical, Fire, Death
Immune: Earth

Nightmare Scion
EXP: 1 350
HP: 1 400
Weak: Holy
Resist: Energy, Fire, Ice
Immune: Earth, Death

Massive Fire Elemental
EXP: 1 400
HP: 1 800
Weak: Ice
Resist: Physical, Energy, Death
Immune: Fire

Lumbering Carnivor
EXP: 1 452
HP: 2 600
Weak: Fire
Resist: Physical

Worm Priestess
EXP: 1 500
HP: 1 100
Resist: Earth, Fire, Ice, Death

Neutral Deepling Warrior
EXP: 1 500
HP: 1 600
Weak: Energy, Earth
Resist: Death
Immune: Fire, Drown, Ice

Vile Grandmaster
EXP: 1 500
HP: 1 700
Resist: Physical, Energy, Earth, Fire
High EXP 98 monsters

Sparkion
EXP: 1 520
HP: 2 700
Weak: Earth
Resist: Physical, Energy, Fire, Ice

Wyrm
EXP: 1 550
HP: 1 825
Weak: Ice, Death
Resist: Earth, Fire
Immune: Energy, Life

Werefox
EXP: 1 600
HP: 1 500
Weak: Fire, Holy
Resist: Physical, Energy, Earth, Death

Werebadger
EXP: 1 600
HP: 1 700
Weak: Fire, Ice, Holy
Resist: Physical, Energy, Earth, Death

Black Knight
EXP: 1 600
HP: 1 800
Weak: Holy
Resist: Physical, Energy, Fire, Death
Immune: Earth, Ice

Shaper Matriarch
EXP: 1 650
HP: 2 000
Weak: Physical, Energy
Resist: Earth, Ice, Holy, Death

Spiky Carnivor
EXP: 1 650
HP: 2 800
Weak: Fire
Resist: Physical

Minotaur Hunter
EXP: 1 700
HP: 1 400
Weak: Ice
Resist: Fire, Holy

Devourer
EXP: 1 755
HP: 1 900
Weak: Energy
Resist: Ice, Death
Immune: Earth

Breach Brood
EXP: 1 760
HP: 3 500
Weak: Physical, Earth, Holy, Death
Resist: Energy, Fire, Ice

Hawk Hopper
EXP: 1 770
HP: 2 180
Weak: Physical, Fire, Ice, Death
Resist: Energy, Earth

Nightmare
EXP: 1 800
HP: 2 700
Weak: Holy
Resist: Energy, Fire, Ice
Immune: Earth, Life, Death

Quara Predator
EXP: 1 850
HP: 2 200
Weak: Energy, Earth
Immune: Fire, Life, Drown

Cursed Ape
EXP: 1 860
HP: 1 700
Weak: Ice, Holy
Resist: Energy, Earth, Fire, Death

Werewolf
EXP: 1 900
HP: 1 955
Weak: Fire, Ice, Holy
Resist: Energy, Earth, Death

Glooth Brigand
EXP: 1 900
HP: 2 400
Weak: Holy
Resist: Physical, Energy, Ice, Death
Immune: Earth

Bramble Wyrmling
EXP: 1 950
HP: 2 350
Weak: Physical, Earth, Holy
Resist: Fire, Death

Wereboar
EXP: 2 000
HP: 2 200
Weak: Fire, Holy
Resist: Energy, Earth, Ice, Death

Glooth Bandit
EXP: 2 000
HP: 2 600
Weak: Fire
Resist: Physical, Energy, Ice, Death
Immune: Earth

Goldhanded Cultist
EXP: 2 000
HP: 3 000
Resist: Energy, Fire, Ice, Death

Rift Scythe
EXP: 2 000
HP: 3 600
Weak: Energy, Fire, Holy
Resist: Physical, Earth, Ice, Death

Headwalker
EXP: 15 000
HP: 13 800
Weak: Energy
Resist: Earth, Ice, Holy, Death

Bluebeak
EXP: 14 200
HP: 13 000
Weak: Holy
Resist: Energy, Fire

Spectre
EXP: 2 100
HP: 1 350
Weak: Energy, Fire
Resist: Physical, Ice
Immune: Earth, Life, Drown

Frost Dragon
EXP: 2 100
HP: 1 800
Resist: Physical, Death
Immune: Earth, Fire, Life

Dragon Lord
EXP: 2 100
HP: 1 900
Weak: Ice
Resist: Energy, Earth
Immune: Fire

Hydra
EXP: 2 100
HP: 2 350
Weak: Physical, Energy
Resist: Ice, Holy
Immune: Earth, Life

Werebear
EXP: 2 100
HP: 2 400
Weak: Fire, Holy
Resist: Physical, Energy, Earth, Ice

Nightfiend
EXP: 2 100
HP: 2 700
Weak: Fire, Holy
Resist: Physical, Energy, Ice
Immune: Earth, Death

Rustheap Golem
EXP: 2 100
HP: 2 800
Weak: Physical, Energy
Resist: Fire, Death
Immune: Life

Thawing Dragon Lord
EXP: 2 100
HP: 25 000

Menacing Carnivor
EXP: 2 112
HP: 3 500
Weak: Ice
Resist: Physical

Werehyaena Shaman
EXP: 2 200
HP: 2 500
Weak: Ice, Death
Resist: Earth, Fire, Holy

Minotaur Amazon
EXP: 2 200
HP: 2 600
Weak: Energy, Fire
Resist: Ice, Holy, Death

werehyaena
EXP: 2 200
HP: 2 700
Weak: Ice, Holy
Resist: Earth, Fire

Werelion
EXP: 2 200
HP: 2 800
Weak: Ice
Resist: Earth, Fire, Death

Lizard Chosen
EXP: 2 200
HP: 3 050
Resist: Energy, Fire, Ice
Immune: Earth

Lost Basher
EXP: 2 300
HP: 2 600
Resist: Energy, Fire, Death
Immune: Earth

Werelioness
EXP: 2 300
HP: 3 000
Weak: Ice, Holy
Resist: Earth, Fire, Death

Shock Head
EXP: 2 300
HP: 4 200
Resist: Physical, Energy, Ice, Death
Immune: Earth, Fire

Kollos
EXP: 2 400
HP: 3 800
Weak: Ice, Death
Resist: Energy, Fire
Immune: Earth

Draken Warmaster
EXP: 2 400
HP: 4 150
Weak: Ice
Resist: Energy, Holy, Death
Immune: Earth, Fire

Dread Intruder
EXP: 2 400
HP: 4 500
Weak: Holy
Resist: Energy, Fire, Ice, Death
Lion Hydra
EXP: 15 500
HP: 14 500
Resist: Earth, Holy, Death

Reality Reaver
EXP: 2 480
HP: 3 900
Weak: Earth
Resist: Energy, Fire, Ice, Death

Elder Wyrm
EXP: 2 500
HP: 2 700
Resist: Earth, Fire
Immune: Energy

Barkless Fanatic
EXP: 2 500
HP: 3 200
Resist: Energy, Fire, Ice, Death

Destroyer
EXP: 2 500
HP: 3 700
Weak: Ice, Holy
Resist: Physical, Earth, Fire, Death
Immune: Energy

Behemoth
EXP: 2 500
HP: 4 000
Weak: Ice, Death
Resist: Physical, Energy, Earth, Fire

Deepworm
EXP: 2 520
HP: 3 500
Weak: Fire
Resist: Earth

Hellspawn
EXP: 2 550
HP: 3 500
Weak: Ice, Death
Resist: Physical, Energy, Earth, Fire

Moohtant
EXP: 2 600
HP: 3 200
Resist: Energy, Fire, Ice, Death
Immune: Earth

Spidris
EXP: 2 600
HP: 3 700
Weak: Energy, Ice, Holy
Resist: Fire, Death
Immune: Earth

Goggle Cake
EXP: 7 800
HP: 6 800
Weak: Physical, Energy, Ice, Holy
Immune: Earth, Fire, Life

Diremaw
EXP: 2 770
HP: 3 600
Weak: Ice
Resist: Earth

Diabolic Imp
EXP: 2 900
HP: 1 950
Weak: Ice, Holy
Resist: Earth, Death
Immune: Fire, Life

Seacrest Serpent
EXP: 2 900
HP: 3 000
Resist: Physical, Energy, Earth, Fire
Immune: Drown, Ice

Vashresamun
EXP: 2 950
HP: 4 000
Resist: Energy, Fire, Ice
Immune: Death

Serpent Spawn
EXP: 3 050
HP: 3 000
Weak: Energy, Fire
Resist: Ice
Immune: Earth

Crusader
EXP: 16 800
HP: 16 000
Weak: Physical, Energy, Fire, Holy
Resist: Earth, Ice

Angry Sugar Fairy
EXP: 3 100
HP: 3 000
Weak: Earth, Fire
Resist: Energy, Ice, Holy, Death

Ripper Spectre
EXP: 3 500
HP: 3 800
Weak: Energy, Fire
Resist: Earth

Betrayed Wraith
EXP: 3 500
HP: 4 200
Weak: Holy
Resist: Energy, Ice
Immune: Earth, Fire, Life

Werepanther
EXP: 3 550
HP: 4 200
Weak: Energy, Ice, Holy
Resist: Earth, Fire, Death

Fury
EXP: 3 600
HP: 4 100
Weak: Physical, Energy, Earth, Death
Resist: Ice, Holy
Immune: Fire

Cunning Werepanther
EXP: 3 620
HP: 4 300
Weak: Earth, Fire, Death
Resist: Energy, Ice, Holy

Defiler
EXP: 3 700
HP: 3 650
Weak: Fire
Resist: Energy, Ice
Immune: Earth

Frazzlemaw
EXP: 3 740
HP: 4 100
Weak: Holy
Resist: Physical, Energy, Earth, Fire

Plaguesmith
EXP: 3 800
HP: 8 250
Weak: Energy, Holy
Resist: Fire, Ice, Death
Immune: Earth

Candy Floss Elemental
EXP: 8 200
HP: 7 000
Weak: Earth, Fire
Resist: Physical, Energy, Ice, Death

Weretiger
EXP: 3 920
HP: 5 000
Weak: Physical, Earth, Fire
Resist: Energy, Ice, Holy

Warlock
EXP: 4 000
HP: 3 500
Weak: Physical, Holy
Resist: Earth
Immune: Energy, Fire, Ice

Ravenous Lava Lurker
EXP: 4 000
HP: 5 000

Lost Soul
EXP: 4 000
HP: 5 800
Weak: Holy
Resist: Energy, Ice
Immune: Earth, Fire, Life

Lava Lurker
EXP: 4 000
HP: 5 900
Immune: Fire

Medusa
EXP: 4 050
HP: 4 500
Weak: Energy, Fire
Resist: Ice
Immune: Earth, Life, Drown

Dawnfire Asura
EXP: 4 100
HP: 2 900
Weak: Physical, Energy, Ice, Holy
Resist: Death
Immune: Fire

Midnight Asura
EXP: 4 100
HP: 3 100
Weak: Energy, Earth
Resist: Fire, Ice, Holy
Immune: Death

Retching Horror
EXP: 4 100
HP: 5 300
Weak: Energy
Resist: Physical, Fire, Ice, Death
Immune: Earth

Varg
EXP: 8 800
HP: 8 000
Weak: Fire, Ice
Resist: Physical, Energy, Holy, Death

Werecrocodile
EXP: 4 140
HP: 5 280
Weak: Energy, Ice, Holy
Resist: Physical, Earth, Fire, Death

Frost Flower Asura
EXP: 4 200
HP: 3 500
Weak: Physical, Earth, Fire
Resist: Holy, Death
Immune: Ice

Gazer Spectre
EXP: 4 200
HP: 4 500
Weak: Ice
Resist: Fire

Ogre Rowdy
EXP: 4 200
HP: 4 500
Weak: Energy, Ice
Resist: Fire
Immune: Earth

Phantasm
EXP: 4 400
HP: 3 950
Weak: Energy, Fire, Holy
Resist: Earth, Ice
Immune: Physical, Life, Death

Dark Carnisylvan
EXP: 4 400
HP: 7 500
Weak: Fire, Ice
Resist: Earth, Death

Poisonous Carnisylvan
EXP: 4 400
HP: 8 000
Weak: Fire, Ice
Resist: Earth, Death

Tunnel Tyrant
EXP: 4 420
HP: 5 200
Weak: Ice
Resist: Energy

Norcferatu Heartless
EXP: 10 300
HP: 9 000
Weak: Physical, Energy, Death
Resist: Earth, Holy

Flimsy Lost Soul
EXP: 4 500
HP: 4 000
Weak: Holy
Resist: Physical, Energy, Earth
Immune: Death

Juvenile Bashmu
EXP: 4 500
HP: 7 500
Weak: Ice, Holy
Resist: Energy, Earth, Death

Arachnophobica
EXP: 4 700
HP: 5 000
Weak: Holy
Resist: Energy, Death

Hulking Carnisylvan
EXP: 4 700
HP: 8 600
Weak: Fire, Ice
Resist: Energy, Earth, Death

Norcferatu Nightweaver
EXP: 9 800
HP: 8 800
Weak: Earth, Ice, Death
Resist: Energy, Holy

Ogre Ruffian
EXP: 5 000
HP: 5 500
Weak: Ice
Resist: Physical

Katex Blood Tongue
EXP: 5 000
HP: 6 300
Resist: Earth, Fire

Hand of Cursed Fate
EXP: 5 000
HP: 6 600
Weak: Ice, Holy
Resist: Energy
Immune: Earth, Fire, Death

Bashmu
EXP: 5 000
HP: 8 200
Weak: Ice, Holy, Death
Resist: Physical, Energy, Earth
Elite EXP 125 monsters

Undead Elite Gladiator
EXP: 5 090
HP: 8 000
Weak: Earth, Death
Resist: Energy, Fire, Holy

Silencer
EXP: 5 100
HP: 5 400
Weak: Holy
Resist: Physical, Energy, Fire, Ice
Immune: Earth

Manticore
EXP: 5 100
HP: 6 700
Weak: Ice
Resist: Fire

Naga Archer
EXP: 5 150
HP: 4 640
Weak: Physical, Energy, Earth, Holy
Resist: Fire, Ice, Death

White Weretiger
EXP: 5 200
HP: 6 100
Weak: Physical, Earth, Fire
Resist: Energy, Ice, Holy

Blemished Spawn
EXP: 5 300
HP: 9 000
Weak: Fire
Resist: Earth, Death

Cave Devourer
EXP: 5 380
HP: 4 500
Weak: Fire

Ironblight
EXP: 5 400
HP: 6 600
Resist: Physical, Energy, Fire, Ice
Immune: Earth

Feral Werecrocodile
EXP: 5 430
HP: 6 400
Weak: Energy, Ice, Holy
Resist: Physical, Earth, Fire, Death

Grim Reaper
EXP: 5 500
HP: 3 900
Weak: Energy, Fire, Holy
Resist: Physical, Earth, Ice, Death

Ogre Sage
EXP: 5 500
HP: 4 800
Weak: Energy, Holy
Resist: Earth
Immune: Death

Mean Lost Soul
EXP: 5 580
HP: 5 000
Weak: Holy
Resist: Physical, Energy, Earth
Immune: Death

Ghastly Dragon
EXP: 5 600
HP: 7 800
Weak: Physical, Energy, Holy
Resist: Fire, Ice
Immune: Earth, Death

Crazed Winter Rearguard
EXP: 5 700
HP: 5 200
Weak: Energy, Earth, Fire
Resist: Ice, Death

Crazed Summer Rearguard
EXP: 5 700
HP: 5 300
Weak: Physical, Ice
Resist: Fire, Holy

Choking Fear
EXP: 5 700
HP: 5 800
Resist: Physical, Energy, Ice, Death
Immune: Earth, Fire

Afflicted Strider
EXP: 5 700
HP: 10 000
Weak: Fire
Resist: Physical, Earth, Death

Makara
EXP: 5 720
HP: 5 050
Weak: Physical, Energy, Earth, Death
Resist: Fire, Ice

Hellfire Fighter
EXP: 5 800
HP: 3 800
Weak: Ice
Resist: Physical, Energy, Death
Immune: Fire

Soul-Broken Harbinger
EXP: 5 800
HP: 6 300
Weak: Energy, Fire
Resist: Ice, Death

Naga Warrior
EXP: 5 890
HP: 5 530
Weak: Energy, Earth, Holy
Resist: Physical, Fire, Ice, Death

Son of Verminor
EXP: 5 900
HP: 8 500
Resist: Energy, Fire
Immune: Earth

Crazed Summer Vanguard
EXP: 6 000
HP: 5 500
Weak: Ice
Resist: Fire, Holy

Burster Spectre
EXP: 6 000
HP: 6 500
Weak: Fire
Resist: Ice

Insane Siren
EXP: 6 000
HP: 6 500
Weak: Physical, Ice
Resist: Fire, Holy

Demon
EXP: 6 000
HP: 8 200
Weak: Ice, Holy
Resist: Physical, Energy, Earth, Death
Immune: Fire, Life, Drown

Guzzlemaw
EXP: 6 050
HP: 6 400
Weak: Holy
Resist: Physical, Energy, Earth, Fire

Tremendous Tyrant
EXP: 6 100
HP: 11 500
Weak: Earth
Resist: Energy, Ice

Lavafungus
EXP: 6 200
HP: 7 200
Weak: Ice
Resist: Fire, Death

Young Goanna
EXP: 6 250
HP: 6 950
Weak: Energy
Resist: Earth

Deathling Scout
EXP: 6 300
HP: 7 200
Weak: Energy, Earth
Resist: Death
Immune: Fire, Drown, Ice

Thanatursus
EXP: 6 300
HP: 7 200
Weak: Death
Resist: Physical, Energy, Holy
Immune: Drown

Venerable Girtablilu
EXP: 6 300
HP: 8 500
Weak: Energy, Holy
Resist: Earth

Crazed Winter Vanguard
EXP: 6 400
HP: 5 800
Weak: Energy, Earth, Fire
Resist: Ice, Death

Deathling Spellsinger
EXP: 6 400
HP: 7 200
Weak: Energy, Earth
Resist: Death
Immune: Fire, Ice

Blightwalker
EXP: 6 400
HP: 8 100
Weak: Physical, Holy
Resist: Energy, Fire, Ice
Immune: Earth, Death

Priestess of the Wild Sun
EXP: 6 400
HP: 8 500
Weak: Ice
Resist: Energy, Fire

Lavaworm
EXP: 6 500
HP: 7 500
Weak: Ice
Resist: Fire, Death

Dark Torturer
EXP: 6 650
HP: 7 350
Weak: Ice, Holy
Resist: Energy, Earth, Death
Immune: Fire

Usurper Archer
EXP: 6 800
HP: 7 300
Weak: Death
Resist: Physical, Fire, Ice, Holy

cave chimera
EXP: 6 800
HP: 8 000
Weak: Earth, Death
Resist: Energy, Ice

Terrorsleep
EXP: 6 900
HP: 7 200
Weak: Holy
Resist: Physical, Energy, Fire, Ice
Immune: Earth

Usurper Knight
EXP: 6 900
HP: 8 200
Weak: Death
Resist: Physical, Fire, Ice, Holy
Gloom Maw
EXP: 12 500
HP: 10 500
Weak: Energy, Earth, Fire, Holy
Resist: Death

Usurper Warlock
EXP: 7 000
HP: 7 500
Weak: Death
Resist: Physical, Fire, Ice, Holy

Freakish Lost Soul
EXP: 7 020
HP: 7 000
Weak: Holy
Resist: Physical, Energy, Earth
Immune: Death

True Frost Flower Asura
EXP: 7 069
HP: 4 000
Weak: Energy, Earth, Fire
Resist: Holy, Death
Immune: Ice

Dworc Shadowstalker
EXP: 11 200
HP: 9 800
Weak: Physical, Earth, Death
Resist: Energy, Fire, Ice

Adult Goanna
EXP: 7 180
HP: 8 300
Weak: Energy
Resist: Earth

Bulltaur Forgepriest
EXP: 7 180
HP: 9 840
Weak: Ice, Death
Resist: Physical, Fire

Black Sphinx Acolyte
EXP: 7 200
HP: 8 100
Weak: Holy
Resist: Earth
Immune: Death

Sineater Inferniarch
EXP: 13 000
HP: 10 500
Weak: Physical, Energy, Ice, Holy
Resist: Death
Immune: Fire

True Midnight Asura
EXP: 7 313
HP: 9 000
Weak: Energy, Earth
Resist: Fire, Ice, Holy
Immune: Death

Burning Gladiator
EXP: 7 350
HP: 10 000
Weak: Ice
Resist: Physical, Energy, Fire

Hellhound
EXP: 7 440
HP: 7 500
Weak: Ice, Holy
Resist: Energy, Earth
Immune: Fire

True Dawnfire Asura
EXP: 7 475
HP: 8 500
Weak: Physical, Energy, Ice, Holy
Resist: Death
Immune: Fire

Undead Dragon
EXP: 7 500
HP: 8 350
Weak: Holy
Resist: Physical, Ice
Immune: Earth, Fire, Drown

Sphinx
EXP: 7 500
HP: 8 500
Weak: Ice, Death
Resist: Fire, Holy

Skeleton Elite Warrior
EXP: 7 800
HP: 7 800
Weak: Energy, Fire, Holy
Resist: Earth
Immune: Death

Orclops Bloodbreaker
EXP: 13 500
HP: 11 500
Weak: Physical, Death
Resist: Fire, Ice

Mega Dragon
EXP: 7 810
HP: 7 920
Weak: Energy, Earth, Holy

Lava Golem
EXP: 7 900
HP: 9 000
Weak: Ice
Resist: Physical, Energy, Death
Immune: Earth, Fire

Cobra Assassin
EXP: 7 980
HP: 8 200
Resist: Physical
Immune: Earth

Floating Savant
EXP: 8 000
HP: 8 000
Weak: Ice
Resist: Death
Immune: Fire

Dazed Leaf Golem
EXP: 8 000
HP: 10 000
Resist: Earth

Crape Man
EXP: 8 040
HP: 9 150
Weak: Ice
Resist: Physical, Energy, Earth, Death

Ancient Lion Knight
EXP: 8 100
HP: 9 100
Weak: Death
Resist: Fire, Ice

Demon Outcast
EXP: 8 200
HP: 6 900
Weak: Energy, Holy
Resist: Physical, Earth, Ice, Death
Immune: Fire

Vexclaw
EXP: 8 248
HP: 8 500
Weak: Ice, Holy
Resist: Physical, Energy, Earth, Fire
Immune: Life, Drown

Carnivostrich
EXP: 8 290
HP: 8 250
Weak: Physical, Fire, Ice, Holy
Resist: Energy, Death

Falcon Knight
EXP: 8 300
HP: 9 000
Weak: Holy
Resist: Physical, Death

Cobra Scout
EXP: 8 310
HP: 8 500
Immune: Earth

Bulltaur Alchemist
EXP: 8 350
HP: 5 690
Weak: Earth, Holy, Death
Resist: Physical, Ice

Crypt Warden
EXP: 8 400
HP: 8 300
Weak: Death
Resist: Earth, Holy

Cobra Vizier
EXP: 8 650
HP: 8 500
Weak: Holy
Resist: Physical
Immune: Earth

Girtablilu Warrior
EXP: 8 800
HP: 8 500
Weak: Energy, Holy
Resist: Earth, Death

Feral Sphinx
EXP: 8 800
HP: 9 800
Weak: Ice, Death
Resist: Fire, Holy

Liodile
EXP: 8 860
HP: 8 600
Weak: Physical, Fire, Ice, Holy
Resist: Energy, Death

Falcon Paladin
EXP: 8 900
HP: 8 500
Weak: Holy
Resist: Physical, Death

Lamassu
EXP: 9 000
HP: 8 700
Weak: Death
Resist: Earth, Holy

The First Dragon
EXP: 9 000
HP: 50 000
Immune: Life, Drown

Grimeleech
EXP: 9 216
HP: 9 500
Weak: Energy
Resist: Earth, Fire, Death
Immune: Life, Drown

Biting Book
EXP: 9 350
HP: 6 500
Resist: Physical

Rhindeer
EXP: 9 600
HP: 8 650
Weak: Fire, Holy
Resist: Energy, Earth

Bulltaur Brute
EXP: 9 700
HP: 8 560
Weak: Energy, Earth, Holy
Resist: Physical, Fire, Ice

Boar Man
EXP: 9 720
HP: 9 200
Weak: Holy
Resist: Physical, Energy, Earth, Fire

Spellreaper Inferniarch
EXP: 17 200
HP: 14 000
Weak: Earth, Death
Resist: Physical, Ice
Immune: Energy

Animated Feather
EXP: 9 860
HP: 13 000
Weak: Fire
Immune: Ice
Custom Young Goanna
EXP: 10 100
HP: 15 200
Weak: Energy
Resist: Earth

Hellhunter Inferniarch
EXP: 16 800
HP: 13 500
Weak: Earth, Death
Resist: Physical, Energy, Ice

Honey Elemental
EXP: 10 400
HP: 11 560
Weak: Energy, Ice
Resist: Physical, Earth, Fire, Holy

Knowledge Elemental
EXP: 10 603
HP: 10 500
Weak: Death
Resist: Holy
Immune: Energy
Custom Adult Goanna
EXP: 10 650
HP: 18 300
Weak: Energy
Resist: Earth

Gorger Inferniarch
EXP: 15 000
HP: 12 000
Weak: Energy, Ice
Resist: Fire, Death

Nibblemaw
EXP: 15 500
HP: 13 200
Weak: Energy, Earth, Holy
Resist: Physical, Death

Harpy
EXP: 10 720
HP: 9 700
Weak: Physical, Fire, Ice, Death
Resist: Energy, Earth

Broodrider Inferniarch
EXP: 15 600
HP: 12 500
Weak: Physical, Energy, Ice, Holy
Resist: Earth, Fire, Death

Juggernaut
EXP: 11 200
HP: 12 000
Weak: Energy, Holy
Resist: Physical, Earth, Fire, Ice

Stalking Stalk
EXP: 11 569
HP: 17 100
Weak: Physical, Ice
Resist: Earth, Fire, Death

Mantosaurus
EXP: 11 569
HP: 19 400
Weak: Physical, Ice, Holy
Resist: Energy, Earth, Death
Candy Horror
EXP: 16 600
HP: 14 000
Weak: Energy, Holy
Resist: Physical, Earth, Fire, Death

Headpecker
EXP: 12 026
HP: 16 300
Weak: Physical, Fire, Ice, Death
Resist: Energy, Earth
Immune: Holy

Mercurial Menace
EXP: 12 095
HP: 18 500
Weak: Energy, Earth, Death
Resist: Physical, Fire, Ice
Immune: Holy

Guardian of Tales
EXP: 12 204
HP: 15 000
Weak: Ice
Resist: Death
Immune: Fire

Energuardian of Tales
EXP: 12 361
HP: 14 000
Weak: Earth
Immune: Energy

Humongous Fungus
EXP: 12 900
HP: 13 400
Weak: Fire
Resist: Energy, Ice, Holy, Death
Immune: Earth

Energetic Book
EXP: 13 034
HP: 17 500
Weak: Earth
Immune: Energy, Holy

Cursed Book
EXP: 13 345
HP: 20 000
Weak: Energy
Immune: Earth

Shrieking Cry-Stal
EXP: 13 560
HP: 20 650
Weak: Earth
Resist: Physical, Energy, Fire, Ice
Immune: Holy

Rootthing Bug Tracker
EXP: 18 500
HP: 14 500
Weak: Fire, Ice, Death
Resist: Physical, Energy
Immune: Earth

Icecold Book
EXP: 13 750
HP: 18 000
Weak: Fire
Immune: Ice

Sabretooth
EXP: 19 800
HP: 16 000
Weak: Physical, Earth, Fire, Ice
Resist: Energy

burning book
EXP: 13 934
HP: 18 000
Weak: Ice
Immune: Fire
Foam Stalker
EXP: 16 000
HP: 13 000
Weak: Energy
Resist: Fire, Ice

Emerald Tortoise
EXP: 22 500
HP: 18 000
Resist: Physical, Energy, Earth, Fire

Noxious Ripptor
EXP: 30 500
HP: 25 000
Weak: Ice, Holy, Death
Resist: Physical, Energy, Earth

Rootthing Nutshell
EXP: 19 500
HP: 15 500
Weak: Fire, Ice, Death
Resist: Physical, Energy, Holy
Immune: Earth
Rootthing Amber Shaper
EXP: 21 000
HP: 16 500
Weak: Fire, Ice, Holy
Resist: Physical, Energy
Immune: Earth

Ink Blob
EXP: 14 450
HP: 9 500
Weak: Energy
Immune: Earth

Sulphur Spouter
EXP: 20 000
HP: 17 000
Weak: Holy
Resist: Fire

Gore Horn
EXP: 22 000
HP: 18 000
Weak: Physical, Fire, Ice
Resist: Energy, Earth

Nighthunter
EXP: 19 000
HP: 16 000
Weak: Physical, Holy
Resist: Earth, Death

Quara Looter
EXP: 15 000
HP: 11 800
Weak: Energy, Earth
Resist: Physical, Fire, Holy, Death
Hulking Prehemoth
EXP: 22 500
HP: 18 000
Weak: Ice, Holy
Resist: Physical, Energy, Fire

Hellflayer
EXP: 14 720
HP: 14 000
Weak: Energy, Holy
Resist: Earth, Fire, Ice, Death
Immune: Life, Drown
Endgame EXP 78 monsters
Quara Raider
EXP: 16 200
HP: 13 000
Weak: Energy, Earth
Resist: Physical, Fire, Holy

Gorerilla
EXP: 21 000
HP: 17 000
Weak: Ice, Holy
Resist: Physical, Fire

Sulphider
EXP: 15 328
HP: 18 000
Weak: Ice, Holy
Resist: Fire, Death

Forest Fury
EXP: 15 500
HP: 9 480
Weak: Fire
Resist: Holy, Death
Undertaker
EXP: 20 500
HP: 17 500
Weak: Physical, Energy, Holy
Resist: Earth, Death

Rage Squid
EXP: 15 820
HP: 17 000
Weak: Ice
Immune: Fire

Squid Warden
EXP: 16 300
HP: 14 500
Weak: Fire
Immune: Ice

Death Squid
EXP: 16 200
HP: 19 500
Weak: Physical, Energy, Fire, Ice
Resist: Earth
Immune: Death

Sight of Surrender
EXP: 17 000
HP: 28 000
Weak: Holy
Resist: Physical, Energy, Earth, Fire

Half Dead Savant
EXP: 14 800
HP: 18 500
Weak: Energy, Ice, Holy
Resist: Physical
Immune: Earth, Fire, Death

Ahau
EXP: 17 500
HP: 9 000
Resist: Energy, Fire
Immune: Earth, Death

Brain Squid
EXP: 18 672
HP: 18 000
Weak: Death
Immune: Energy, Holy

Courage Leech
EXP: 22 500
HP: 23 500
Weak: Earth, Death
Resist: Physical, Energy, Holy

Infernal Demon
EXP: 21 500
HP: 14 500
Weak: Ice, Holy
Resist: Physical, Fire, Death

Dark Knowledge
EXP: 14 500
HP: 20 000
Weak: Physical, Energy, Earth, Ice
Immune: Fire, Death

Vibrant Phantom
EXP: 23 000
HP: 23 500
Weak: Physical, Earth, Death
Resist: Energy, Holy

Cloak of Terror
EXP: 23 000
HP: 24 000
Weak: Earth, Death
Resist: Energy, Holy

Brachiodemon
EXP: 22 000
HP: 14 500
Weak: Ice, Holy
Resist: Fire, Death

Infernal Phantom
EXP: 22 500
HP: 19 000
Weak: Physical, Earth, Ice, Holy
Resist: Energy, Fire
Immune: Death

Branchy Crawler
EXP: 19 860
HP: 16 000
Weak: Energy, Fire, Death
Resist: Earth, Holy

Rotten Golem
EXP: 22 000
HP: 14 500
Weak: Energy, Fire, Death
Resist: Physical, Earth, Holy
Brinebrute Inferniarch
EXP: 27 500
HP: 22 000
Weak: Earth, Death
Resist: Physical, Energy, Ice

Mould Phantom
EXP: 21 330
HP: 22 000
Weak: Physical
Resist: Earth

Capricious Phantom
EXP: 24 000
HP: 22 000
Weak: Physical
Resist: Earth

Many Faces
EXP: 24 000
HP: 14 500
Weak: Fire, Death
Resist: Ice, Holy

Turbulent Elemental
EXP: 24 500
HP: 14 500
Weak: Energy, Fire
Resist: Physical, Earth, Ice

Bony Sea Devil
EXP: 22 470
HP: 16 000
Weak: Fire, Holy
Resist: Earth, Ice, Death

Meandering Mushroom
EXP: 32 500
HP: 18 000
Weak: Earth, Fire, Holy
Resist: Energy, Ice, Death

Mycobiontic Beetle
EXP: 34 000
HP: 19 000
Weak: Energy, Ice, Holy
Resist: Physical, Earth, Fire

Darklight Matter
EXP: 35 000
HP: 20 000
Weak: Physical, Earth, Fire
Resist: Energy, Ice

Darklight Source
EXP: 42 000
HP: 20 000
Weak: Physical, Earth, Fire
Resist: Energy, Ice

Darklight Emitter
EXP: 32 500
HP: 18 000
Weak: Physical, Energy, Death
Resist: Earth, Fire, Holy

Oozing Corpus
EXP: 40 200
HP: 19 000
Weak: Energy, Ice, Holy
Resist: Physical, Earth, Fire

Oozing Carcass
EXP: 32 500
HP: 18 000
Weak: Earth, Fire, Holy
Resist: Energy, Ice, Death

Darklight Striker
EXP: 33 500
HP: 19 000
Weak: Earth, Fire
Resist: Physical, Energy, Ice, Holy

Wandering Pillar
EXP: 44 400
HP: 20 000
Weak: Physical, Earth, Fire
Resist: Energy, Ice, Death

Sopping Carcass
EXP: 42 600
HP: 20 000
Weak: Earth, Fire, Holy
Resist: Energy, Ice, Death

Sopping Corpus
EXP: 35 500
HP: 20 000
Weak: Energy, Ice
Resist: Physical, Earth, Fire, Holy

Rotten Man-Maggot
EXP: 41 400
HP: 19 000
Weak: Earth, Fire, Holy
Resist: Energy, Ice, Death

Mirror Image
EXP: 27 000
HP: 35 000
Weak: Fire, Death
Resist: Physical, Ice, Holy

Walking Pillar
EXP: 45 600
HP: 20 000
Weak: Physical, Earth, Fire
Resist: Energy, Ice, Death

Darklight Construct
EXP: 40 800
HP: 19 000
Weak: Physical, Energy, Ice, Death
Resist: Earth, Fire, Holy

Converter
EXP: 33 500
HP: 19 000
Weak: Physical, Energy, Death
Resist: Earth, Fire, Holy

Bloated Man-Maggot
EXP: 42 000
HP: 20 000
Weak: Energy, Ice, Holy
Resist: Physical, Earth, Fire, Death

Druid's Apparition
EXP: 28 600
HP: 16 000
Weak: Physical, Fire, Death
Resist: Ice, Holy

Knight's Apparition
EXP: 28 600
HP: 16 000
Weak: Fire, Death
Resist: Physical, Ice

Sorcerer's Apparition
EXP: 28 600
HP: 16 000
Weak: Physical, Fire, Death
Resist: Ice, Holy

Shaburak Demon
EXP: 34 800
HP: 24 000
Weak: Physical, Energy, Earth, Fire

Paladin's Apparition
EXP: 29 600
HP: 16 000
Weak: Fire, Death
Resist: Physical, Ice, Holy

Orc Grimspell
EXP: 20 400
HP: 14 000
Weak: Physical, Holy, Energy, Fire
Resist: Earth, Death
Czarna Wdowa
EXP: 20 400
HP: 14 000
Weak: Physical, Holy
Resist: Energy, Earth, Fire, Death
Hellflayer Big
EXP: 22 200
HP: 15 000
Weak: Physical, Energy, Ice
Resist: Earth, Fire, Death
Blue Demon
EXP: 35 430
HP: 32 000
Weak: Physical, Energy, Earth, Fire
Gravewalker
EXP: 22 200
HP: 15 000
Weak: Ice, Fire, Energy, Earth
Resist: Physical, Death
Venomstrike
EXP: 24 000
HP: 16 000
Weak: Physical, Energy, Ice, Holy
Resist: Fire, Death, Earth
Orc Bloodreaver
EXP: 24 000
HP: 16 000
Weak: Physical, Energy, Fire, Ice
Fell Hammer Demon
EXP: 24 000
HP: 16 000
Weak: Physical, Energy, Ice, Holy
Resist: Earth, Fire
Orc Ragefist
EXP: 25 800
HP: 17 000
Weak: Physical, Ice, Holy, Energy
Resist: Fire
Cold Wight
EXP: 20 000
HP: 16 000
Weak: Physical, Fire, Energy, Earth
Resist: Ice
King Of Demons
EXP: 49 720
HP: 34 000
Weak: Ice, Holy
Resist: Physical, Fire, Death
Orc Icebound
EXP: 25 800
HP: 17 000
Weak: Physical, Fire, Energy, Earth
Resist: Ice
Tiger Of Death
EXP: 75 000
HP: 24 000
Weak: Physical, Holy, Death
Resist: Energy, Earth, Fire
Inferthrasher
EXP: 72 500
HP: 25 000
Weak: Energy, Earth, Fire, Ice
Blazebane
EXP: 72 500
HP: 23 000
Weak: Physical, Energy, Ice, Holy
Resist: Earth, Fire
Pyrovex
EXP: 70 000
HP: 22 000
Weak: Energy, Earth, Fire, Ice
Angelic Warrior
EXP: 82 500
HP: 28 000
Weak: Energy, Earth, Fire, Ice
Celestial Warrior
EXP: 80 000
HP: 27 000
Weak: Energy, Earth, Fire, Ice
Stitched Horror
EXP: 65 000
HP: 55 000
Weak: Earth, Ice
Sucker Mutant
EXP: 65 000
HP: 55 000
Weak: Physical, Death
Aevis Killer
EXP: 105 300
HP: 29 000
Weak: Energy, Earth, Fire, Ice
Byblos
EXP: 110 700
HP: 32 000
Weak: Energy, Earth, Fire, Ice
Iron Giant
EXP: 118 800
HP: 34 000
Weak: Energy, Earth, Fire, Ice
Liquid Flame
EXP: 102 600
HP: 28 000
Weak: Energy, Earth, Fire, Ice
Sandworm
EXP: 108 000
HP: 30 000
Weak: Energy, Earth, Fire, Ice
Cogwheel Wraith
EXP: 75 000
HP: 55 000
Weak: Energy, Earth, Fire, Ice
Dreadbound Sentinel
EXP: 75 000
HP: 55 000
Weak: Energy, Earth, Fire, Ice
Herald of Ruin
EXP: 75 000
HP: 59 000
Weak: Physical, Holy
Task Bosses
Bosses available for performing tasks.
Task Bosses
By completing quests, you earn Task Tokens, which grant access to special bosses. Each boss offers a chance to obtain unique equipment.
| Name Boss | Tokens | Location | Noteworthy loot |
|---|---|---|---|
| Big Maggot | 3x | Depot -1 (Middle) |
|
| Raxias | 7x | Depot -1 (Middle) |
|
| The Blazing Rose | 12x | Depot -1 (Middle) |
|
| Sister Hetai | 20x | Depot -1 (Middle) |
|
| The False God | 30x | Depot -1 (Middle) |
|
| Submissiv | 40x | Depot -1 (Middle) |
|
| Preceptix | 40x | Depot -1 (Middle) |
|
| Furry Killer | 40x | Depot -1 (Middle) |
|
| Overgrown Monster | 45x | Depot -1 (Middle) |
|
| Strong Minds | 45x | Depot -1 (Middle) |
|
| Unformed Human | 50x | Depot -1 (Middle) |
|
Daily Mission Varkas
Kill the bosses and collect your reward.
Daily Bosses & Mystery Boss Bag
Hunt the most dangerous creatures in the world and earn exclusive rewards! Meet NPC Varkas, the ultimate boss tracker, who will reward you for your bravery.
How the Daily Boss System Works
NPC Varkas assigns a global daily target. The designated boss changes every day and is the same for all players on the server. Here is how you can participate:
- Talk to Varkas and say boss or mission to find out which boss is the target for today.
- Gather your team or go solo to defeat the designated daily boss.
- Return to Varkas and say report to complete your mission.
- Reward: You will receive exactly 5 Boss Tokens for a successful daily report!
Note: You can only complete the Daily Boss mission once per day. The mission resets daily at server save.
The Mystery Boss Bag
Once you have collected enough tokens, you can trade them for a chance to win top-tier equipment!
- Say exchange or bag to NPC Varkas.
- The cost of one Mystery Boss Bag is exactly 10 Boss Tokens (which equals 2 days of doing the Daily Boss).
Fair Loot System: Opening the Mystery Boss Bag gives you a 100% equal chance to draw ANY item from the loot pool. No item is rarer than the other!
Mystery Boss Bag - Possible Loot
Opening the bag will reward you with one of the following items (or a stack of 100 Gold Tokens):
 100x Gold Token
 Antler-horn Helmet
 Arcane Dragon Robe
 Bear Skin
 Cobra Axe
 Cobra Bo
 Cobra Boots
 Cobra Club
 Cobra Hood
 Cobra Rod
 Cobra Sword
 Cobra Wand
 Dark Whispers
 Dawnfire Pantaloons
 Dawnfire Sherwani
 Death Oyoroi
 Depth Lorica
 Dragon Scale Helmet
 Eldritch Cowl
 Eldritch Cuirass
 Eldritch Hood
 Eldritch Monk Boots
 Eldritch Quiver
 Embrace of Nature
 Fabulous Legs
 Falcon Battleaxe
 Falcon Bow
 Falcon Circlet
 Falcon Coif
 Falcon Greaves
 Falcon Longsword
 Falcon Mace
 Falcon Plate
 Falcon Sai
 Galea Mortis
 Ghost Chestplate
 Gnome Helmet
 Jade Legs
 Lion Claws
 Lion Longsword
 Lion Plate
 Lion Rod
 Lion Spangenhelm
 Lion Wand
 Midnight Sarong
 Midnight Tunic
 Mystical Dragon Robe
 Naga Axe
 Naga Club
 Naga Katar
 Naga Rod
 Naga Sword
 Naga Tanko
 Naga Wand
 Norcferatu Bonehood
 Norcferatu Fleshguards
 Norcferatu Goretrampers
 Ornate Chestplate
 Pair of Dreamwalkers
 Stitched Mutant Hide Legs
 Stoic Iks Boots
 Stoic Iks Casque
 Stoic Iks Cuirass
 Stoic Iks Headpiece
 Stoic Iks Robe
 Toga Mortis
Dungeons
Discover the dungeon challenges!
The Depths Arena Challenge
Overview & Mechanics
Deep beneath the main Depot, on level -1, lies a forgotten arena designed to test the skills of a coordinated team. This dungeon is balanced for a party of 5 adventurers.
New Mechanic: Unlike before, you no longer need to collect Dungeon Tokens. Once your team enters the arena, your primary objective is to navigate the map, find the Guardian's lair, and defeat him in direct combat.
Coordination is key! Search the area thoroughly to locate the boss. Remember, you can always check your current cooldown for retrying the dungeon using the command !dungeon.
The Hidden Addon
Explorers should keep their eyes open! A Secret Addon is cleverly hidden somewhere on the map. Finding these addons is crucial for character progression, as collecting unique addons grants powerful passive bonuses to your character.
Guardian's Rewards
Defeating the final boss offers a high chance to obtain unique and extremely valuable items:
| Item Name | Drop Chance |
|---|---|
| Upgrades & Materials | |
| Addon Cloth (up to 2) | 100% |
| Prey Cards | 20.0% |
| Forge Crystal | 13.0% |
| Reroll Crystal | 12.0% |
| Bonus Crystal | 12.0% |
| Special & Utility Items | |
| Chalice Bag | 10.0% |
| Exp Goblet | 7.0% |
| Random Box Item | 5.0% |
| Backpack 12erth | 3.0% |
| Skeleton Addon (Super Rare) | 1.0% |
| Currency | |
| Casino Token (up to 2) | 100% |
Elemental Island
Find the ten statues and unlock the northern gate.
How to unlock Elemental Island
The entrance to Elemental Island does not open automatically at level 1200. First, find all 10 magical statues hidden across Vantoria. Each clue below points toward one of them.
Where to search
- 1. Shadow of the CitySearch the forgotten outskirts of the metropolis, where the city ends and the wilderness begins.
- 2. The Gloom of RoshamuulExplore the darkest corners of cursed Roshamuul, where light rarely reaches.
- 3. The Cobra BastionOne statue is guarded by the relentless warriors of the Cobra Bastion.
- 4. The Cursed LandsThe lands of the Bulltaurs conceal more than the curse hanging over them.
- 5. Heart of the GolemThe powerful Rotten Golem was created to guard an ancient secret.
- 6. The Secret of GnompronaBeneath Gnomprona lies a secret far older than the mine itself.
- 7. The Swamp GuardianSomewhere in the swamps, the Shopping Corpus guards another statue.
- 8. The Chamber of ChallengesSearch the level 800+ chamber where heroes test their new weapons.
- 9. The Isle of FlamesThe forgotten Hellflayer island hides an angelic statue among fire and danger.
- 10. The Warrior's PathThe final statue waits at the end of a path intended for Vantoria's bravest warriors.
After collecting all ten statues: go to the mystical gate located north of Vantoria city. The completed collection unlocks the passage to Elemental Island. Details of the island's bosses, elemental paths and trials are listed separately in Elemental Content.
Elemental Trial 1200+
Core, seals, five trials, The Primordial Titan and 1500 equipment upgrades.
Elemental Trial 1200+
Elemental Trial is the main progression content after the 1200 access quest. The system is built around elemental bosses, Core to Seal exchange, five profession-friendly trials, The Primordial Titan and equipment upgrades from the 1200 set into the 1500 set.
Important: This page describes the Elemental Trial 1200+ progression, including seals, trials, boss access and equipment upgrades.
Progression Overview
Collect 5 Elemental Cores.
Defeat each elemental boss three times. A credited kill requires direct player damage and presence inside the boss arena. The matching Core is granted after the third credited kill.
Defeat each elemental boss three times. A credited kill requires direct player damage and presence inside the boss arena. The matching Core is granted after the third credited kill.
Talk to the Elemental Sage.
The Elemental Sage exchanges each Core into a matching Seal. You need all five Seals to open the Chamber of Elements.
The Elemental Sage exchanges each Core into a matching Seal. You need all five Seals to open the Chamber of Elements.
Enter the Chamber of Elements.
The entrance requires all five Seals. The content is intended for 1200+ characters.
The entrance requires all five Seals. The content is intended for 1200+ characters.
Complete five Elemental Trials.
Each trial unlocks one equipment slot for upgrade at Questor.
Each trial unlocks one equipment slot for upgrade at Questor.
Defeat The Primordial Titan.
The final boss unlocks the next island and continues the high-level storyline.
The final boss unlocks the next island and continues the high-level storyline.
Core to Seal Exchange
The Elemental Sage handles the first part of the system. Bring the Sage the elemental Core, choose the element in dialogue, and he will exchange it into a Seal. These Cores are not used again for equipment upgrades, so players do not pay the same progression item twice.
| Element | Boss Core | Seal Reward | Say to the Sage |
|---|---|---|---|
| Fire |  Flame Core Flame Core |  Flame Seal Flame Seal | {fire} or {flame} |
| Ice |  Frost Core Frost Core |  Frost Seal Frost Seal | {ice} or {frost} |
| Earth |  Terra Core Terra Core |  Terra Seal Terra Seal | {earth} or {terra} |
| Energy |  Storm Core Storm Core |  Storm Seal Storm Seal | {energy} or {storm} |
| Death |  Shadow Core Shadow Core |  Shadow Seal Shadow Seal | {death} or {shadow} |
The Five Trials
Fire TrialHelmet UnlockHunt Pyrovex and defeat Elemental of fire bosses. This trial unlocks helmet upgrades.
Ice TrialArmor UnlockEnter the frozen arena, survive waves and reach the kill requirement. This trial unlocks armor upgrades.
Earth TrialLegs UnlockHunt Inferthrashers and bring 100 Ancient Roots and 50 Living Stones. This trial unlocks legs upgrades.
Energy TrialBoots UnlockActivate all six Energy Crystals hidden on the island. This trial unlocks boots upgrades.
Death TrialWeapon UnlockEnter the survival room and defeat the required enemies. This trial unlocks weapon upgrades.
| Trial | Main Objective | Unlocks | Extra Notes |
|---|---|---|---|
| Fire Trial | 1500 Pyrovex kills and 5 Elemental of fire boss kills. | Helmet upgrade | Progress is counted while the trial is active. |
| Ice Trial | 42 arena kills inside the Ice Trial room. | Armor upgrade | Use the arena lever after accepting the trial. |
| Earth Trial |  100 Ancient Roots 100 Ancient Roots 50 Living Stones 50 Living Stones | Legs upgrade | Both materials are dropped by Inferthrashers and are consumed when reporting the trial. |
| Energy Trial | Activate 6 Energy Crystals. | Boots upgrade | Return to the Energy Trial Master and say {report}. |
| Death Trial | 43 survival kills in the Death Trial room. | Weapon upgrade | This is the gateway to the strongest 1500 weapon upgrades. |
Daily Trial limit: a character may complete only one Elemental Trial per server day. Completion unlocks the matching Questor upgrade. The limit resets with the 06:00 server save, and an active trial can be continued after the reset.
Equipment Upgrade at Questor
After completing a trial, talk to Questor and say {upgrade}. Choose the slot you want to improve. The system consumes the old 1200 item, gold and Task Tokens, then gives the clean 1500 item.
| Slot | Required Trial | Cost | Questor Words |
|---|---|---|---|
| Helmet | Fire Trial | 5kk gold + 25 Task Tokens | {helmet} |
| Armor | Ice Trial | 10kk gold + 50 Task Tokens | {armor} |
| Legs | Earth Trial | 8kk gold + 40 Task Tokens | {legs} |
| Boots | Energy Trial | 5kk gold + 25 Task Tokens | {boots} |
| Weapon | Death Trial | 25kk gold + 100 Task Tokens | {weapon} |
Upgrade warning: the old 1200 item is removed and the 1500 item is created. Its forge tier is transferred, but Bonus Crystal rolls and other custom bonuses are not transferred.
1500 Upgrade Examples


1500 Weapons
| Vocation | Weapon | Type | Questor Word |
|---|---|---|---|
| EK |  Radiant Bulwark Cleaver Radiant Bulwark Cleaver | 2H Axe | {cleaver} |
| EK |  Bloodrage Executioner Bloodrage Executioner | 1H Axe | {executioner} |
| EK |  Bloodrage Skullmaul Bloodrage Skullmaul | 2H Club | {skullmaul} |
| EK |  Bloodrage Mace Bloodrage Mace | 1H Club | {mace} |
| EK |  Stormwalker Fate Fang Stormwalker Fate Fang | 2H Sword | {sword} / {fang} |
| RP |  Sacred Thunder Piercer Sacred Thunder Piercer | Crossbow | {crossbow} |
| RP |  Sacred Thunder Bleeder Sacred Thunder Bleeder | Bow | {bow} |
| MS |  Storm Sanguine Coil Storm Sanguine Coil | Wand | {wand} / {coil} |
| ED |  Storm Sanguine Rod Storm Sanguine Rod | Rod | {rod} |
| Monk |  Ascended Stormwalker Fists Ascended Stormwalker Fists | PvE Fist Weapon | {fists} |
Final Boss and Next Island
After all five trials are completed, the final path opens. The final encounter is The Primordial Titan. Defeating him unlocks access to the next island and rewards the configured access item.

The Riftforge 2000+
The next custom progression chapter after Elemental Content.
Available for testing — mechanics active
The Riftforge
The Riftforge is Vantoria's next custom progression chapter for level 2000+. It begins after the complete Elemental storyline and combines five hunting routes, repeatable Anomalies, party trials, permanent character development and a complete equipment progression for level 2500.
Equipment 1200→Elemental Trials→Equipment 1500→Primordial Titan→The Riftforge 2000+→Equipment 2500
Access Requirements
⚔️Level 2000The island is the main hunting and progression stage for characters moving beyond Elemental Content.
🏝️Elemental StorylineComplete all five elemental paths, their bosses and every Elemental Trial.
🗿Primordial TitanDefeat The Primordial Titan to unlock permanent access to The Riftforge.
Five Hunting Routes
Five portals lead to dedicated hunting grounds. Every portal lets the player choose between two areas containing the same creature family, making it easier to find a free hunting place.
🦂SandwormTwo hunting-ground choices. Progresses Earth Attunement and Earthen Resonance.
🔥Liquid FlameTwo hunting-ground choices. Progresses Flame Attunement and Molten Resonance.
⚙️Iron GiantTwo hunting-ground choices. Progresses Steel Attunement and Forged Resonance.
🌑ByblosTwo hunting-ground choices. Progresses Shadow Attunement and Shadow Resonance.
🪽Aevis KillerTwo hunting-ground choices. Progresses Wind Attunement and Aerial Resonance.
Anomalies
Each matching monster kill gives one route point and one Resonance charge. At 150/150, use !riftforge anomaly on that hunting ground to summon its elite Anomaly. Defeating it awards 125 additional branch points. Each branch has its own 20-hour Anomaly cooldown.
Fair progression: every matching kill advances the branch. Players who only want to hunt for experience never have an Anomaly forced on them.
Party Trials
🛡️Trial of MightProtect the central crystal through four creature waves and defeat the Riftforged Champion in wave five.
🔮Trial of ResonanceFollow eight announced runes. Wrong choices deal damage and move progress back; safe-rune blasts test positioning.
👹The Riftforged ColossusDestroy three Anchors at 75%, 50% and 25% HP. Avoid marked fractures and reach the announced safe field.
Every encounter scales to the number of players. A full team is not required: solo players can complete the mechanics, while larger groups receive appropriately stronger enemies. Each Trial and the Riftforged Colossus has a 15-minute time limit and a separate 20-hour personal cooldown.
Rift Attunement
Rift Attunement is permanent character progression earned inside The Riftforge. Every hunting route develops a different branch. A character may develop all branches but may have only two active at the same time.
| Branch | Source | Development Focus |
|---|---|---|
| Earth Attunement | Sandworm | +2% maximum HP and +200 oz capacity per rank (maximum +10% and +1000 oz) |
| Flame Attunement | Liquid Flame | +2% basic attack damage and +3% critical extra damage per rank (maximum +10% and +15%) |
| Steel Attunement | Iron Giant | -2% incoming physical damage per rank (maximum -10%) |
| Shadow Attunement | Byblos | +3% healing and mana recovery per rank (maximum +15%) |
| Wind Attunement | Aevis Killer | +3% base damage of all offensive spells per rank (maximum +15%) |
Attunement Rank Costs
Branch points are spent when a rank is purchased. The cost shown below is deducted from that branch's current point balance; developing one branch does not consume points from the other branches.
| Rank being unlocked | Branch points required |
|---|---|
| Rank 1 | 300 points |
| Rank 2 | 700 points |
| Rank 3 | 1,200 points |
| Rank 4 | 1,800 points |
| Rank 5 | 2,500 points |
Commands: !riftforge status, !riftforge rank earth, !riftforge activate earth and !riftforge deactivate earth. Replace earth with flame, steel, shadow or wind. Only two branches may be active at once.
Riftforged Sigils and Rewards
Riftforged Sigils are the main crafting material of this chapter and the only material consumed by the level 2500 forge. Your previous equipment is never required or destroyed.
 First Colossus victory: 5 Sigils
Repeat victory: 2 Sigils
Weekly chest: 4 Sigils
Exalted Cores
Attunement Points
First Colossus victory: 5 Sigils
Repeat victory: 2 Sigils
Weekly chest: 4 Sigils
Exalted Cores
Attunement Points
Each successful Trial awards 150 Attunement points to every active branch and 1 Boss Essence. The first Colossus victory awards 5 Sigils, 2 Exalted Cores and 250 points to both active branches. Each repeat victory after its cooldown awards 2 Sigils, 1 Exalted Core and 250 points. After the first victory, the chest west of the Rift Warden can be claimed once per calendar week for 4 Sigils, 1 Exalted Core and 100 points to both active branches.
How to Forge Level 2500 Equipment
1Complete Elemental ProgressionComplete the level 1200 equipment quest, Elemental Trials and Questor progression to reach The Riftforge. Existing equipment is not consumed by the level 2500 forge.
2Defeat the ColossusBoth trials and the final victory are required before the Rift Warden will forge equipment.
3Develop AttunementsEvery equipment slot has a permanent Attunement rank requirement. The branch only needs to be developed; it does not have to remain active.
4Speak to Rift WardenSay equipment. The forge consumes only Sigils and gold. Your old item, its Forge tier and all other bonuses remain untouched.
| Equipment slot | Requirement | Crafting cost |
|---|---|---|
| Helmet | Earth Attunement rank 2 | 4 Riftforged Sigils + 30kk gold |
| Armor | Steel Attunement rank 3 | 6 Riftforged Sigils + 50kk gold |
| Legs | Shadow Attunement rank 2 | 5 Riftforged Sigils + 40kk gold |
| Boots | Wind Attunement rank 2 | 4 Riftforged Sigils + 30kk gold |
| Weapon | Flame Attunement rank 3 | 8 Riftforged Sigils + 75kk gold |
| Shield, quiver or spellbook | All five Attunements rank 2 | 5 Riftforged Sigils + 40kk gold |
Important: the new items require level 2500 to equip. Forging is deterministic, has no random roll and never consumes or modifies the equipment already owned by the player.
Signature Spell Augments
Level 2500 weapons and leg pieces provide a visible vocation-specific power step. The bonuses extend the existing level 1500 augment path instead of multiplying every source of damage.
| Vocation | Weapon bonus | Leg bonus |
|---|---|---|
| Royal Paladin | Divine Caldera base damage: +21% crossbow or +19% bow | Divine Caldera critical extra damage +16% and Avatar of Light cooldown support |
| Master Sorcerer | Hell's Core and Energy Wave base damage +16% | Both spells gain +16% critical extra damage and Avatar of Storm cooldown support |
| Elder Druid | Eternal Winter and Terra Wave base damage +16% | Both spells gain +16% critical extra damage and Avatar of Nature cooldown support |
| Elite Knight | Fierce Berserk base damage +17% with club/axe or +20% with sword | Fierce Berserk critical extra damage +16% and Avatar of Steel cooldown support |
| Exalted Monk | Sweeping Takedown base damage +20% and Spiritual Outburst critical chance +16% | Spiritual Outburst critical chance +16% and Avatar of Balance cooldown support |
Level 2500 Equipment Sets
Royal Paladin — Supreme Sacred


Distance and holy growth, improved Perfect Shot support, physical, fire, death and energy protection, with stronger sustain.
Exalted Monk — Verdure


Fist skill, magic level and Mantra progression with physical, death and energy protection, life leech and mobility.
Master Sorcerer — Supreme Arcane


Magic level with fire, energy and death specialization, stronger Magic Shield capacity and protection against the main Riftforge damage types.
Elder Druid — Supreme Mystic


Magic, healing, ice and earth growth with life leech, stronger Magic Shield capacity and balanced fire, death and physical protection.
Elite Knight — Eclipseforge


The animated Eclipseforge set is the current Elite Knight level 2500 progression: four armor pieces, an optional shield and three two-handed weapon choices for sword, axe or club.
Complete level 2500 equipment progression available
Nexus of Shattered Realms
The heroic level 3000–5000 campaign beyond The Riftforge.
Content preview — routes, trials and equipment progression are connected
Nexus of Shattered Realms
Nuxus Land is the next heroic progression chapter after The Riftforge. Characters from level 3000 will enter a fractured realm threatened by Lord Nexus, recover six elemental seals and open the path to the final golden chamber.
The Riftforge→Riftforged Colossus→Nuxus Land 3000+→Six Realm Seals→Lord Nexus→Endgame 5000
How to Enter Nuxus Land
⚔️Reach level 3000Progress is saved separately for every character.
🗿Finish The RiftforgeDefeat the Riftforged Colossus to prove that your character completed the previous chapter.
🧙Find the Nexus HeraldMeet the Herald in the Riftforge hub and ask for travel to Nuxus Land.
The Nuxus Land Hub
The new mini-city is the base for the entire campaign. It connects the Trial Corridor, the Expedition Hall and the return route to The Riftforge.
✦Nexus WardenExplains the campaign and shows your collected seals.
🧭Expedition MasterManages realm expeditions, daily contracts and contract rewards.
🔨Relic SmithUpgrades Riftforge equipment through the level 3000–5000 Relic Forge path.
🎖️QuartermasterExchanges Nexus Marks and reputation for useful rewards.
Seven Campaign Trials
The first six chambers award permanent realm seals. They must be completed in order. Each normal trial accepts one to three players, lasts 15 minutes and may award its reward once per server day after the 06:00 server save.
| Trial | Level | Core mechanic | Realm Warden |
|---|---|---|---|
| Verdant Seal | 3000 | Activate three living crystals and defeat their guardians. | Sylvaris the Verdant Warden |
| Ember Seal | 3250 | Ignite three braziers in the announced order. | Ignivar the Ember Warden |
| Ossuary Seal | 3500 | Cleanse four corrupted graves while surviving the dead. | Ossivar the Grave Warden |
| Earthen Seal | 3750 | Awaken four stone pillars in the correct sequence. | Terragor the Earthen Warden |
| Tempest Seal | 4000 | Link all four storm conductors within 20 seconds. | Voltraxis the Storm Warden |
| Glacial Seal | 4250 | Light three frozen braziers and survive three assaults. | Cryonax the Glacial Warden |
| Nexus Seal | 4750 | Unlock six golden pedestals and confront the ruler of the fractured realms. | Lord Nexus |
Final encounter: all six elemental seals and level 4750 are required. Up to five players receive 20 minutes to defeat Lord Nexus. The first victory grants 3 Realm Cores, Relic Forge access and the complete Arctic Crusader outfit with both addons. There is no mount reward. The repeat reward is available once per server week.
Expedition Hall
The Hall contains 12 expedition portals covering progression from level 3000 to 5000. Nine routes are designed for solo play and three for coordinated groups. Seals earned during the campaign unlock increasingly dangerous realms.
🗺️Progressive hunting groundsEach realm has its own creature family, damage profile and elemental weakness.
👥Three group routesParty expeditions require coordination and at least two nearby party members.
🌀Unstable ExpeditionThe current build uses a stable mixed-realm composition. Daily alignment rotation is still being prepared.
👑Heart of the NexusThe level 5000 route opens only after defeating Lord Nexus.
| # | Expedition | Level | Mode | Primary crafting drop |
|---|---|---|---|---|
| 1 | Verdant Wilds | 3000 | Solo | Verdant Crystal |
| 2 | Ember Scar | 3250 | Solo | Ember Crystal |
| 3 | Ossuary Fields | 3500 | Solo | Ossuary Crystal |
| 4 | Titanstone Reach | 3750 | Solo | Auric Crystal |
| 5 | Tempest Canopy | 4000 | Solo | Tempest Crystal |
| 6 | Glacial Hollow | 4250 | Solo | Glacial Crystal |
| 7 | Auric Bastion | 4000 | Solo | Auric Crystal |
| 8 | Rift Cavalry Grounds | 4250 | Group | Ember and Ossuary Crystals |
| 9 | Nexus Warfront | 4500 | Group | Tempest and Auric Crystals |
| 10 | Relic Depths | 4500 | Solo | Glacial and Ossuary Crystals |
| 11 | Unstable Expedition | 4750 | Solo | Mixed crystals; rare Stabilized Nexus Heart |
| 12 | Heart of the Nexus | 5000 | Group | Mixed crystals; improved catalyst chance |
Portal status: all 12 expeditions and their return portals are connected. The three group grounds—Rift Cavalry Grounds, Nexus Warfront and Heart of the Nexus—contain tougher creatures but offer better experience efficiency for coordinated parties.
Marks, Reputation and Contracts
Trials and expeditions develop your character through three connected reward systems.
Nexus Marks — character-bound
Reputation — permanent progress
Daily Expedition Contracts
Realm Cores — tradeable crafting material
Contracts ask the player to defeat creatures in an unlocked expedition before the next server save. A solo contract awards 1 Realm Core and a group contract awards 2. The Quartermaster also sells 1 Realm Core for 125 Marks after reaching 1500 reputation. The Relic Smith uses the previous Riftforge equipment piece, Realm Cores, Nexus Marks and expedition minerals for high-level crafting.
Equipment Progression
3000BootsRiftforge boots + Verdant Seal + 3 Realm Cores + 100 Marks + 10 Verdant Crystals.
3500HelmetRiftforge helmet + Ossuary Seal + 4 Realm Cores + 150 Marks + 12 Ossuary Crystals.
4000LegsRiftforge legs + Tempest Seal + 5 Realm Cores + 225 Marks + 14 Tempest Crystals.
4500ArmorRiftforge armor + Glacial Seal + 6 Realm Cores + 300 Marks + 16 Glacial Crystals.
5000Immortal SetEach final part upgrades its earlier Nexus piece and requires Lord Nexus, Realm Cores, Marks, two mineral types, a Stabilized Nexus Heart and one profession schematic.
Important: every forge recipe consumes the previous equipment piece. A Lord Nexus victory grants every participant one schematic matching their vocation; additional schematics are rare, tradeable drops from late expeditions. This keeps The Riftforge relevant and makes the 3000–5000 path a long-term progression rather than a one-day reward.
All forty profession-specific Nexus equipment pieces, their requirements and real item graphics are available in Custom Items.
Wheel of Destiny
Interactive planner using the real Vantoria server rules.
How does Wheel of Destiny work?
Fill connected slices to gain health, mana, capacity, mitigation, skill, leech and real vocation spell improvements.
Each colour reaches stage I, II and III at 250, 500 and 1000 points. Hover the four outer icons for the active effect.
Test Lesser, Regular and Greater gems with real basic and vocation Supreme modifier names. The planner never changes your character.
Planner only: this interactive wheel works locally in your browser. The character profile uses the same component in read-only mode and displays the allocation saved by the game engine.
World Boss
Join daily events at 19:00.
World Boss System
Every evening the strongest creatures of Vantoria invade the continent.
Gather your allies and challenge deadly World Bosses for powerful rewards.
World Boss Information
- Every day at 19:00 Server Time a teleport to the boss arena appears.
- The World Boss spawns at 19:05 Server Time.
- Each day features a different World Boss.
- Every World Boss uses the new Ritual Totem Mechanic.
- World Bosses are designed as large-scale cooperative encounters.
Universal Ritual Totem Mechanic
All World Bosses share a special mechanic called the Ritual Totem Phase.
At specific health percentages the boss becomes completely invulnerable and summons several Ritual Totems around the arena.
Players must quickly locate and destroy all totems before the ritual timer expires.
If the team fails the mechanic:
- The boss restores its full health.
- The failed ritual counter increases.
- After too many failed rituals the boss permanently empowers itself and becomes impossible to defeat.
Coordination, mobility and fast reactions are the key to victory.
World Boss Rotation
| Day | Boss | Difficulty | Main Combat Style |
|---|---|---|---|
| Monday | Dreadlord | Hard | Dark Magic & AoE Damage |
| Tuesday | Shadowmaw | Medium | Fast Movement & Pressure |
| Wednesday | Dark Priest Zulthar | Hard | Death Magic & Rituals |
| Thursday | Abyssal | Extreme | Abyssal Chaos Damage |
| Friday | Vexa | Medium | Area Denial & Summons |
| Saturday | Warbeast | Hard | Heavy Physical Damage |
| Sunday | Dwarf King | Hard | Tank Mechanics & Control |
World Boss Rewards
| Reward | Drop Chance | Quantity |
|---|---|---|
| Addon Cloth | 100% | Up to 5 |
| Casino Token | 100% | Up to 2 |
| Prey Cards | 20% | 1 Piece |
| Forge Crystal | 13% | Up to 3 |
| Bonus Crystal | 12% | Up to 3 |
| Reroll Crystal | 12% | Up to 3 |
| Chalice Bag | 10% | 1 Piece |
| Exp Goblet | 7% | 1 Piece |
| Stamina Refill | 7% | 1 Piece |
| Random Box Item | 5% | 1 Piece |
| Skeleton Addon Item | 1% | 1 Piece |

Abyssal
The most dangerous abyssal entity ever discovered beneath Vantoria.
Speciality: Massive chaos magic and brutal arena pressure.

Warbeast
A savage creature known for devastating melee attacks and relentless aggression.
Speciality: Extreme physical damage and mobility.

Dark Priest Zulthar
A corrupted ritual master channeling forbidden death magic.
Speciality: Ritual phases and death curses.

Dreadlord
An ancient lord of darkness commanding destructive infernal energy.
Speciality: High AoE burst damage.

Shadowmaw
A terrifying deep-sea predator emerging from forgotten abyssal waters.
Speciality: Fast attacks and battlefield pressure.

Dwarf King
The corrupted ruler of the underground kingdoms and master of defense.
Speciality: Heavy armor and control mechanics.
Boss Archivist
Kill bosses and collect your reward.
Vantoria Boss Rewards System
The Boss Rewards System allows players to earn guaranteed rewards by defeating specific boss categories. Every boss kill increases your progress automatically.
Once you complete the required amount of kills for a category, visit the Boss Archivist NPC and say bosses. A reward window will open where you can choose a category and claim one reward.
- Defeat bosses from one of the listed categories.
- Your category progress increases automatically.
- Talk to Boss Archivist and say bosses.
- Select a category, choose a reward and click Claim Reward.
- After claiming, the required progress is consumed and you can farm the category again.
Soul BossesRequired Kills: 20
Bosses
 Goshnar's Malice
 Goshnar's Hatred
 Goshnar's Cruelty
 Goshnar's Spite
 Goshnar's Greed
 Goshnar's Megalomania
Rewards
 Soultainter
 Soulshredder
 Soulbiter
 Soulbleeder
 Soulmantle
 Soulcrusher
 Soulpiercer
 Soulbastion
 Soulhexer
 Souleater
 Soulcutter
 Soulmaimer
 Soulstrider
 Pair of Soulwalkers
 Pair of Soulstalkers
 Soulshell
 Soulshroud
 Soulshanks
Sanguine BossesRequired Kills: 15
Bosses
 Bakragore
 Chagorz
 Ichgahal
 Murcion
 Vemiath
Rewards
 Sanguine Blade
 Sanguine Cudgel
 Sanguine Hatchet
 Sanguine Razor
 Sanguine Bludgeon
 Sanguine Battleaxe
 Sanguine Legs
 Sanguine Bow
 Sanguine Crossbow
 Sanguine Greaves
 Sanguine Coil
 Sanguine Boots
 Sanguine Rod
 Sanguine Galoshes
 Sanguine Trousers
 Sanguine Claws
Primal BossesRequired Kills: 15
Bosses
 Magma bubble
 The Primal Menace
 The Rootkraken
Rewards
 Spiritthorn Armor
 Spiritthorn Helmet
 Spiritthorn Ring
 Charged Ethereal Ring
 Alicorn Headguard
 Alicorn Quiver
 Alicorn Ring
 Ethereal Coned Hat
 Arboreal Crown
 Arboreal Tome
 Arboreal Ring
Falcon BossesRequired Kills: 10
Bosses
 Grand Master Oberon
 Preceptor LazareGrand Chaplain Gaucelm
 Grand Commander Soeren
Rewards
Falcon PlateFalcon GreavesFalcon LongswordFalcon BowFalcon CoifFalcon BattleaxeFalcon Mace Falcon Rod
 Falcon WandFalcon Sai
Cobra & Naga BossesRequired Kills: 6
Bosses
 Scarlett Etzel
 Gaffir
 Ugly Monster
 Timira the Many-Headed
Rewards
Cobra HoodCobra BootsCobra WandCobra RodCobra SwordCobra AxeCobra ClubCobra BoNaga SwordNaga AxeNaga RodNaga Wand Naga CrossbowNaga ClubNaga Katar
Lion & Grave DangerRequired Kills: 8
Bosses
 Drume
Drume Kesar
Kesar King Zelos
 Duke Krule
 Earl Osam
 Lord Azaram
 Sir Baeloc
 Count Vlarkorth
Rewards
Lion PlateLion SpangenhelmLion Wand Lion SpellbookLion RodLion Longsword
 Bow of Cataclysm
 Shadow Cowl
 PenduletLion Claws
Water & Dream CourtsRequired Kills: 8
Bosses
 Jaul
Jaul Obujos
 Tanjis
 BrokulRatmiral
 Alptramun
 Izcandar the Banished
 Maxxenius
 Plagueroot
 Faceless Bane
 Urmahlullu the Weakened
Rewards
Depth LoricaOrnate ChestplatePair of DreamwalkersFabulous LegsGhost ChestplateShadow CowlPenduletDark Whispers Depth Claws
Destruction & GoldRequired Kills: 10
Bosses
 World Devourer
 Anomaly
 Rupture
 Realityquake
 Outburst
 Eradicator
Rewards
100x Gold Token Bow of Destruction
 Wand of Destruction
 Rod of Destruction
 Blade of Destruction
 Chopper of Destruction
 Mace of Destruction
Boss Relics
Rare upgraded versions of normal boss loot, unlocked through Bosstiary progress.
Boss Relics System
Boss Relics are very rare bonus drops from reward bosses. When your character unlocks Bosstiary progress on a boss, that boss can occasionally create a special upgraded version of one item from its own normal loot table.
Important: the system uses the standard loot of the killed boss. It does not use grouped reward lists from other systems. If Scarlett Etzel drops Cobra items, her relic roll can only choose eligible equipment from Scarlett's own loot. It will not pull Timira, Sanguine or other boss rewards unless those items are actually in that boss loot table.
How it works
1Kill reward bossesDefeat bosses normally. The relic roll is an extra chance after regular reward chest loot is generated.
2Unlock Bosstiary stagesThe better your Bosstiary progress for that boss, the better relic tier can appear.
3Receive relic lootIf the extra roll succeeds, the relic item is placed in your reward chest with a special name and bonus attributes.
Relic tiers
| Bosstiary Stage | Relic Name | Extra Chance | Bonus Power | Example |
|---|---|---|---|---|
| Stage 1 | Low +1 | 0.10% | 1 random bonus | Low Cobra Sword +1 |
| Stage 2 | Epic +2 | 0.20% | 2 random bonuses | Epic Falcon Bow +2 |
| Stage 3 / Full | Legendary +3 | 0.30% | 3 random bonuses | Legendary Sanguine Rod +3 |
Different bosses may require different kill amounts to unlock Bosstiary stages. The drop rate is intentionally low because relics are meant to be long-term chase items, not guaranteed farming rewards.
Eligible items
The system filters the boss loot and only chooses equipment-like items: weapons, spellcaster weapons, fist weapons, helmets, armors, legs, boots, shields, rings, amulets and quivers. Stackable items, tokens, gold and materials are ignored.
Low Cobra Sword +1Epic Falcon Bow +2Legendary Sanguine Rod +3Legendary Spiritthorn Armor +3Bonus attributes
| Item Type | Possible bonus direction |
|---|---|
| Melee weapons | Weapon skill, critical chance, critical damage, life leech, mana leech and survivability bonuses. |
| Distance weapons | Distance fighting, critical bonuses, leech effects, speed and health bonuses. |
| Wands, rods and magic weapons | Magic level, critical bonuses, mana support, maximum mana and maximum health. |
| Armor pieces, shields and accessories | Health, mana, speed, shielding, regeneration and defensive support bonuses. |
Rules and safety
- Boss Relics are an additional reward roll. They do not remove or replace normal boss loot.
- The item keeps its original base item, but receives a custom relic name and special bonus description.
- Only players with real reward participation can receive relic rolls.
- Bosses without eligible equipment in their normal loot table cannot create relic equipment.
- Relic items use custom bonuses, so some systems may block stash or market actions to protect the item attributes.
Daily Missions Valthar
Complete tasks for experience.
Valthar's Daily Missions
Welcome to the Daily Mission System. Speak with NPC Valthar to receive a daily hunting contract. One unique set of targets is generated every 24 hours. You can complete one mission per day.
How it works
- Find NPC Valthar and say "mission".
- Choose Easy, Medium, or Hard.
- Every player receives the same target for the day.
- Kill counts are randomized within specific ranges.
Reward Scaling
Rewards include Guaranteed Items and Chance-based Items. The base drop rates scale with the difficulty level you choose.
Quantity Bonus
The more kills the system rolls for you, the luckier you are! Completing a mission with a high kill count provides a bonus of up to +20% to all drop chances!
Reward Structure (Base Chances)
| Item | Easy Mission | Medium Mission | Hard Mission |
|---|---|---|---|
| Crystal Coins | 100 (Always) | 100 (Always) | 100 (Always) |
| Task Tokens | 8 (Always) | 12 (Always) | 20 (Always) |
| Gold Tokens | 8 (Always) | 12 (Always) | 20 (Always) |
| Casino Tokens | 20%* | 30%* | 40%* |
| Prey Cards | 20%* | 30%* | 40%* |
| Reroll Token | 20%* | 30%* | 40%* |
| Forge Crystal | 5%* | 10%* | 15%* |
| Bonus Crystal | 5%* | 10%* | 15%* |
* These are Base Chances. If you roll a high kill count, these values can increase by up to +20% (e.g., 40% base + 20% bonus = 60% total).
Mission Tiers & Monster Pools
Easy (Beginner)
Range: 8 - 150 |
Kills: 150 - 350
- Minotaur / Mage / Archer
- Rotworm / Carrion Worm
- Amazon / Valkyrie
- Stonerefiner
- Cyclops (All)
- Dragon / Hatchling
- Dragon Lord / Hatchling
- Frost Dragon / Hatchling
- Wyrm / Elder Wyrm
- Giant Spider
Medium
Range: 151 - 250 |
Kills: 500 - 1500
- Glooth Bandit / Brigand
- Ravenous Lava Lurker
- Frazzlemaw (Weakened)
- Silencer (Enfeebled)
- Asuras (Dawn/Mid)
- Were-creatures (All)
- Cults (All)
- Vampires (All)
- Hero / Renegade Knight
- Hellspawn
- Sparkion / Breach Brood
Hard (Expert)
Range: 251 - 850 |
Kills: 1500 - 4000
- Guzzlemaw / Silencer
- Demons (All)
- Grim Reaper
- Naga Warrior / Archer
- Juggernaut
- Falcon Knights
- Cobra Assassin / Scout
- Spectres (All)
- Vexclaw / Grimeleech
- Hellflayer
- Rootthings (All)
- Rotten Golems
- Darklight Matter/Construct
- Inferniarchs (All)
- Bony Sea Devil
- Spectre / Lost Souls
- Books (All Tiers)
Daily Mission Eryndor
Complete island elite tasks for experience.
Eryndor's Daily Mission
Welcome to the Island Elite Daily Mission. Speak with NPC Eryndor to receive a daily hunting contract. One target is generated every 24 hours. This mission shares the same daily lock as Valthar, so you can complete only one of these daily missions per day.
How it works
- Find NPC Eryndor and say "mission".
- Required level: 800+.
- Accept the mission by saying "yes".
- Return and say "report" when the kills are finished.
Reward Scaling
Rewards include Guaranteed Items and Chance-based Items. Eryndor has one elite mission tier with a daily monster roll.
Quantity Bonus
The more kills the system rolls for you, the luckier you are! Completing a mission with a high kill count provides a bonus of up to +20% to all drop chances!
Reward Structure (Base Chances)
| Item | Island Elite Hunt |
|---|---|
| Experience | 25,000,000 EXP (Always) |
| Task Tokens | 50 (Always) |
| Gold Tokens | 20 (Always) |
| Crystal Coins | 250 (Always) |
| Casino Tokens | 2x - 40%* |
| Prey Cards | 2x - 40%* |
| Reroll Token | 1x - 40%* |
| Forge Crystal | 1x - 15%* |
| Bonus Crystal | 1x - 15%* |
* These are Base Chances. If you roll a high kill count, these values can increase by up to +20% (e.g. 40% base + 20% bonus = 60% total).
Mission Tiers & Monster Pools
Island Elite Hunt
Range: 800+ |
Kills: 1000 - 3500
- Hellflayer Big
- Fell Hammer Demon
- Czarna Wdowa
- Cold Wight
- Orc Icebound
- Orc Grimspell
- Gravewalker
- Venomstrike
- King Of Demons
- Blue Demon
- Shaburak Demon
- Orc Ragefist
- Orc Bloodreaver
Weekly tasks
Weekly tasks list of mobs.
Weekly Tasks & Bounty Tasks
Weekly Tasks and Bounty Tasks now use a custom monster pool divided into difficulty categories. Monsters are no longer selected from the entire Bestiary, but from dedicated categories available on the server.
Weekly Tasks reset every 3 days. After each reset, players can choose a difficulty level again and receive a fresh set of tasks.
Beginner
The easiest monsters available. Includes the Starter and Low EXP groups.
The easiest monsters available. Includes the Starter and Low EXP groups.
Adept
A moderate difficulty level. Includes the Medium EXP group.
A moderate difficulty level. Includes the Medium EXP group.
Expert
More challenging monsters. Includes the High EXP group.
More challenging monsters. Includes the High EXP group.
Master
The strongest monsters available. Includes the Elite EXP and Endgame EXP groups.
The strongest monsters available. Includes the Elite EXP and Endgame EXP groups.
How does the selection work?
After selecting a difficulty, the system randomly chooses monsters only from the corresponding category. This keeps tasks balanced and better suited to Vantoria's progression.
Total monsters in the task pool: 266 monsters.
Beginner 40 monsters
The easiest category, ideal for new characters and beginner-friendly tasks.
Sandcrawler

Water Buffalo
Rotworm
Minotaur
Amazon
Valkyrie
Cyclops
Mummy
Minotaur Guard
Cyclops Drone

Thornfire Wolf
Cyclops Smith

Crystal Wolf
Vampire
Swarmer
Stonerefiner
Energy Elemental
Bonebeast
Necromancer
Twisted Pooka
Insectoid Worker
Dragon
Pixie
Swan Maiden
Frost Dragon Hatchling
Faun
Undead Gladiator
Vampire Viscount
Waspoid
Cult Believer
Blood Priest
Dark Faun
Giant Spider
Mooh'Tah Warrior
Vicious Squire
Boogy
Blood Beast
Crawler
Cult Enforcer
Weakened Frazzlemaw
Adept 36 monsters
A moderate difficulty level for progressing characters.
Vampire Bride
Cult Scholar
Enfeebled Silencer
Spitter
Hero
Renegade Knight
Massive Fire Elemental
Worm Priestess
Sparkion
Wyrm
Werebadger
Werefox
Minotaur Hunter
Breach Brood
Glooth Brigand
Glooth Bandit
Wereboar
Headwalker
Bluebeak
Dragon Lord
Frost Dragon
werehyaena
Werehyaena Shaman
Werelion
Werelioness
Dread Intruder
Kollos
Lion Hydra
Reality Reaver
Destroyer
Elder Wyrm
Hellspawn
Spidris
Crusader
Betrayed Wraith
Ripper Spectre
Expert 95 monsters
More challenging monsters for experienced hunters.
Werepanther
Fury
Cunning Werepanther
Defiler
Frazzlemaw
Plaguesmith
Weretiger
Ravenous Lava Lurker
Dawnfire Asura
Midnight Asura
Retching Horror
Varg
Werecrocodile
Frost Flower Asura
Gazer Spectre
Ogre Rowdy
Dark Carnisylvan
Poisonous Carnisylvan
Norcferatu Heartless
Flimsy Lost Soul
Juvenile Bashmu
Arachnophobica
Hulking Carnisylvan
Norcferatu Nightweaver
Bashmu
Undead Elite Gladiator
Manticore
Silencer
Naga Archer
White Weretiger
Blemished Spawn
Feral Werecrocodile
Grim Reaper
Ogre Sage
Mean Lost Soul
Afflicted Strider
Choking Fear
Crazed Summer Rearguard
Crazed Winter Rearguard
Makara
Hellfire Fighter
Naga Warrior
Burster Spectre
Crazed Summer Vanguard
Demon
Insane Siren
Guzzlemaw
Tremendous Tyrant
Lavafungus
Young Goanna
Deathling Scout
Thanatursus
Venerable Girtablilu
Blightwalker
Crazed Winter Vanguard
Deathling Spellsinger
Priestess of the Wild Sun
Lavaworm
Dark Torturer
cave chimera
Usurper Archer
Gloom Maw
Terrorsleep
Usurper Knight
Freakish Lost Soul
True Frost Flower Asura
Dworc Shadowstalker
Adult Goanna
Bulltaur Forgepriest
Black Sphinx Acolyte
Sineater Inferniarch
True Midnight Asura
Burning Gladiator
Hellhound
True Dawnfire Asura
Sphinx
Orclops Bloodbreaker
Skeleton Elite Warrior
Mega Dragon
Cobra Assassin
Floating Savant
Crape Man
Demon Outcast
Vexclaw
Carnivostrich
Falcon Knight
Cobra Scout
Bulltaur Alchemist
Crypt Warden
Cobra Vizier
Feral Sphinx
Girtablilu Warrior
Liodile
Falcon Paladin
Lamassu
Master 95 monsters
The strongest task pool for elite and endgame characters.
Grimeleech
Rhindeer
Bulltaur Brute
Boar Man
Spellreaper Inferniarch
Animated Feather
Custom Young Goanna
Hellhunter Inferniarch
Knowledge Elemental
Custom Adult Goanna
Gorger Inferniarch
Nibblemaw
Harpy
Broodrider Inferniarch
Juggernaut
Stalking Stalk
Candy Horror
Guardian of Tales
Energuardian of Tales
Energetic Book
Cursed Book
Rootthing Bug Tracker
Icecold Book
Sabretooth
burning book
Foam Stalker
Emerald Tortoise
Rootthing Nutshell
Rootthing Amber Shaper
Ink Blob
Sulphur Spouter
Gore Horn
Nighthunter
Quara Looter
Hulking Prehemoth
Hellflayer
Quara Raider
Gorerilla
Sulphider
Undertaker
Rage Squid
Squid Warden
Death Squid
Half Dead Savant
Brain Squid
Courage Leech
Infernal Demon
Dark Knowledge
Cloak of Terror
Vibrant Phantom
Brachiodemon
Infernal Phantom
Branchy Crawler
Rotten Golem
Brinebrute Inferniarch
Mould Phantom
Capricious Phantom
Many Faces
Turbulent Elemental
Bony Sea Devil
Meandering Mushroom
Mycobiontic Beetle
Darklight Matter
Darklight Source
Darklight Emitter
Oozing Corpus
Oozing Carcass
Darklight Striker
Wandering Pillar
Sopping Carcass
Sopping Corpus
Rotten Man-Maggot
Walking Pillar
Darklight Construct
Converter
Bloated Man-Maggot
Shaburak Demon

Orc Grimspell

Czarna Wdowa

Hellflayer Big

Blue Demon

Gravewalker

Venomstrike

Orc Bloodreaver

Fell Hammer Demon

Orc Ragefist

Cold Wight

King Of Demons

Orc Icebound

Tiger Of Death

Inferthrasher

Blazebane

Pyrovex

Angelic Warrior

Celestial Warrior
Delivery Items 175 items used for item delivery tasks
Only delivery items from task_board_delivery_items.lua are listed here.

Terra Mantle
Delivery
Required: 20
Item ID: 811
Required count: 20
Required count: 20

Terra Boots
Delivery
Required: 20
Item ID: 813
Required count: 20
Required count: 20

Magma Boots
Delivery
Required: 20
Item ID: 818
Required count: 20
Required count: 20

Glacier Shoes
Delivery
Required: 20
Item ID: 819
Required count: 20
Required count: 20

Lightning Boots
Delivery
Required: 20
Item ID: 820
Required count: 20
Required count: 20

Magma Legs
Delivery
Required: 20
Item ID: 821
Required count: 20
Required count: 20

Glacier Robe
Delivery
Required: 20
Item ID: 824
Required count: 20
Required count: 20

Lightning Robe
Delivery
Required: 20
Item ID: 825
Required count: 20
Required count: 20

Magma Coat
Delivery
Required: 20
Item ID: 826
Required count: 20
Required count: 20

Magma Monocle
Delivery
Required: 20
Item ID: 827
Required count: 20
Required count: 20

Lightning Headband
Delivery
Required: 20
Item ID: 828
Required count: 20
Required count: 20

Glacier Mask
Delivery
Required: 20
Item ID: 829
Required count: 20
Required count: 20

Terra Hood
Delivery
Required: 20
Item ID: 830
Required count: 20
Required count: 20

Halberd
Delivery
Required: 20
Item ID: 3269
Required count: 20
Required count: 20

Double Axe
Delivery
Required: 20
Item ID: 3275
Required count: 20
Required count: 20

Knife
Delivery
Required: 50
Item ID: 3291
Required count: 50
Required count: 50

Combat Knife
Delivery
Required: 50
Item ID: 3292
Required count: 50
Required count: 50

Broadsword
Delivery
Required: 20
Item ID: 3301
Required count: 20
Required count: 20

Golden Sickle
Delivery
Required: 20
Item ID: 3306
Required count: 20
Required count: 20

Orcish Axe
Delivery
Required: 20
Item ID: 3316
Required count: 20
Required count: 20

Knight Axe
Delivery
Required: 20
Item ID: 3318
Required count: 20
Required count: 20

Fire Axe
Delivery
Required: 20
Item ID: 3320
Required count: 20
Required count: 20

Dragon Hammer
Delivery
Required: 20
Item ID: 3322
Required count: 20
Required count: 20

Heavy Machete
Delivery
Required: 20
Item ID: 3330
Required count: 20
Required count: 20

Crystal Mace
Delivery
Required: 20
Item ID: 3333
Required count: 20
Required count: 20

Bone Club
Delivery
Required: 50
Item ID: 3337
Required count: 50
Required count: 50

War Axe
Delivery
Required: 20
Item ID: 3342
Required count: 20
Required count: 20

Ripper Lance
Delivery
Required: 20
Item ID: 3346
Required count: 20
Required count: 20

Golden Legs
Delivery
Required: 10
Item ID: 3364
Required count: 10
Required count: 10

Knight Legs
Delivery
Required: 20
Item ID: 3371
Required count: 20
Required count: 20

Strange Helmet
Delivery
Required: 20
Item ID: 3373
Required count: 20
Required count: 20

Battle Shield
Delivery
Required: 20
Item ID: 3413
Required count: 20
Required count: 20

Guardian Shield
Delivery
Required: 20
Item ID: 3415
Required count: 20
Required count: 20

Dark Shield
Delivery
Required: 20
Item ID: 3421
Required count: 20
Required count: 20

Black Shield
Delivery
Required: 20
Item ID: 3429
Required count: 20
Required count: 20

Plate Legs
Delivery
Required: 20
Item ID: 3557
Required count: 20
Required count: 20

Wood Cape
Delivery
Required: 20
Item ID: 3575
Required count: 20
Required count: 20

Piece of Hell Steel
Delivery
Required: 50
Item ID: 5888
Required count: 50
Required count: 50

Piece of Draconian Steel
Delivery
Required: 50
Item ID: 5889
Required count: 50
Required count: 50

Flask of Demonic Blood
Delivery
Required: 50
Item ID: 6558
Required count: 50
Required count: 50

Relic Sword
Delivery
Required: 20
Item ID: 7383
Required count: 20
Required count: 20

Mercenary Sword
Delivery
Required: 20
Item ID: 7386
Required count: 20
Required count: 20

Diamond Sceptre
Delivery
Required: 20
Item ID: 7387
Required count: 20
Required count: 20

Vile Axe
Delivery
Required: 20
Item ID: 7388
Required count: 20
Required count: 20

Dragon Slayer
Delivery
Required: 10
Item ID: 7402
Required count: 10
Required count: 10

Titan Axe
Delivery
Required: 20
Item ID: 7413
Required count: 20
Required count: 20

Chaos Mace
Delivery
Required: 20
Item ID: 7427
Required count: 20
Required count: 20

Bonebreaker
Delivery
Required: 20
Item ID: 7428
Required count: 20
Required count: 20

Angelic Axe
Delivery
Required: 20
Item ID: 7436
Required count: 20
Required count: 20

Crystal Sword
Delivery
Required: 20
Item ID: 7449
Required count: 20
Required count: 20

Glorious Axe
Delivery
Required: 10
Item ID: 7454
Required count: 10
Required count: 10

Focus Cape
Delivery
Required: 20
Item ID: 8043
Required count: 20
Required count: 20

Hibiscus Dress
Delivery
Required: 20
Item ID: 8045
Required count: 20
Required count: 20

Crystalline Armor
Delivery
Required: 10
Item ID: 8050
Required count: 10
Required count: 10

Skullcracker Armor
Delivery
Required: 10
Item ID: 8061
Required count: 10
Required count: 10

Spellbook of Mind Control
Delivery
Required: 10
Item ID: 8074
Required count: 10
Required count: 10

Hydra Head
Delivery
Required: 50
Item ID: 10282
Required count: 50
Required count: 50

Sulphurous Stone
Delivery
Required: 50
Item ID: 10315
Required count: 50
Required count: 50

Unholy Bone
Delivery
Required: 50
Item ID: 10316
Required count: 50
Required count: 50

Book of Necromantic Rituals
Delivery
Required: 50
Item ID: 10320
Required count: 50
Required count: 50

Zaoan Armor
Delivery
Required: 20
Item ID: 10384
Required count: 20
Required count: 20

Zaoan Shoes
Delivery
Required: 20
Item ID: 10386
Required count: 20
Required count: 20

Spellweaver's Robe
Delivery
Required: 20
Item ID: 10438
Required count: 20
Required count: 20

Sandcrawler Shell
Delivery
Required: 50
Item ID: 10456
Required count: 50
Required count: 50

Dragon's Tail
Delivery
Required: 50
Item ID: 11457
Required count: 50
Required count: 50

Piece of Warrior Armor
Delivery
Required: 50
Item ID: 11482
Required count: 50
Required count: 50

Scroll of Heroic Deeds
Delivery
Required: 50
Item ID: 11510
Required count: 50
Required count: 50

Heavy Trident
Delivery
Required: 20
Item ID: 12683
Required count: 20
Required count: 20

Swarmer Antenna
Delivery
Required: 50
Item ID: 14076
Required count: 50
Required count: 50

Spitter Nose
Delivery
Required: 50
Item ID: 14078
Required count: 50
Required count: 50

Waspoid Claw
Delivery
Required: 50
Item ID: 14080
Required count: 50
Required count: 50

Ornate Crossbow
Delivery
Required: 20
Item ID: 14247
Required count: 20
Required count: 20

Crystalline Sword
Delivery
Required: 20
Item ID: 16160
Required count: 20
Required count: 20

Crystal Crossbow
Delivery
Required: 20
Item ID: 16163
Required count: 20
Required count: 20

Buckle
Delivery
Required: 50
Item ID: 17829
Required count: 50
Required count: 50

Bone Fetish
Delivery
Required: 50
Item ID: 17831
Required count: 50
Required count: 50

Vampire's Cape Chain
Delivery
Required: 50
Item ID: 18927
Required count: 50
Required count: 50

Frazzle Tongue
Delivery
Required: 50
Item ID: 20198
Required count: 50
Required count: 50

Silencer Resonating Chamber
Delivery
Required: 50
Item ID: 20201
Required count: 50
Required count: 50

Rubber Cap
Delivery
Required: 20
Item ID: 21165
Required count: 20
Required count: 20

Alloy Legs
Delivery
Required: 20
Item ID: 21168
Required count: 20
Required count: 20

Metal Spats
Delivery
Required: 20
Item ID: 21169
Required count: 20
Required count: 20

Metal Bat
Delivery
Required: 20
Item ID: 21171
Required count: 20
Required count: 20

Mino Shield
Delivery
Required: 20
Item ID: 21175
Required count: 20
Required count: 20

Fur Armor
Delivery
Required: 20
Item ID: 22085
Required count: 20
Required count: 20

Shamanic Talisman
Delivery
Required: 50
Item ID: 22184
Required count: 50
Required count: 50

Ogre Ear Stud
Delivery
Required: 50
Item ID: 22188
Required count: 50
Required count: 50

Instable Proto Matter
Delivery
Required: 50
Item ID: 23516
Required count: 50
Required count: 50

Energy Ball
Delivery
Required: 50
Item ID: 23523
Required count: 50
Required count: 50

Bone Toothpick
Delivery
Required: 50
Item ID: 24380
Required count: 50
Required count: 50

Dandelion Seeds
Delivery
Required: 50
Item ID: 25695
Required count: 50
Required count: 50

Werefox Tail
Delivery
Required: 50
Item ID: 27463
Required count: 50
Required count: 50

Stonerefiner's Skull
Delivery
Required: 50
Item ID: 27606
Required count: 50
Required count: 50

Book Page
Delivery
Required: 50
Item ID: 28569
Required count: 50
Required count: 50

Glowing Rune
Delivery
Required: 50
Item ID: 28570
Required count: 50
Required count: 50

Falcon Crest
Delivery
Required: 50
Item ID: 28823
Required count: 50
Required count: 50

Sphinx Tiara
Delivery
Required: 50
Item ID: 31438
Required count: 50
Required count: 50

Manticore Tail
Delivery
Required: 50
Item ID: 31439
Required count: 50
Required count: 50

Manticore Ear
Delivery
Required: 50
Item ID: 31440
Required count: 50
Required count: 50

Lamassu Hoof
Delivery
Required: 50
Item ID: 31441
Required count: 50
Required count: 50

Lamassu Horn
Delivery
Required: 50
Item ID: 31442
Required count: 50
Required count: 50

Fafnar Symbol
Delivery
Required: 50
Item ID: 31443
Required count: 50
Required count: 50

Red Goanna Scale
Delivery
Required: 50
Item ID: 31558
Required count: 50
Required count: 50

Blue Goanna Scale
Delivery
Required: 50
Item ID: 31559
Required count: 50
Required count: 50

Goanna Meat
Delivery
Required: 50
Item ID: 31560
Required count: 50
Required count: 50

Goanna Claw
Delivery
Required: 50
Item ID: 31561
Required count: 50
Required count: 50

Cobra Crest
Delivery
Required: 50
Item ID: 31678
Required count: 50
Required count: 50

Werehyaena Nose
Delivery
Required: 50
Item ID: 33943
Required count: 50
Required count: 50

Werehyaena Talisman
Delivery
Required: 50
Item ID: 33944
Required count: 50
Required count: 50

Crawler's Essence
Delivery
Required: 50
Item ID: 33982
Required count: 50
Required count: 50

Lion Crest
Delivery
Required: 50
Item ID: 34160
Required count: 50
Required count: 50

Lion Cloak Patch
Delivery
Required: 50
Item ID: 34162
Required count: 50
Required count: 50

Lavaworm Spike Roots
Delivery
Required: 50
Item ID: 36769
Required count: 50
Required count: 50

Lavaworm Spikes
Delivery
Required: 50
Item ID: 36770
Required count: 50
Required count: 50

Lavaworm Jaws
Delivery
Required: 50
Item ID: 36771
Required count: 50
Required count: 50

Blemished Spawn Head
Delivery
Required: 50
Item ID: 36778
Required count: 50
Required count: 50

Blemished Spawn Abdomen
Delivery
Required: 50
Item ID: 36779
Required count: 50
Required count: 50

Blemished Spawn Tail
Delivery
Required: 50
Item ID: 36780
Required count: 50
Required count: 50

Lavafungus Head
Delivery
Required: 50
Item ID: 36785
Required count: 50
Required count: 50

Lavafungus Ring
Delivery
Required: 50
Item ID: 36786
Required count: 50
Required count: 50

Afflicted Strider Head
Delivery
Required: 50
Item ID: 36789
Required count: 50
Required count: 50

Afflicted Strider Worms
Delivery
Required: 50
Item ID: 36790
Required count: 50
Required count: 50

Carnisylvan Finger
Delivery
Required: 50
Item ID: 36805
Required count: 50
Required count: 50

Carnisylvan Bark
Delivery
Required: 50
Item ID: 36806
Required count: 50
Required count: 50

Bashmu Fang
Delivery
Required: 50
Item ID: 36820
Required count: 50
Required count: 50

Bashmu Tongue
Delivery
Required: 50
Item ID: 36821
Required count: 50
Required count: 50

Bashmu Feather
Delivery
Required: 50
Item ID: 36823
Required count: 50
Required count: 50

Girtablilu Warrior Carapace
Delivery
Required: 50
Item ID: 36971
Required count: 50
Required count: 50

Old Girtablilu Carapace
Delivery
Required: 50
Item ID: 36972
Required count: 50
Required count: 50

Sulphider Shell
Delivery
Required: 50
Item ID: 39375
Required count: 50
Required count: 50

Sulphur Powder
Delivery
Required: 50
Item ID: 39376
Required count: 50
Required count: 50

Gore Horn
Delivery
Required: 50
Item ID: 39377
Required count: 50
Required count: 50

Sabretooth Fur
Delivery
Required: 50
Item ID: 39378
Required count: 50
Required count: 50

Emerald Tortoise Shell
Delivery
Required: 50
Item ID: 39379
Required count: 50
Required count: 50

Undertaker Fangs
Delivery
Required: 50
Item ID: 39380
Required count: 50
Required count: 50

Nighthunter Wing
Delivery
Required: 50
Item ID: 39381
Required count: 50
Required count: 50

Prehemoth Horns
Delivery
Required: 50
Item ID: 39382
Required count: 50
Required count: 50

Prehemoth Claw
Delivery
Required: 50
Item ID: 39383
Required count: 50
Required count: 50

Gorerilla Mane
Delivery
Required: 50
Item ID: 39392
Required count: 50
Required count: 50

Gorerilla Tail
Delivery
Required: 50
Item ID: 39393
Required count: 50
Required count: 50

Makara Fin
Delivery
Required: 50
Item ID: 39401
Required count: 50
Required count: 50

Makara Tongue
Delivery
Required: 50
Item ID: 39402
Required count: 50
Required count: 50

Naga Armring
Delivery
Required: 50
Item ID: 39411
Required count: 50
Required count: 50

Naga Earring
Delivery
Required: 50
Item ID: 39412
Required count: 50
Required count: 50

Naga Archer Scales
Delivery
Required: 50
Item ID: 39413
Required count: 50
Required count: 50

Naga Warrior Scales
Delivery
Required: 50
Item ID: 39414
Required count: 50
Required count: 50

Crab Man Claws
Delivery
Required: 50
Item ID: 40582
Required count: 50
Required count: 50

Liodile Fang
Delivery
Required: 50
Item ID: 40583
Required count: 50
Required count: 50

Boar Man Hoof
Delivery
Required: 50
Item ID: 40584
Required count: 50
Required count: 50

Harpy Feathers
Delivery
Required: 50
Item ID: 40585
Required count: 50
Required count: 50

Carnivostrich Feather
Delivery
Required: 50
Item ID: 40586
Required count: 50
Required count: 50

Rhindeer Antlers
Delivery
Required: 50
Item ID: 40587
Required count: 50
Required count: 50

Werecrocodile Tongue
Delivery
Required: 50
Item ID: 43729
Required count: 50
Required count: 50

Weretiger Tooth
Delivery
Required: 50
Item ID: 43730
Required count: 50
Required count: 50

Werepanther Claw
Delivery
Required: 50
Item ID: 43731
Required count: 50
Required count: 50

Decayed Finger Bone
Delivery
Required: 50
Item ID: 43846
Required count: 50
Required count: 50

Darklight Matter
Delivery
Required: 50
Item ID: 43851
Required count: 50
Required count: 50

Darklight Basalt Chunk
Delivery
Required: 50
Item ID: 43852
Required count: 50
Required count: 50

Darklight Core
Delivery
Required: 50
Item ID: 43853
Required count: 50
Required count: 50

Nimmersatt's Seal
Delivery
Required: 50
Item ID: 44743
Required count: 50
Required count: 50

Molten Dragon Essence
Delivery
Required: 50
Item ID: 44744
Required count: 50
Required count: 50

Mega Dragon Heart
Delivery
Required: 50
Item ID: 44745
Required count: 50
Required count: 50

Amber Souvenir
Delivery
Required: 50
Item ID: 48508
Required count: 50
Required count: 50

Resinous Fish Fin
Delivery
Required: 50
Item ID: 48509
Required count: 50
Required count: 50

Demon Root
Delivery
Required: 50
Item ID: 48510
Required count: 50
Required count: 50

Resin Parasite
Delivery
Required: 50
Item ID: 48511
Required count: 50
Required count: 50

Demonic Matter
Delivery
Required: 50
Item ID: 49894
Required count: 50
Required count: 50

Mummified Demon Finger
Delivery
Required: 50
Item ID: 49908
Required count: 50
Required count: 50

Brinebrute Claw
Delivery
Required: 50
Item ID: 50056
Required count: 50
Required count: 50

Sineater Wing
Delivery
Required: 50
Item ID: 50057
Required count: 50
Required count: 50

Broodrider Saddle
Delivery
Required: 50
Item ID: 50058
Required count: 50
Required count: 50

Gorger Antlers
Delivery
Required: 50
Item ID: 50059
Required count: 50
Required count: 50

Ritual Bone Knife
Delivery
Required: 50
Item ID: 51475
Required count: 50
Required count: 50

Bone Rattle
Delivery
Required: 50
Item ID: 51478
Required count: 50
Required count: 50

Bone Fibula
Delivery
Required: 50
Item ID: 51485
Required count: 50
Required count: 50
Custom Items
Every custom equipment piece, weapon and progression material currently available on Vantoria.
Custom Items Catalog
This catalog is generated from the live server item definitions. It contains all custom equipment and weapons from level 800 through 5000, plus the real Nexus and Riftforge crafting materials. Use search or tier filters below.
Items
Weapons, Armors, legs, boots...
Item Catalog
Browse useful equipment by category. New Vantoria custom items are included with their ID, level, vocation, bonuses and icon path.
Weapon Cores
Empower your weapon with rare PvE combat effects.
Weapon Core System
Weapon Cores are a weapon progression system focused on hunting. A core can be used directly on a weapon to add one permanent special PvE effect. The effect can trigger during combat and gives your weapon an extra layer of power without replacing normal imbuements, augments or item stats.

Weapon Core FragmentMaterial used by the Core Artificer.

Refined Weapon CoreRolls a Tier I or Tier II weapon effect.

Ancient Weapon CoreRolls a Tier III weapon effect.
How to use: use a Refined or Ancient Weapon Core on a weapon in your inventory. If the weapon is eligible, the core is consumed and the weapon receives a random compatible effect.
| Core | Crafting cost | Possible tier | Purpose |
|---|---|---|---|
| Refined Weapon Core | 100 Weapon Core Fragments | Tier I or Tier II | Early core upgrade for weapons. Good for building your first weapon effect. |
| Ancient Weapon Core | 250 Weapon Core Fragments + 1 Refined Weapon Core | Tier III | Endgame core upgrade with the strongest version of each effect. |
Possible Effects
Twin Strike
Chance to hit the same target again for bonus physical damage. Available for most weapon styles.
Chain Surge
Chance to chain extra energy damage into nearby monsters. Especially useful while hunting groups.
Rift Burst
Chance to burst fire damage around the target, damaging several nearby monsters.
Execution Mark
Chance to deal bonus death damage when the target is already low on health.
| Tier | Effect strength | Typical role |
|---|---|---|
| Tier I | Lowest chance and bonus damage. | Starter core effect. |
| Tier II | Improved chance and stronger bonus damage. | Good mid-progress weapon upgrade. |
| Tier III | Best chance and strongest effect values. | Endgame weapon upgrade from Ancient Core. |
Important Rules
One effect per weapon
A weapon that already has a Weapon Core effect cannot receive another one.
PvE system
Weapon Core effects are designed for hunting monsters. They do not trigger on players.
No training abuse
Effects do not trigger on training machines, exercise dummies or target dummies.
Boss Relic restriction
Boss Relic weapons cannot receive Weapon Core effects. Relic items keep their own rare identity.
Note: choose your weapon carefully before applying a core. The result is random within the effects compatible with that weapon type, and the core is consumed after a successful upgrade.
Upgrade Slots
Add bonuses to your items.
Slot Upgrade Skill System
Every time you use a Bonus Crystal on an eligible piece of equipment, you gain experience in the Slot Upgrade Skill. As your skill level increases, you unlock access to stronger bonus values and improve the overall quality of upgrades applied to your gear.
Tier Progression:
Level 0 - 12: Rolls are limited to the Tier 1 bonus pool.
Level 13+: You unlock Tier 2, allowing access to the highest possible bonus values available in the system.
Level 0 - 12: Rolls are limited to the Tier 1 bonus pool.
Level 13+: You unlock Tier 2, allowing access to the highest possible bonus values available in the system.
How to level up:
Each successful use of a Bonus Crystal has a chance to increase your Slot Upgrade Skill. The higher your level, the stronger bonuses you can roll.
Each successful use of a Bonus Crystal has a chance to increase your Slot Upgrade Skill. The higher your level, the stronger bonuses you can roll.
Check your progress:
Type the !slot command in-game to view your current Slot Upgrade Skill level.
Type the !slot command in-game to view your current Slot Upgrade Skill level.
Equipment Upgrading (Bonus Crystals)
Each item can contain up to 3 unique bonus slots.
Duplicate bonuses are not allowed, ensuring every slot provides a different benefit.
| Bonus Type | Tier 1 (Lvl 0-12) | Tier 2 (Lvl 13+) | Applicable To |
|---|---|---|---|
| Mana Leech | 1.0% / 2.0% / 2.5% | 3.0% / 4.0% / 5.0% | Helmets |
| Life Leech | 1.0% / 2.0% / 2.5% | 3.0% / 4.0% / 5.0% | Armors |
| Weapon Skills | +1 / +2 | +3 / +4 / +5 | Swords, Axes, Clubs, Distance, Fist Weapons |
| Magic Level | +1 / +2 | +3 / +4 | Helmets, Wands, Rings |
| Shielding | +1 / +2 | +3 / +4 / +5 | Armors, Legs, Shields |
| Max Health | +25 / +50 / +75 | +100 / +150 / +200 | Armors, Boots, Shields |
| Max Mana | +25 / +50 / +75 | +100 / +150 / +200 | Legs, Boots |
| Health Gain | +5 / +10 / +15 | +20 / +30 / +45 | Armors, Legs |
| Mana Gain | +5 / +10 / +15 | +20 / +30 / +45 | Helmets, Legs, Boots |
| Speed | +5 / +10 / +15 | +20 / +25 / +30 | Boots |
| Critical Chance | 1% / 2% | 3% / 4% / 5% | Shields |
| Critical Damage | 1% / 2% | 3% / 4% / 5% | Shields |
| Bonus EXP | +5% / +10% | +12% / +15% / +20% | Rings (rare bonus) |
* Leech, Critical Chance, Critical Damage and Bonus EXP bonuses stack with other sources. Health Gain and Mana Gain are flat regeneration values applied by the slot system.
Reroll System (Rellor Crystal)
| Item | Function Description |
|---|---|
| Rellor Crystal |
Allows you to attempt to upgrade the value of an existing slot without changing its bonus type.
Success Rate: 30%. Progression Logic: The crystal respects your Skill Level. If you are Level 12 or lower, a Reroll will never exceed the Tier 1 limit. Only upon reaching Level 13 can a Reroll "break through" into Tier 2 values. |
Bonus Transfer System
| Feature | Cost | Location |
|---|---|---|
| Bonus Transfer | 400 Tibia Coins | Transfers all 3 slots from one item to another of the same type. The source item will be cleared. The transfer machine is located in the Depot on level +1. |
Crafting
Create items using materials.
Crafting System
Recipes are displayed in the same clean card style as Passive Charms.
Materials are shown in one centered recipe line, then the final crafted result below.
Materials are shown in one centered recipe line, then the final crafted result below.
5 recipes visible

Celestial Backpack
Backpack crafted from elemental backpacks. Gives protection against all listed elements.
 Death Backpack x1
 Ice Backpack x1
 Holy Backpack x1
 Fire Backpack x1
 Energy Backpack x1
 Poison Backpack x1
 Physical Backpack x1
↓
Celestial Backpack
Chalice of Lords
Combines all elemental chalices into one powerful artifact.
 Fire x1
 Ice x1
 Earth x1
 Holy x1
 Death x1
 Physical x1
 Energy x1
↓
Chalice of Lords
Honorable Ring
A prestigious ring created by merging legendary rings and currency.
 Alicorn Ring x1
 Arboreal Ring x1
 Sigil x1
 Spiritthorn Ring x1
 Ethereal Ring x1Crystal Coins 5000cc
↓
Honorable Ring
Wraith Ring
Advanced ring recipe upgraded from Honorable Ring and additional legendary materials.
Honorable Ring x1Alicorn Ring x1Arboreal Ring x1Sigil x1Spiritthorn Ring x1Ethereal Ring x1Crystal Coins 10000cc↓
Wraith RingWorld Boost Key
Activates a 60-minute global EXP event for all players.
 Bronze Key x1
 Silver Key x1
 Gold Key x1
↓
World Boost KeyNo crafting recipes found.
Recipes and requirements may change. Check in-game for the latest version.
Buff System
Learn about temporary power-ups.
Buff System
The Buff System becomes available when your character reaches Level 300 and after completing a specific quest.
Buffs grant new abilities to your character, enhancing your gameplay experience. However, keep in mind the following:
- Buffs reset upon death.
- Buffs can be reactivated after they are reset.
Buff Effects
| Category | Effect |
|---|---|
| Sword | +3 skill levels |
| Axe | +3 skill levels |
| Club | +3 skill levels |
| Distance | +3 skill levels |
| Shield | +3 skill levels |
| Fist | +3 skill levels |
| Fishing | +3 skill levels |
| Critical Hit Chance | +3.15% |
| Critical Hit Damage | +3.15% |
| Life Leech Chance | +3.15% |
| Life Leech Amount | +3.15% |
| Mana Leech Chance | +3.15% |
| Mana Leech Amount | +3.15% |
| Max HP | +500 |
| Max Mana | +500 |
| Magic Level | +3 |
Visual overview of buff
Forge System
Crystal Tiering System.
Forgaste Crystal (Item Tiering)
Forgaste Crystal is a powerful artifact that allows you to permanently increase the Tier of your equipment.
Each subsequent Tier strengthens the item's statistics and increases its combat value.
How does it work?
How does it work?
-
Use the crystal (Forge Token) on the item you wish to upgrade.
>You must have the required amount of gold in your Bank (cost depends on the current Tier).
A minimum of 250 oz. free capacity (Cap) is required.
| Current Tier | Upgrade Cost | Success Rate | Destination |
|---|---|---|---|
| Tier 0 → 1 | 4,000,000 gp | 80% | Store Inbox (Chest) |
| Tier 1 → 2 | 10,000,000 gp | 80% | Store Inbox (Chest) |
| Tier 2 → 3 | 20,000,000 gp | 80% | Store Inbox (Chest) |
| Tier 3 → 4 | 32,500,000 gp | 80% | Store Inbox (Chest) |
| Tier 4 → 5 | 50,000,000 gp | 80% | Store Inbox (Chest) |
| Tier 5 → 6 | 125,000,000 gp | 80% | Store Inbox (Chest) |
| Tier 6 → 7 | 375,000,000 gp | 80% | Store Inbox (Chest) |
| Tier 7 → 8 | 1,250,000,000 gp | 80% | Store Inbox (Chest) |
| Tier 8 → 9 | 4,000,000,000 gp | 80% | Store Inbox (Chest) |
| Tier 9 → 10 | 7,500,000,000 gp | 80% | Store Inbox (Chest) |
System Comparison
| Feature | Standard Forge | Forgaste Crystal |
|---|---|---|
| Required Items | TWO identical items (Fusion) | ONLY ONE item |
| Safety | Risk of losing item / Tier | 100% Safety (item does not disappear) |
| Additional Ingredients | Cores (Rdzenie) | None (only GP and Crystal) |
| Delivery | To backpack (risk of insufficient Cap) | Secure chest in Store Inbox |
*In case of failure: The crystal and gold are lost, but the item remains intact (it does not disappear and does not lose its current Tier).
Bonus Addons
Unique bonuses for your outfits.
Addon Bonus System
Collect outfits and unlock powerful bonuses for your character. Bonuses activate automatically when you equip a full outfit (including 2 add-ons).
Custom Store Outfits
| Outfit Name | Preview | Bonus Statistics |
|---|---|---|
| Arctic Crusader |   |
 Health + 400 Mana + 400 Magic Level + 4 Fist Fighting + 4 Club Fighting + 4 Axe Fighting + 4 Sword Fighting + 4 Distance Skill + 4 Shielding + 4 Mana Leech + 2% Life Leech + 2% Health + 400 Mana + 400 Magic Level + 4 Fist Fighting + 4 Club Fighting + 4 Axe Fighting + 4 Sword Fighting + 4 Distance Skill + 4 Shielding + 4 Mana Leech + 2% Life Leech + 2% |
| Validus |   |
Health + 30 Mana + 30 Magic Level + 1 Fist Fighting + 1 Club Fighting + 1 Axe Fighting + 1 Sword Fighting + 1 Distance Skill + 1 Shielding + 1 |
| Diamond |  |
Health + 400 Mana + 400 Magic Level + 4 Fist Fighting + 4 Club Fighting + 4 Axe Fighting + 4 Sword Fighting + 4 Distance Skill + 4 Shielding + 4 Mana Leech + 2% Life Leech + 2% |
| Silver |  |
Health + 400 Mana + 400 Magic Level + 4 Fist Fighting + 4 Club Fighting + 4 Axe Fighting + 4 Sword Fighting + 4 Distance Skill + 4 Shielding + 4 Mana Leech + 2% Life Leech + 2% |
| Golden Seraph |   |
Health + 400 Mana + 400 Magic Level + 4 Fist Fighting + 4 Club Fighting + 4 Axe Fighting + 4 Sword Fighting + 4 Distance Skill + 4 Shielding + 4 Mana Leech + 2% Life Leech + 2% |
| Soul Reaper |   |
Health + 400 Mana + 400 Magic Level + 4 Fist Fighting + 4 Club Fighting + 4 Axe Fighting + 4 Sword Fighting + 4 Distance Skill + 4 Shielding + 4 Mana Leech + 2% Life Leech + 2% |
| Celestial Raven |   |
Health + 400 Mana + 400 Magic Level + 4 Fist Fighting + 4 Club Fighting + 4 Axe Fighting + 4 Sword Fighting + 4 Distance Skill + 4 Shielding + 4 Mana Leech + 2% Life Leech + 2% |
| Nightshade |   |
Health + 400 Mana + 400 Magic Level + 4 Fist Fighting + 4 Club Fighting + 4 Axe Fighting + 4 Sword Fighting + 4 Distance Skill + 4 Shielding + 4 Mana Leech + 2% Life Leech + 2% |
| Zerobot |   |
Health + 30 Mana + 30 Magic Level + 1 Fist Fighting + 1 Club Fighting + 1 Axe Fighting + 1 Sword Fighting + 1 Distance Skill + 1 Shielding + 1 |
| Light Green |  |
Health + 400 Mana + 400 Magic Level + 4 Fist Fighting + 4 Club Fighting + 4 Axe Fighting + 4 Sword Fighting + 4 Distance Skill + 4 Shielding + 4 Mana Leech + 2% Life Leech + 2% |
| White |  |
Health + 400 Mana + 400 Magic Level + 4 Fist Fighting + 4 Club Fighting + 4 Axe Fighting + 4 Sword Fighting + 4 Distance Skill + 4 Shielding + 4 Mana Leech + 2% Life Leech + 2% |
| Turquoise |  |
Health + 400 Mana + 400 Magic Level + 4 Fist Fighting + 4 Club Fighting + 4 Axe Fighting + 4 Sword Fighting + 4 Distance Skill + 4 Shielding + 4 Mana Leech + 2% Life Leech + 2% |
| Purple |  |
Health + 400 Mana + 400 Magic Level + 4 Fist Fighting + 4 Club Fighting + 4 Axe Fighting + 4 Sword Fighting + 4 Distance Skill + 4 Shielding + 4 Mana Leech + 2% Life Leech + 2% |
| Fire Warrior |  |
Health + 400 Mana + 400 Magic Level + 4 Fist Fighting + 4 Club Fighting + 4 Axe Fighting + 4 Sword Fighting + 4 Distance Skill + 4 Shielding + 4 Mana Leech + 2% Life Leech + 2% |
| Inwalid |  |
Health + 400 Mana + 400 Magic Level + 4 Fist Fighting + 4 Club Fighting + 4 Axe Fighting + 4 Sword Fighting + 4 Distance Skill + 4 Shielding + 4 Mana Leech + 2% Life Leech + 2% |
| Green |  |
Health + 400 Mana + 400 Magic Level + 4 Fist Fighting + 4 Club Fighting + 4 Axe Fighting + 4 Sword Fighting + 4 Distance Skill + 4 Shielding + 4 Mana Leech + 2% Life Leech + 2% |
| Outfit Name | Preview | Bonus Statistics |
|---|---|---|
| Citizen |   |
Health + 100 Mana + 100 Magic Level + 1 Fist Fighting + 1 Club Fighting + 1 Axe Fighting + 1 Sword Fighting + 1 Distance Skill + 1 Shielding + 1 |
| Hunter |   |
Health + 150 Mana + 150 Distance Skill + 1 |
| Mage |   |
Mana + 350 Magic Level + 4 Mana Leech + 2% |
| Knight |   |
Health + 100 Club Fighting + 2 Sword Fighting + 2 Axe Fighting + 2 |
| Noble |   |
Health + 150 Mana + 150 |
| Summoner |   |
Mana + 100 Magic Level + 2 |
| Warrior |   |
Health + 100 Club Fighting + 2 Sword Fighting + 2 Axe Fighting + 2 |
| Barbarian |   |
Health + 100 Club Fighting + 2 Sword Fighting + 2 Axe Fighting + 2 |
| Druid |   |
Magic Level + 2 |
| Wizard |   |
Magic Level + 2 |
| Oriental |   |
Health + 200 |
| Pirate |   |
Health + 150 Club Fighting + 3 Sword Fighting + 3 Axe Fighting + 3 |
| Assassin |   |
Health + 150 Magic Level + 2 Distance Skill + 3 |
| Beggar |   |
Health + 500 Mana + 250 Life Leech + 1% |
| Shaman |   |
Magic Level + 3 |
| Norse |   |
Health + 250 Mana + 150 Shielding + 2 |
| Nightmare |   |
Health + 300 |
| Jester |   |
Health + 150 Mana + 150 |
| Brotherhood |   |
Health + 650 Mana + 400 Shielding + 2 Life Leech + 2% |
| Demon Hunter |   |
Health + 750 Mana + 250 Club Fighting + 2 Sword Fighting + 2 Axe Fighting + 2 Distance Skill + 5 Critical Chance + 1% |
| Yalaharian |   |
Health + 200 |
| Newly Wed |   |
Health + 250 Mana + 150 |
| Warmaster |   |
Health + 200 Mana + 200 |
| Wayfarer |   |
Health + 100 Mana + 100 Fist Fighting + 1 Club Fighting + 1 Sword Fighting + 1 Axe Fighting + 1 Distance Skill + 1 Shielding + 3 |
| Afflicted |   |
Health + 100 |
| Elementalist |   |
Mana + 400 Magic Level + 3 |
| Deepling |   |
Health + 200 Club Fighting + 4 Sword Fighting + 4 Axe Fighting + 4 |
| Insectoid |   |
Health + 200 Magic Level + 2 |
| Entrepreneur |   |
Health + 650 Mana + 350 |
| Crystal Warlord |   |
Health + 200 Club Fighting + 3 Sword Fighting + 3 Axe Fighting + 3 |
| Soil Guardian |   |
Health + 200 Club Fighting + 3 Sword Fighting + 3 Axe Fighting + 3 |
| Demon |   |
Health + 250 Club Fighting + 3 Sword Fighting + 3 Axe Fighting + 3 |
| Cave Explorer |   |
Health + 450 Mana + 450 Shielding + 2 |
| Dream Warden |   |
Health + 200 Mana + 800 Magic Level + 5 Mana Leech + 2% |
| Glooth Engineer |   |
Health + 550 Mana + 350 Shielding + 2 Distance Skill + 4 |
| Jersey |   |
Health + 100 Mana + 100 |
| Champion |   |
Health + 700 Mana + 300 Club Fighting + 5 Sword Fighting + 5 Axe Fighting + 5 Critical Chance + 2% |
| Conjurer |   |
Mana + 500 Magic Level + 2 |
| Beastmaster |   |
Health + 650 Mana + 300 Distance Skill + 5 Club Fighting + 1 Sword Fighting + 1 Axe Fighting + 1 Life Leech + 2% |
| Chaos Acolyte |   |
Mana + 100 Magic Level + 1 |
| Death Herald |   |
Health + 400 Mana + 650 Magic Level + 4 |
| Ranger |   |
Distance Skill + 2 |
| Ceremonial Garb |   |
Health + 500 Mana + 400 Magic Level + 2 |
| Puppeteer |   |
Mana + 650 Magic Level + 4 Mana Leech + 2% |
| Spirit Caller |   |
Mana + 650 Magic Level + 4 Mana Leech + 2% |
| Evoker |   |
Mana + 750 Magic Level + 5 Mana Leech + 2% |
| Seaweaver |   |
Health + 350 Mana + 650 Magic Level + 3 |
| Recruiter |   |
Health + 500 Mana + 300 Fist Fighting + 1 Club Fighting + 1 Sword Fighting + 1 Axe Fighting + 1 Distance Skill + 4 Shielding + 1 |
| Sea Dog |   |
Health + 600 Mana + 250 Club Fighting + 4 Sword Fighting + 4 Axe Fighting + 2 Distance Skill + 1 |
| Royal Pumpkin |   |
Health + 600 Mana + 600 |
| Rift Warrior |   |
Health + 200 Mana + 200 |
| Winter Warden |   |
Health + 100 Mana + 100 |
| Philosopher |   |
Health + 150 Mana + 750 Magic Level + 5 Mana Leech + 2% |
| Arena Champion |   |
Club Fighting + 2 Sword Fighting + 2 Axe Fighting + 2 |
| Lupine Warden |   |
Distance Skill + 2 |
| Grove Keeper |   |
Mana + 100 Magic Level + 2 |
| Festive |   |
Health + 500 Mana + 500 Fist Fighting + 1 Club Fighting + 1 Sword Fighting + 1 Axe Fighting + 1 Distance Skill + 1 Shielding + 1 |
| Pharaoh |   |
Health + 700 Mana + 600 Magic Level + 3 |
| Trophy Hunter |   |
Club Fighting + 2 Sword Fighting + 2 Axe Fighting + 2 |
| Retro Warrior |   |
Health + 650 Mana + 250 Club Fighting + 5 Sword Fighting + 5 Axe Fighting + 5 Critical Chance + 1% |
| Retro Summoner |   |
Mana + 750 Magic Level + 5 Mana Leech + 2% |
| Retro Noble |   |
Health + 250 Mana + 250 |
| Retro Mage |   |
Mana + 100 Magic Level + 2 |
| Retro Knight |   |
Club Fighting + 2 Sword Fighting + 2 Axe Fighting + 2 |
| Retro Hunter |   |
Distance Skill + 2 |
| Retro Citizen |   |
Health + 350 Mana + 350 Fist Fighting + 2 Club Fighting + 2 Sword Fighting + 2 Axe Fighting + 2 Distance Skill + 2 Shielding + 2 |
| Herbalist |   |
Health + 250 Mana + 600 Magic Level + 3 |
| Sun Priest |   |
Health + 50 Mana + 50 |
| Makeshift Warrior |   |
Club Fighting + 3 Sword Fighting + 3 Axe Fighting + 3 |
| Siege Master |   |
Club Fighting + 2 Sword Fighting + 2 Axe Fighting + 2 |
| Mercenary |   |
Club Fighting + 2 Sword Fighting + 2 Axe Fighting + 2 |
| Battle Mage |   |
Mana + 150 Magic Level + 3 |
| Discoverer |   |
Health + 450 Mana + 450 Shielding + 2 |
| Sinister Archer |   |
Distance Skill + 2 |
| Pumpkin Mummy |   |
Health + 550 Mana + 250 Life Leech + 1% |
| Dream Warrior |   |
Mana + 200 Magic Level + 3 |
| Percht Raider |   |
Health + 500 Mana + 400 Club Fighting + 2 Sword Fighting + 2 Axe Fighting + 4 Shielding + 2 |
| Owl Keeper |   |
Mana + 100 Magic Level + 2 |
| Guidon Bearer |   |
Mana + 100 Magic Level + 2 |
| Void Master |   |
Mana + 100 Magic Level + 2 |
| Veteran Paladin |   |
Distance Skill + 2 |
| Lion of War |   |
Club Fighting + 2 Sword Fighting + 2 Axe Fighting + 2 |
| Golden |   |
Health + 800 Mana + 400 Shielding + 5 |
| Hand of the Inquisition |   |
Health + 250 Mana + 200 Club Fighting + 4 Sword Fighting + 4 Axe Fighting + 4 |
| Breezy Garb |   |
Health + 450 Mana + 350 Distance Skill + 3 |
| Orcsoberfest Garb |   |
Health + 600 Mana + 450 Club Fighting + 4 Axe Fighting + 4 |
| Poltergeist |   |
Health + 150 Mana + 150 |
| Herder |   |
Mana + 100 Magic Level + 2 |
| Falconer |   |
Health + 200 Distance Skill + 4 |
| Dragon Slayer |   |
Club Fighting + 2 Sword Fighting + 2 Axe Fighting + 2 |
| Trailblazer |   |
Health + 550 Mana + 250 Distance Skill + 3 |
| Revenant |   |
Health + 650 Mana + 300 Club Fighting + 4 Sword Fighting + 4 Axe Fighting + 4 Critical Chance + 1% |
| Jouster |   |
Club Fighting + 2 Sword Fighting + 2 Axe Fighting + 2 |
| Moth Cape |   |
Magic Level + 2 Club Fighting + 2 Sword Fighting + 2 Axe Fighting + 2 Distance Skill + 2 Shielding + 2 |
| Rascoohan |   |
Health + 750 Mana + 250 Shielding + 5 |
| Merry Garb |   |
Magic Level + 3 Club Fighting + 3 Sword Fighting + 3 Axe Fighting + 3 Distance Skill + 3 Shielding + 3 |
| Rune Master |   |
Mana + 100 Magic Level + 2 |
| Citizen of Issavi |   |
Health + 150 Mana + 150 Club Fighting + 4 Sword Fighting + 4 Axe Fighting + 4 |
| Forest Warden |   |
Mana + 100 Magic Level + 2 |
| Royal Bounacean Advisor |   |
Magic Level + 3 Club Fighting + 3 Sword Fighting + 3 Axe Fighting + 3 Distance Skill + 3 Shielding + 3 |
| Dragon Knight |   |
Club Fighting + 2 Sword Fighting + 2 Axe Fighting + 2 Critical Chance + 1% |
| Arbalester |   |
Health + 300 Distance Skill + 5 Life Leech + 1% |
| Royal Costume |   |
Magic Level + 2 Club Fighting + 2 Sword Fighting + 2 Axe Fighting + 2 Distance Skill + 2 Shielding + 2 Mana Leech + 1% |
| Formal Dress |   |
Health + 450 Mana + 650 Magic Level + 3 |
| Ghost Blade |   |
Magic Level + 2 Club Fighting + 2 Sword Fighting + 2 Axe Fighting + 2 Distance Skill + 2 Critical Chance + 1% |
| Nordic Chieftain |   |
Club Fighting + 2 Sword Fighting + 2 Axe Fighting + 2 |
| Fire-Fighter |   |
Health + 150 |
| Fencer |   |
Club Fighting + 2 Sword Fighting + 2 Axe Fighting + 2 Life Leech + 1% |
| Shadowlotus Disciple |   |
Magic Level + 1 Club Fighting + 2 Sword Fighting + 2 Axe Fighting + 2 |
| Ancient Aucar |   |
Magic Level + 2 Club Fighting + 3 Sword Fighting + 3 Axe Fighting + 3 Life Leech + 1% |
| Frost Tracer |   |
Magic Level + 2 Mana Leech + 1% |
| Armoured Archer |   |
Distance Skill + 2 Critical Chance + 1% |
| Decaying Defender |   |
Health + 250 Mana + 250 Magic Level + 3 Club Fighting + 4 Sword Fighting + 4 Axe Fighting + 4 Distance Skill + 4 Shielding + 4 Life Leech + 1% Mana Leech + 1% Critical Chance + 1% |
| Darklight Evoker |   |
Mana + 800 Magic Level + 5 Mana Leech + 2% |
| Flamefury Mage |   |
Mana + 800 Magic Level + 5 Mana Leech + 2% |
| Doom Knight |   |
Health + 850 Mana + 250 Club Fighting + 5 Sword Fighting + 5 Axe Fighting + 5 Critical Chance + 3% Life Leech + 2% |
| Draccoon Herald |   |
Health + 200 Mana + 200 Magic Level + 3 Club Fighting + 3 Sword Fighting + 3 Axe Fighting + 3 Distance Skill + 3 Critical Chance + 1% |
| Rootwalker |   |
Health + 700 Mana + 300 Distance Skill + 4 Shielding + 4 Life Leech + 1% |
| Celestial Avenger |   |
Health + 750 Mana + 400 Club Fighting + 5 Sword Fighting + 5 Axe Fighting + 5 Critical Chance + 2% |
| Blade Dancer |   |
Health + 600 Mana + 300 Sword Fighting + 5 Critical Chance + 2% |
| Beekeeper |   |
Mana + 150 Magic Level + 2 |
| Monk |   |
Health + 500 Mana + 350 Fist Fighting + 4 |
| Fiend Slayer |   |
Health + 650 Mana + 250 Club Fighting + 4 Sword Fighting + 4 Axe Fighting + 4 Critical Chance + 2% |
| Field Surgeon |   |
Health + 450 Mana + 600 Magic Level + 3 Life Leech + 1% Mana Leech + 2% |
| Winged Druid |   |
Mana + 700 Magic Level + 4 Mana Leech + 2% |
| Martial Artist |   |
Health + 600 Mana + 300 Fist Fighting + 5 Critical Chance + 2% |
| Necromancer |   |
Mana + 700 Magic Level + 4 Mana Leech + 2% |
| Illuminator |   |
Mana + 650 Magic Level + 4 Mana Leech + 2% |
| Bat Knight |   |
Health + 650 Mana + 250 Club Fighting + 4 Sword Fighting + 4 Axe Fighting + 4 |
| Feral Trapper |   |
Health + 550 Mana + 250 Distance Skill + 4 Critical Chance + 1% |
Soulpit System
Kill. Absorb. Evolve.
Soulpit System - Vantoria
Kill. Absorb. Evolve.
On Vantoria, every monster you kill can leave behind a soul. Collect Soul Cores, unlock new entries in your Animus Mastery, and gain permanent experience bonuses against those creatures!
| Parameter | Value |
|---|---|
| Soul Core Drop Chance | 25% |
| Match Chance (Same Monster) | 55% |
| Ominous Soul Core Chance | 20% |
| Soul Prism Chance | 30% |
| Max XP Multiplier | x1.25 (+25%) |
| Bonus per Mastery | +0.05% XP |
| Masteries needed for Max XP | 500 Monsters |
Begin your evolution now - only on Vantoria!
Soulpit Interface Preview
Visioner Addons
Exchange addon cloth or mounts.
Visioner NPC - Outfits, Addons & Mounts
Visioner is a special cosmetic NPC where players can unlock outfits, addons and mounts.
To buy something, speak with Visioner, check the available offers, choose the exact offer name and confirm the purchase.

Addon Cloth
Used to buy outfits and addons.
Used to buy outfits and addons.

Mount Token
Used to buy mounts.
Used to buy mounts.
How to Buy
hi
Start talking with Visioner.
Start talking with Visioner.
addons
Shows outfit and addon offers.
Shows outfit and addon offers.
mounts
Shows mount offers.
Shows mount offers.
offer name
Say the exact name of the addon or mount you want to buy.
Say the exact name of the addon or mount you want to buy.
Important: Each outfit, addon and mount can only be unlocked once per character. You must have all required items in your backpack before confirming the purchase.
Outfits & Addons
Bonus preview: Hover your mouse over the outfit preview image marked with ✓ to see its full outfit bonus.
| Outfit | Preview | Available Unlocks | Required Items |
|---|---|---|---|
| Ancient Aucar | Full outfit bonus Active after unlocking the full outfit with addons. Magic Level + 2 Club Fighting + 3 Sword Fighting + 3 Axe Fighting + 3 Life Leech + 1% Full outfit bonusActive after unlocking the full outfit with addons. Magic Level + 2 Club Fighting + 3 Sword Fighting + 3 Axe Fighting + 3 Life Leech + 1% |
Base Outfit First Addon Second Addon |
Base Outfit 125x Addon Cloth First Addon 100x Addon ClothSecond Addon 135x Addon Cloth |
| Assassin | Full outfit bonus Active after unlocking the full outfit with addons. Health + 150 Magic Level + 2 Distance Skill + 3 Full outfit bonusActive after unlocking the full outfit with addons. Health + 150 Magic Level + 2 Distance Skill + 3 |
Base Outfit First Addon Second Addon |
Base Outfit 75x Addon Cloth First Addon 60x Addon ClothSecond Addon 80x Addon Cloth |
| Barbarian | Full outfit bonus Active after unlocking the full outfit with addons. Health + 100 Club Fighting + 2 Sword Fighting + 2 Axe Fighting + 2 Full outfit bonusActive after unlocking the full outfit with addons. Health + 100 Club Fighting + 2 Sword Fighting + 2 Axe Fighting + 2 |
First Addon Second Addon |
First Addon 50x Addon Cloth Second Addon 70x Addon Cloth |
| Bat Knight | Full outfit bonus Active after unlocking the full outfit with addons. Health + 650 Mana + 250 Club Fighting + 4 Sword Fighting + 4 Axe Fighting + 4 Full outfit bonusActive after unlocking the full outfit with addons. Health + 650 Mana + 250 Club Fighting + 4 Sword Fighting + 4 Axe Fighting + 4 |
Base Outfit First Addon Second Addon |
Base Outfit 110x Addon Cloth First Addon 90x Addon ClothSecond Addon 120x Addon Cloth |
| Battle Mage | Full outfit bonus Active after unlocking the full outfit with addons. Mana + 150 Magic Level + 3 Full outfit bonusActive after unlocking the full outfit with addons. Mana + 150 Magic Level + 3 |
Base Outfit First Addon Second Addon |
Base Outfit 70x Addon Cloth First Addon 55x Addon ClothSecond Addon 75x Addon Cloth |
| Beekeeper | Full outfit bonus Active after unlocking the full outfit with addons. Mana + 150 Magic Level + 2 Full outfit bonusActive after unlocking the full outfit with addons. Mana + 150 Magic Level + 2 |
Base Outfit First Addon Second Addon |
Base Outfit 55x Addon Cloth First Addon 45x Addon ClothSecond Addon 60x Addon Cloth |
| Beggar | Full outfit bonus Active after unlocking the full outfit with addons. Health + 500 Mana + 250 Life Leech + 1% Full outfit bonusActive after unlocking the full outfit with addons. Health + 500 Mana + 250 Life Leech + 1% |
Base Outfit First Addon Second Addon |
Base Outfit 45x Addon Cloth First Addon 35x Addon ClothSecond Addon 45x Addon Cloth |
| Blade Dancer | Full outfit bonus Active after unlocking the full outfit with addons. Health + 600 Mana + 300 Sword Fighting + 5 Critical Chance + 2% Full outfit bonusActive after unlocking the full outfit with addons. Health + 600 Mana + 300 Sword Fighting + 5 Critical Chance + 2% |
Base Outfit First Addon Second Addon |
Base Outfit 95x Addon Cloth First Addon 75x Addon ClothSecond Addon 100x Addon Cloth |
| Brotherhood | Full outfit bonus Active after unlocking the full outfit with addons. Health + 650 Mana + 400 Shielding + 2 Life Leech + 2% Full outfit bonusActive after unlocking the full outfit with addons. Health + 650 Mana + 400 Shielding + 2 Life Leech + 2% |
Base Outfit First Addon Second Addon |
Base Outfit 70x Addon Cloth First Addon 55x Addon ClothSecond Addon 75x Addon Cloth |
| Cave Explorer | Full outfit bonus Active after unlocking the full outfit with addons. Health + 450 Mana + 450 Shielding + 2 Full outfit bonusActive after unlocking the full outfit with addons. Health + 450 Mana + 450 Shielding + 2 |
Base Outfit First Addon Second Addon |
Base Outfit 45x Addon Cloth First Addon 35x Addon ClothSecond Addon 50x Addon Cloth |
| Celestial Avenger | Full outfit bonus Active after unlocking the full outfit with addons. Health + 750 Mana + 400 Club Fighting + 5 Sword Fighting + 5 Axe Fighting + 5 Critical Chance + 2% Full outfit bonusActive after unlocking the full outfit with addons. Health + 750 Mana + 400 Club Fighting + 5 Sword Fighting + 5 Axe Fighting + 5 Critical Chance + 2% |
Base Outfit First Addon Second Addon |
Base Outfit 160x Addon Cloth First Addon 130x Addon ClothSecond Addon 175x Addon Cloth |
| Citizen | Full outfit bonus Active after unlocking the full outfit with addons. Health + 100 Mana + 100 Magic Level + 1 Fist Fighting + 1 Club Fighting + 1 Axe Fighting + 1 Sword Fighting + 1 Distance Skill + 1 Shielding + 1 Full outfit bonusActive after unlocking the full outfit with addons. Health + 100 Mana + 100 Magic Level + 1 Fist Fighting + 1 Club Fighting + 1 Axe Fighting + 1 Sword Fighting + 1 Distance Skill + 1 Shielding + 1 |
First Addon Second Addon |
First Addon 65x Addon Cloth Second Addon 85x Addon Cloth |
| Citizen Of Issavi | Full outfit bonus Active after unlocking the full outfit with addons. Health + 150 Mana + 150 Club Fighting + 4 Sword Fighting + 4 Axe Fighting + 4 Full outfit bonusActive after unlocking the full outfit with addons. Health + 150 Mana + 150 Club Fighting + 4 Sword Fighting + 4 Axe Fighting + 4 |
Base Outfit First Addon Second Addon |
Base Outfit 105x Addon Cloth First Addon 85x Addon ClothSecond Addon 115x Addon Cloth |
| Crystal Warlord | Full outfit bonus Active after unlocking the full outfit with addons. Health + 200 Club Fighting + 3 Sword Fighting + 3 Axe Fighting + 3 Full outfit bonusActive after unlocking the full outfit with addons. Health + 200 Club Fighting + 3 Sword Fighting + 3 Axe Fighting + 3 |
Base Outfit First Addon Second Addon |
Base Outfit 85x Addon Cloth First Addon 70x Addon ClothSecond Addon 90x Addon Cloth |
| Darklight Evoker | Full outfit bonus Active after unlocking the full outfit with addons. Mana + 800 Magic Level + 5 Mana Leech + 2% Full outfit bonusActive after unlocking the full outfit with addons. Mana + 800 Magic Level + 5 Mana Leech + 2% |
Base Outfit First Addon Second Addon |
Base Outfit 125x Addon Cloth First Addon 105x Addon ClothSecond Addon 140x Addon Cloth |
| Decaying Defender | Full outfit bonus Active after unlocking the full outfit with addons. Health + 250 Mana + 250 Magic Level + 3 Club Fighting + 4 Sword Fighting + 4 Axe Fighting + 4 Distance Skill + 4 Shielding + 4 Life Leech + 1% Mana Leech + 1% Critical Chance + 1% Full outfit bonusActive after unlocking the full outfit with addons. Health + 250 Mana + 250 Magic Level + 3 Club Fighting + 4 Sword Fighting + 4 Axe Fighting + 4 Distance Skill + 4 Shielding + 4 Life Leech + 1% Mana Leech + 1% Critical Chance + 1% |
Base Outfit First Addon Second Addon |
Base Outfit 240x Addon Cloth First Addon 195x Addon ClothSecond Addon 265x Addon Cloth |
| Deepling | Full outfit bonus Active after unlocking the full outfit with addons. Health + 200 Club Fighting + 4 Sword Fighting + 4 Axe Fighting + 4 Full outfit bonusActive after unlocking the full outfit with addons. Health + 200 Club Fighting + 4 Sword Fighting + 4 Axe Fighting + 4 |
Base Outfit First Addon Second Addon |
Base Outfit 105x Addon Cloth First Addon 85x Addon ClothSecond Addon 115x Addon Cloth |
| Demon | Full outfit bonus Active after unlocking the full outfit with addons. Health + 250 Club Fighting + 3 Sword Fighting + 3 Axe Fighting + 3 Full outfit bonusActive after unlocking the full outfit with addons. Health + 250 Club Fighting + 3 Sword Fighting + 3 Axe Fighting + 3 |
Base Outfit First Addon Second Addon |
Base Outfit 85x Addon Cloth First Addon 70x Addon ClothSecond Addon 90x Addon Cloth |
| Demon Hunter | Full outfit bonus Active after unlocking the full outfit with addons. Health + 750 Mana + 250 Club Fighting + 2 Sword Fighting + 2 Axe Fighting + 2 Distance Skill + 5 Critical Chance + 1% Full outfit bonusActive after unlocking the full outfit with addons. Health + 750 Mana + 250 Club Fighting + 2 Sword Fighting + 2 Axe Fighting + 2 Distance Skill + 5 Critical Chance + 1% |
Base Outfit First Addon Second Addon |
Base Outfit 120x Addon Cloth First Addon 95x Addon ClothSecond Addon 130x Addon Cloth |
| Discoverer | Full outfit bonus Active after unlocking the full outfit with addons. Health + 450 Mana + 450 Shielding + 2 Full outfit bonusActive after unlocking the full outfit with addons. Health + 450 Mana + 450 Shielding + 2 |
Base Outfit First Addon Second Addon |
Base Outfit 45x Addon Cloth First Addon 35x Addon ClothSecond Addon 50x Addon Cloth |
| Doom Knight | Full outfit bonus Active after unlocking the full outfit with addons. Health + 850 Mana + 250 Club Fighting + 5 Sword Fighting + 5 Axe Fighting + 5 Critical Chance + 3% Life Leech + 2% Full outfit bonusActive after unlocking the full outfit with addons. Health + 850 Mana + 250 Club Fighting + 5 Sword Fighting + 5 Axe Fighting + 5 Critical Chance + 3% Life Leech + 2% |
Base Outfit First Addon Second Addon |
Base Outfit 195x Addon Cloth First Addon 160x Addon ClothSecond Addon 220x Addon Cloth |
| Draccoon Herald | Full outfit bonus Active after unlocking the full outfit with addons. Health + 200 Mana + 200 Magic Level + 3 Club Fighting + 3 Sword Fighting + 3 Axe Fighting + 3 Distance Skill + 3 Critical Chance + 1% Full outfit bonusActive after unlocking the full outfit with addons. Health + 200 Mana + 200 Magic Level + 3 Club Fighting + 3 Sword Fighting + 3 Axe Fighting + 3 Distance Skill + 3 Critical Chance + 1% |
Base Outfit First Addon Second Addon |
Base Outfit 165x Addon Cloth First Addon 130x Addon ClothSecond Addon 180x Addon Cloth |
| Dream Warden | Full outfit bonus Active after unlocking the full outfit with addons. Health + 200 Mana + 800 Magic Level + 5 Mana Leech + 2% Full outfit bonusActive after unlocking the full outfit with addons. Health + 200 Mana + 800 Magic Level + 5 Mana Leech + 2% |
Base Outfit First Addon Second Addon |
Base Outfit 130x Addon Cloth First Addon 105x Addon ClothSecond Addon 140x Addon Cloth |
| Dream Warrior | Full outfit bonus Active after unlocking the full outfit with addons. Mana + 200 Magic Level + 3 Full outfit bonusActive after unlocking the full outfit with addons. Mana + 200 Magic Level + 3 |
Base Outfit First Addon Second Addon |
Base Outfit 70x Addon Cloth First Addon 55x Addon ClothSecond Addon 75x Addon Cloth |
| Druid | Full outfit bonus Active after unlocking the full outfit with addons. Magic Level + 2 Full outfit bonusActive after unlocking the full outfit with addons. Magic Level + 2 |
First Addon Second Addon |
First Addon 45x Addon Cloth Second Addon 55x Addon Cloth |
| Elementalist | Full outfit bonus Active after unlocking the full outfit with addons. Mana + 400 Magic Level + 3 Full outfit bonusActive after unlocking the full outfit with addons. Mana + 400 Magic Level + 3 |
Base Outfit First Addon Second Addon |
Base Outfit 70x Addon Cloth First Addon 60x Addon ClothSecond Addon 75x Addon Cloth |
| Falconer | Full outfit bonus Active after unlocking the full outfit with addons. Health + 200 Distance Skill + 4 Full outfit bonusActive after unlocking the full outfit with addons. Health + 200 Distance Skill + 4 |
Base Outfit First Addon Second Addon |
Base Outfit 50x Addon Cloth First Addon 40x Addon ClothSecond Addon 55x Addon Cloth |
| Feral Trapper | Full outfit bonus Active after unlocking the full outfit with addons. Health + 550 Mana + 250 Distance Skill + 4 Critical Chance + 1% Full outfit bonusActive after unlocking the full outfit with addons. Health + 550 Mana + 250 Distance Skill + 4 Critical Chance + 1% |
Base Outfit First Addon Second Addon |
Base Outfit 70x Addon Cloth First Addon 60x Addon ClothSecond Addon 75x Addon Cloth |
| Field Surgeon | Full outfit bonus Active after unlocking the full outfit with addons. Health + 450 Mana + 600 Magic Level + 3 Life Leech + 1% Mana Leech + 2% Full outfit bonusActive after unlocking the full outfit with addons. Health + 450 Mana + 600 Magic Level + 3 Life Leech + 1% Mana Leech + 2% |
Base Outfit First Addon Second Addon |
Base Outfit 115x Addon Cloth First Addon 90x Addon ClothSecond Addon 125x Addon Cloth |
| Fiend Slayer | Full outfit bonus Active after unlocking the full outfit with addons. Health + 650 Mana + 250 Club Fighting + 4 Sword Fighting + 4 Axe Fighting + 4 Critical Chance + 2% Full outfit bonusActive after unlocking the full outfit with addons. Health + 650 Mana + 250 Club Fighting + 4 Sword Fighting + 4 Axe Fighting + 4 Critical Chance + 2% |
Base Outfit First Addon Second Addon |
Base Outfit 140x Addon Cloth First Addon 110x Addon ClothSecond Addon 150x Addon Cloth |
| Fire-fighter | Full outfit bonus Active after unlocking the full outfit with addons. Health + 150 Full outfit bonusActive after unlocking the full outfit with addons. Health + 150 |
Base Outfit First Addon Second Addon |
Base Outfit 25x Addon Cloth First Addon 20x Addon ClothSecond Addon 25x Addon Cloth |
| Formal Dress | Full outfit bonus Active after unlocking the full outfit with addons. Health + 450 Mana + 650 Magic Level + 3 Full outfit bonusActive after unlocking the full outfit with addons. Health + 450 Mana + 650 Magic Level + 3 |
Base Outfit First Addon Second Addon |
Base Outfit 75x Addon Cloth First Addon 60x Addon ClothSecond Addon 85x Addon Cloth |
| Glooth Engineer | Full outfit bonus Active after unlocking the full outfit with addons. Health + 550 Mana + 350 Shielding + 2 Distance Skill + 4 Full outfit bonusActive after unlocking the full outfit with addons. Health + 550 Mana + 350 Shielding + 2 Distance Skill + 4 |
Base Outfit First Addon Second Addon |
Base Outfit 70x Addon Cloth First Addon 55x Addon ClothSecond Addon 75x Addon Cloth |
| Hand Of The Inquisition | Full outfit bonus Active after unlocking the full outfit with addons. Health + 250 Mana + 200 Club Fighting + 4 Sword Fighting + 4 Axe Fighting + 4 Full outfit bonusActive after unlocking the full outfit with addons. Health + 250 Mana + 200 Club Fighting + 4 Sword Fighting + 4 Axe Fighting + 4 |
Base Outfit First Addon Second Addon |
Base Outfit 105x Addon Cloth First Addon 85x Addon ClothSecond Addon 115x Addon Cloth |
| Hunter | Full outfit bonus Active after unlocking the full outfit with addons. Health + 150 Mana + 150 Distance Skill + 1 Full outfit bonusActive after unlocking the full outfit with addons. Health + 150 Mana + 150 Distance Skill + 1 |
First Addon Second Addon |
First Addon 25x Addon Cloth Second Addon 35x Addon Cloth |
| Illuminator | Full outfit bonus Active after unlocking the full outfit with addons. Mana + 650 Magic Level + 4 Mana Leech + 2% Full outfit bonusActive after unlocking the full outfit with addons. Mana + 650 Magic Level + 4 Mana Leech + 2% |
Base Outfit First Addon Second Addon |
Base Outfit 110x Addon Cloth First Addon 90x Addon ClothSecond Addon 125x Addon Cloth |
| Insectoid | Full outfit bonus Active after unlocking the full outfit with addons. Health + 200 Magic Level + 2 Full outfit bonusActive after unlocking the full outfit with addons. Health + 200 Magic Level + 2 |
Base Outfit First Addon Second Addon |
Base Outfit 55x Addon Cloth First Addon 45x Addon ClothSecond Addon 60x Addon Cloth |
| Jersey | Full outfit bonus Active after unlocking the full outfit with addons. Health + 100 Mana + 100 Full outfit bonusActive after unlocking the full outfit with addons. Health + 100 Mana + 100 |
Base Outfit First Addon Second Addon |
Base Outfit 25x Addon Cloth First Addon 20x Addon ClothSecond Addon 25x Addon Cloth |
| Knight | Full outfit bonus Active after unlocking the full outfit with addons. Health + 100 Club Fighting + 2 Sword Fighting + 2 Axe Fighting + 2 Full outfit bonusActive after unlocking the full outfit with addons. Health + 100 Club Fighting + 2 Sword Fighting + 2 Axe Fighting + 2 |
First Addon Second Addon |
First Addon 50x Addon Cloth Second Addon 70x Addon Cloth |
| Makeshift Warrior | Full outfit bonus Active after unlocking the full outfit with addons. Club Fighting + 3 Sword Fighting + 3 Axe Fighting + 3 Full outfit bonusActive after unlocking the full outfit with addons. Club Fighting + 3 Sword Fighting + 3 Axe Fighting + 3 |
Base Outfit First Addon Second Addon |
Base Outfit 85x Addon Cloth First Addon 65x Addon ClothSecond Addon 90x Addon Cloth |
| Monk | Full outfit bonus Active after unlocking the full outfit with addons. Health + 500 Mana + 350 Fist Fighting + 4 Full outfit bonusActive after unlocking the full outfit with addons. Health + 500 Mana + 350 Fist Fighting + 4 |
First Addon Second Addon |
First Addon 45x Addon Cloth Second Addon 60x Addon Cloth |
| Newly Wed | Full outfit bonus Active after unlocking the full outfit with addons. Health + 250 Mana + 150 Full outfit bonusActive after unlocking the full outfit with addons. Health + 250 Mana + 150 |
Base Outfit First Addon Second Addon |
Base Outfit 30x Addon Cloth First Addon 25x Addon ClothSecond Addon 30x Addon Cloth |
| Nightmare | Full outfit bonus Active after unlocking the full outfit with addons. Health + 300 Full outfit bonusActive after unlocking the full outfit with addons. Health + 300 |
Base Outfit First Addon Second Addon |
Base Outfit 25x Addon Cloth First Addon 20x Addon ClothSecond Addon 30x Addon Cloth |
| Noble | Full outfit bonus Active after unlocking the full outfit with addons. Health + 150 Mana + 150 Full outfit bonusActive after unlocking the full outfit with addons. Health + 150 Mana + 150 |
First Addon Second Addon |
First Addon 20x Addon Cloth Second Addon 30x Addon Cloth |
| Norse | Full outfit bonus Active after unlocking the full outfit with addons. Health + 250 Mana + 150 Shielding + 2 Full outfit bonusActive after unlocking the full outfit with addons. Health + 250 Mana + 150 Shielding + 2 |
Base Outfit First Addon Second Addon |
Base Outfit 40x Addon Cloth First Addon 35x Addon ClothSecond Addon 45x Addon Cloth |
| Orcsoberfest Garb | Full outfit bonus Active after unlocking the full outfit with addons. Health + 600 Mana + 450 Club Fighting + 4 Axe Fighting + 4 Full outfit bonusActive after unlocking the full outfit with addons. Health + 600 Mana + 450 Club Fighting + 4 Axe Fighting + 4 |
Base Outfit First Addon Second Addon |
Base Outfit 85x Addon Cloth First Addon 70x Addon ClothSecond Addon 90x Addon Cloth |
| Oriental | Full outfit bonus Active after unlocking the full outfit with addons. Health + 200 Full outfit bonusActive after unlocking the full outfit with addons. Health + 200 |
First Addon Second Addon |
First Addon 20x Addon Cloth Second Addon 25x Addon Cloth |
| Percht Raider | Full outfit bonus Active after unlocking the full outfit with addons. Health + 500 Mana + 400 Club Fighting + 2 Sword Fighting + 2 Axe Fighting + 4 Shielding + 2 Full outfit bonusActive after unlocking the full outfit with addons. Health + 500 Mana + 400 Club Fighting + 2 Sword Fighting + 2 Axe Fighting + 4 Shielding + 2 |
Base Outfit First Addon Second Addon |
Base Outfit 95x Addon Cloth First Addon 80x Addon ClothSecond Addon 105x Addon Cloth |
| Poltergeist | Full outfit bonus Active after unlocking the full outfit with addons. Health + 150 Mana + 150 Full outfit bonusActive after unlocking the full outfit with addons. Health + 150 Mana + 150 |
Base Outfit First Addon Second Addon |
Base Outfit 25x Addon Cloth First Addon 20x Addon ClothSecond Addon 30x Addon Cloth |
| Rascoohan | Full outfit bonus Active after unlocking the full outfit with addons. Health + 750 Mana + 250 Shielding + 5 Full outfit bonusActive after unlocking the full outfit with addons. Health + 750 Mana + 250 Shielding + 5 |
Base Outfit First Addon Second Addon |
Base Outfit 65x Addon Cloth First Addon 50x Addon ClothSecond Addon 70x Addon Cloth |
| Recruiter | Full outfit bonus Active after unlocking the full outfit with addons. Health + 500 Mana + 300 Fist Fighting + 1 Club Fighting + 1 Sword Fighting + 1 Axe Fighting + 1 Distance Skill + 4 Shielding + 1 Full outfit bonusActive after unlocking the full outfit with addons. Health + 500 Mana + 300 Fist Fighting + 1 Club Fighting + 1 Sword Fighting + 1 Axe Fighting + 1 Distance Skill + 4 Shielding + 1 |
Base Outfit First Addon Second Addon |
Base Outfit 90x Addon Cloth First Addon 70x Addon ClothSecond Addon 95x Addon Cloth |
| Revenant | Full outfit bonus Active after unlocking the full outfit with addons. Health + 650 Mana + 300 Club Fighting + 4 Sword Fighting + 4 Axe Fighting + 4 Critical Chance + 1% Full outfit bonusActive after unlocking the full outfit with addons. Health + 650 Mana + 300 Club Fighting + 4 Sword Fighting + 4 Axe Fighting + 4 Critical Chance + 1% |
Base Outfit First Addon Second Addon |
Base Outfit 125x Addon Cloth First Addon 100x Addon ClothSecond Addon 135x Addon Cloth |
| Rootwalker | Full outfit bonus Active after unlocking the full outfit with addons. Health + 700 Mana + 300 Distance Skill + 4 Shielding + 4 Life Leech + 1% Full outfit bonusActive after unlocking the full outfit with addons. Health + 700 Mana + 300 Distance Skill + 4 Shielding + 4 Life Leech + 1% |
Base Outfit First Addon Second Addon |
Base Outfit 95x Addon Cloth First Addon 80x Addon ClothSecond Addon 105x Addon Cloth |
| Royal Bounacean Advisor | Full outfit bonus Active after unlocking the full outfit with addons. Magic Level + 3 Club Fighting + 3 Sword Fighting + 3 Axe Fighting + 3 Distance Skill + 3 Shielding + 3 Full outfit bonusActive after unlocking the full outfit with addons. Magic Level + 3 Club Fighting + 3 Sword Fighting + 3 Axe Fighting + 3 Distance Skill + 3 Shielding + 3 |
Base Outfit First Addon Second Addon |
Base Outfit 165x Addon Cloth First Addon 135x Addon ClothSecond Addon 180x Addon Cloth |
| Royal Costume | Full outfit bonus Active after unlocking the full outfit with addons. Magic Level + 2 Club Fighting + 2 Sword Fighting + 2 Axe Fighting + 2 Distance Skill + 2 Shielding + 2 Mana Leech + 1% Full outfit bonusActive after unlocking the full outfit with addons. Magic Level + 2 Club Fighting + 2 Sword Fighting + 2 Axe Fighting + 2 Distance Skill + 2 Shielding + 2 Mana Leech + 1% |
Base Outfit First Addon Second Addon |
Base Outfit 130x Addon Cloth First Addon 105x Addon ClothSecond Addon 145x Addon Cloth |
| Royal Pumpkin | Full outfit bonus Active after unlocking the full outfit with addons. Health + 600 Mana + 600 Full outfit bonusActive after unlocking the full outfit with addons. Health + 600 Mana + 600 |
Base Outfit | Base Outfit 35x Addon Cloth |
| Shaman | Full outfit bonus Active after unlocking the full outfit with addons. Magic Level + 3 Full outfit bonusActive after unlocking the full outfit with addons. Magic Level + 3 |
Base Outfit First Addon Second Addon |
Base Outfit 70x Addon Cloth First Addon 55x Addon ClothSecond Addon 75x Addon Cloth |
| Soil Guardian | Full outfit bonus Active after unlocking the full outfit with addons. Health + 200 Club Fighting + 3 Sword Fighting + 3 Axe Fighting + 3 Full outfit bonusActive after unlocking the full outfit with addons. Health + 200 Club Fighting + 3 Sword Fighting + 3 Axe Fighting + 3 |
Base Outfit First Addon Second Addon |
Base Outfit 85x Addon Cloth First Addon 70x Addon ClothSecond Addon 90x Addon Cloth |
| Summoner | Full outfit bonus Active after unlocking the full outfit with addons. Mana + 100 Magic Level + 2 Full outfit bonusActive after unlocking the full outfit with addons. Mana + 100 Magic Level + 2 |
First Addon Second Addon |
First Addon 45x Addon Cloth Second Addon 60x Addon Cloth |
| Trophy Hunter | Full outfit bonus Active after unlocking the full outfit with addons. Club Fighting + 2 Sword Fighting + 2 Axe Fighting + 2 Full outfit bonusActive after unlocking the full outfit with addons. Club Fighting + 2 Sword Fighting + 2 Axe Fighting + 2 |
Base Outfit | Base Outfit 65x Addon Cloth |
| Warmaster | Full outfit bonus Active after unlocking the full outfit with addons. Health + 200 Mana + 200 Full outfit bonusActive after unlocking the full outfit with addons. Health + 200 Mana + 200 |
Base Outfit First Addon Second Addon |
Base Outfit 30x Addon Cloth First Addon 25x Addon ClothSecond Addon 30x Addon Cloth |
| Wizard | Full outfit bonus Active after unlocking the full outfit with addons. Magic Level + 2 Full outfit bonusActive after unlocking the full outfit with addons. Magic Level + 2 |
First Addon Second Addon |
First Addon 45x Addon Cloth Second Addon 55x Addon Cloth |
| Yalaharian | Full outfit bonus Active after unlocking the full outfit with addons. Health + 200 Full outfit bonusActive after unlocking the full outfit with addons. Health + 200 |
Base Outfit First Addon Second Addon |
Base Outfit 25x Addon Cloth First Addon 20x Addon ClothSecond Addon 25x Addon Cloth |
Mounts
| Mount | Preview | Required Items |
|---|---|---|
| Widow Queen |  |
20x Mount Token |
| Racing Bird |  |
20x Mount Token |
| War Bear |  |
20x Mount Token |
| Black Sheep |  |
20x Mount Token |
| Midnight Panther |  |
20x Mount Token |
| Draptor |  |
20x Mount Token |
| Titanica |  |
20x Mount Token |
| Tin Lizzard |  |
20x Mount Token |
| Blazebringer |  |
20x Mount Token |
| Rapid Boar |  |
20x Mount Token |
| Stampor |  |
20x Mount Token |
| Undead Cavebear |  |
20x Mount Token |
| Donkey |  |
20x Mount Token |
| Tiger Slug |  |
20x Mount Token |
| Uniwheel |  |
20x Mount Token |
| Crystal Wolf |  |
20x Mount Token |
| War Horse |  |
20x Mount Token |
| Kingly Deer |  |
20x Mount Token |
| Tamed Panda |  |
20x Mount Token |
| Dromedary |  |
20x Mount Token |
| Scorpion King |  |
20x Mount Token |
| Rented Horse |  |
20x Mount Token |
| Armoured War Horse |  |
40x Mount Token |
| Shadow Draptor |  |
40x Mount Token |
| Rented Horse (Gray) |  |
20x Mount Token |
| Rented Horse (Brown) |  |
20x Mount Token |
| Lady Bug |  |
20x Mount Token |
| Manta Ray |  |
20x Mount Token |
| Ironblight |  |
20x Mount Token |
| Magma Crawler |  |
20x Mount Token |
| Dragonling |  |
20x Mount Token |
| Gnarlhound |  |
20x Mount Token |
| Crimson Ray |  |
40x Mount Token |
| Steelbeak |  |
40x Mount Token |
| Water Buffalo |  |
20x Mount Token |
| Tombstinger |  |
40x Mount Token |
| Platesaurian |  |
40x Mount Token |
| Ursagrodon |  |
20x Mount Token |
| The Hellgrip |  |
20x Mount Token |
| Noble Lion |  |
20x Mount Token |
| Desert King |  |
40x Mount Token |
| Shock Head |  |
20x Mount Token |
| Walker |  |
20x Mount Token |
| Azudocus |  |
40x Mount Token |
| Carpacosaurus |  |
40x Mount Token |
| Death Crawler |  |
40x Mount Token |
| Flamesteed |  |
40x Mount Token |
| Jade Lion |  |
40x Mount Token |
| Jade Pincer |  |
40x Mount Token |
| Nethersteed |  |
40x Mount Token |
| Tempest |  |
40x Mount Token |
| Winter King |  |
40x Mount Token |
| Doombringer |  |
40x Mount Token |
| Woodland Prince |  |
40x Mount Token |
| Hailstorm Fury |  |
40x Mount Token |
| Siegebreaker |  |
40x Mount Token |
| Poisonbane |  |
40x Mount Token |
| Blackpelt |  |
40x Mount Token |
| Golden Dragonfly |  |
40x Mount Token |
| Steel Bee |  |
40x Mount Token |
| Copper Fly |  |
40x Mount Token |
| Tundra Rambler |  |
40x Mount Token |
| Highland Yak |  |
40x Mount Token |
| Glacier Vagabond |  |
40x Mount Token |
| Flying Divan |  |
40x Mount Token |
| Magic Carpet |  |
40x Mount Token |
| Floating Kashmir |  |
40x Mount Token |
| Ringtail Waccoon |  |
40x Mount Token |
| Night Waccoon |  |
40x Mount Token |
| Emerald Waccoon |  |
40x Mount Token |
| Glooth Glider |  |
20x Mount Token |
| Shadow Hart |  |
40x Mount Token |
| Black Stag |  |
40x Mount Token |
| Emperor Deer |  |
40x Mount Token |
| Flitterkatzen |  |
40x Mount Token |
| Venompaw |  |
40x Mount Token |
| Batcat |  |
40x Mount Token |
| Sea Devil |  |
40x Mount Token |
| Coralripper |  |
40x Mount Token |
| Plumfish |  |
40x Mount Token |
| Gorongra |  |
40x Mount Token |
| Noctungra |  |
40x Mount Token |
| Silverneck |  |
40x Mount Token |
| Slagsnare |  |
40x Mount Token |
| Nightstinger |  |
40x Mount Token |
| Razorcreep |  |
40x Mount Token |
| Rift Runner |  |
20x Mount Token |
| Nightdweller |  |
40x Mount Token |
| Frostflare |  |
40x Mount Token |
| Cinderhoof |  |
40x Mount Token |
| Mouldpincer |  |
40x Mount Token |
| Bloodcurl |  |
40x Mount Token |
| Leafscuttler |  |
40x Mount Token |
| Sparkion |  |
20x Mount Token |
| Swamp Snapper |  |
40x Mount Token |
| Mould Shell |  |
40x Mount Token |
| Reed Lurker |  |
40x Mount Token |
| Neon Sparkid |  |
20x Mount Token |
| Vortexion |  |
20x Mount Token |
| Ivory Fang |  |
40x Mount Token |
| Shadow Claw |  |
40x Mount Token |
| Snow Pelt |  |
40x Mount Token |
| Jackalope |  |
40x Mount Token |
| Dreadhare |  |
40x Mount Token |
| Wolpertinger |  |
40x Mount Token |
| Stone Rhino |  |
20x Mount Token |
| Gold Sphinx |  |
40x Mount Token |
| Emerald Sphinx |  |
40x Mount Token |
| Shadow Sphinx |  |
40x Mount Token |
| Jungle Saurian |  |
40x Mount Token |
| Ember Saurian |  |
40x Mount Token |
| Lagoon Saurian |  |
40x Mount Token |
| Blazing Unicorn |  |
40x Mount Token |
| Arctic Unicorn |  |
40x Mount Token |
| Prismatic unicorn |  |
40x Mount Token |
| Cranium Spider |  |
40x Mount Token |
| Cave Tarantula |  |
40x Mount Token |
| Gloom Widow |  |
40x Mount Token |
| Mole |  |
20x Mount Token |
| Marsh Toad |  |
40x Mount Token |
| Sanguine Frog |  |
40x Mount Token |
| Toxic Toad |  |
40x Mount Token |
| Ebony Tiger |  |
40x Mount Token |
| Feral Tiger |  |
40x Mount Token |
| Jungle Tiger |  |
40x Mount Token |
| Fleeting Knowledge |  |
20x Mount Token |
| Tawny Owl |  |
40x Mount Token |
| Snowy Owl |  |
40x Mount Token |
| Boreal Owl |  |
40x Mount Token |
| Lacewing Moth |  |
20x Mount Token |
| Hibernal Moth |  |
20x Mount Token |
| Cold Percht Sleigh |  |
20x Mount Token |
| Bright Percht Sleigh |  |
20x Mount Token |
| Dark Percht Sleigh |  |
20x Mount Token |
| Festive Snowman |  |
40x Mount Token |
| Muffled Snowman |  |
40x Mount Token |
| Caped Snowman |  |
40x Mount Token |
| Rabbit Rickshaw |  |
40x Mount Token |
| Bunny Dray |  |
40x Mount Token |
| Cony Cart |  |
40x Mount Token |
| River Crocovile |  |
40x Mount Token |
| Swamp Crocovile |  |
40x Mount Token |
| Nightmarish Crocovile |  |
40x Mount Token |
| Gryphon |  |
20x Mount Token |
| Jousting Eagle |  |
40x Mount Token |
| Cerberus Champion |  |
40x Mount Token |
| Cold Percht Sleigh Variant |  |
20x Mount Token |
| Bright Percht Sleigh Variant |  |
20x Mount Token |
| Dark Percht Sleigh Variant |  |
20x Mount Token |
| Cold Percht Sleigh Final | |
20x Mount Token |
| Bright Percht Sleigh Final | |
20x Mount Token |
| Dark Percht Sleigh Final | |
20x Mount Token |
| Battle Badger |  |
40x Mount Token |
| Ether Badger |  |
40x Mount Token |
| Zaoan Badger |  |
40x Mount Token |
| Blue Rolling Barrel |  |
20x Mount Token |
| Red Rolling Barrel |  |
20x Mount Token |
| Green Rolling Barrel |  |
20x Mount Token |
| Floating Sage |  |
40x Mount Token |
| Floating Scholar |  |
40x Mount Token |
| Floating Augur |  |
40x Mount Token |
| Haze |  |
20x Mount Token |
| Antelope |  |
20x Mount Token |
| Snow Strider |  |
40x Mount Token |
| Dusk Pryer |  |
40x Mount Token |
| Dawn Strayer |  |
40x Mount Token |
| Phantasmal Jade |  |
20x Mount Token |
| Savanna Ostrich |  |
40x Mount Token |
| Coral Rhea |  |
40x Mount Token |
| Eventide Nandu |  |
40x Mount Token |
| Voracious Hyaena |  |
40x Mount Token |
| Cunning Hyaena |  |
40x Mount Token |
| Scruffy Hyaena |  |
40x Mount Token |
| White Lion |  |
20x Mount Token |
| Krakoloss |  |
20x Mount Token |
| Merry Mammoth |  |
40x Mount Token |
| Holiday Mammoth |  |
40x Mount Token |
| Festive Mammoth |  |
40x Mount Token |
| Void Watcher |  |
40x Mount Token |
| Rune Watcher |  |
40x Mount Token |
| Rift Watcher |  |
40x Mount Token |
| Phant |  |
30x Mount Token |
| Shellodon |  |
20x Mount Token |
| Singeing Steed |  |
20x Mount Token |
| Hyacinth |  |
40x Mount Token |
| Peony |  |
40x Mount Token |
| Dandelion |  |
40x Mount Token |
| Rustwurm |  |
40x Mount Token |
| Bogwurm |  |
40x Mount Token |
| Gloomwurm |  |
40x Mount Token |
| Emerald Raven |  |
40x Mount Token |
| Mystic Raven |  |
40x Mount Token |
| Radiant Raven |  |
40x Mount Token |
| Gloothomotive |  |
40x Mount Token |
| Topaz Shrine |  |
40x Mount Token |
| Jade Shrine |  |
40x Mount Token |
| Obsidian Shrine |  |
40x Mount Token |
| Poppy ibex |  |
40x Mount Token |
| Mint ibex |  |
40x Mount Token |
| Cinnamon ibex |  |
40x Mount Token |
| Giant Beaver |  |
20x Mount Token |
| Noxious Ripptor | |
20x Mount Token |
| Parade Horse |  |
40x Mount Token |
| Jousting Horse |  |
40x Mount Token |
| Tourney Horse |  |
40x Mount Token |
| Mutated Abomination |  |
20x Mount Token |
| Tangerine Flecked Koi |  |
40x Mount Token |
| Brass Speckled Koi |  |
40x Mount Token |
| Ink Spotted Koi |  |
40x Mount Token |
| Frostbringer |  |
40x Mount Token |
| Winterstride |  |
40x Mount Token |
| Icebreacher |  |
40x Mount Token |
| Boisterous Bull |  |
40x Mount Token |
| Surly Steer |  |
40x Mount Token |
| Obstinate Ox |  |
40x Mount Token |
| Darkfire Devourer |  |
40x Mount Token |
| Spirit of Purity |  |
20x Mount Token |
| Foxmouse |  |
40x Mount Token |
| Doom Skull |  |
40x Mount Token |
| Magma Skull |  |
40x Mount Token |
| Corpsefire Skull |  |
40x Mount Token |
| Mystic Jaguar |  |
20x Mount Token |
| Gorgon Hydra |  |
40x Mount Token |
| Dawnbringer Pegasus |  |
40x Mount Token |
| Wrathfire Pegasus |  |
40x Mount Token |
| Skybreaker Pegasus |  |
40x Mount Token |
| Pegasus |  |
20x Mount Token |
| Glacier Wyrm |  |
40x Mount Token |
| Bog Tyrant |  |
40x Mount Token |
| Crimson Fang |  |
40x Mount Token |
| Bumblebee |  |
40x Mount Token |
| Primal Demonosaur |  |
20x Mount Token |
| Night Locust |  |
40x Mount Token |
| Leaf Locust |  |
40x Mount Token |
| Pearl Locust |  |
40x Mount Token |
| Satin Moth |  |
40x Mount Token |
| Pallbearer |  |
40x Mount Token |
| Hellish Demonosaur |  |
20x Mount Token |
| Ancient Demonosaur | |
20x Mount Token |
| Corpse Phoenix |  |
40x Mount Token |
| Death Phoenix |  |
40x Mount Token |
| Soul Phoenix |  |
40x Mount Token |
| White Gloom Maw |  |
20x Mount Token |
| Gloom Maw | |
20x Mount Token |
| Battle Werewolf |  |
40x Mount Token |
| Battlefrazzle |  |
20x Mount Token |
| Tidal Seawater Predator |  |
20x Mount Token |
| Ashen Coast Predator |  |
20x Mount Token |
| Crimson Bay Predator |  |
20x Mount Token |
| Harry Potters broomstick | |
200x Mount Token |
Balance note: Basic cosmetics are cheaper, while rare and valuable addons or mounts require more currency. This keeps cosmetic progression meaningful and fair.
Easy Charms
Get some easy charms.
Easy Charm Points
Quick Creature List
A list of so-called “easy charms” that respawn on our server at specific locations these are fairly easy charm points to earn.

Raging Fire
Sun Catcher Quest
Raging Fire can be found during the Sun Catcher quest.
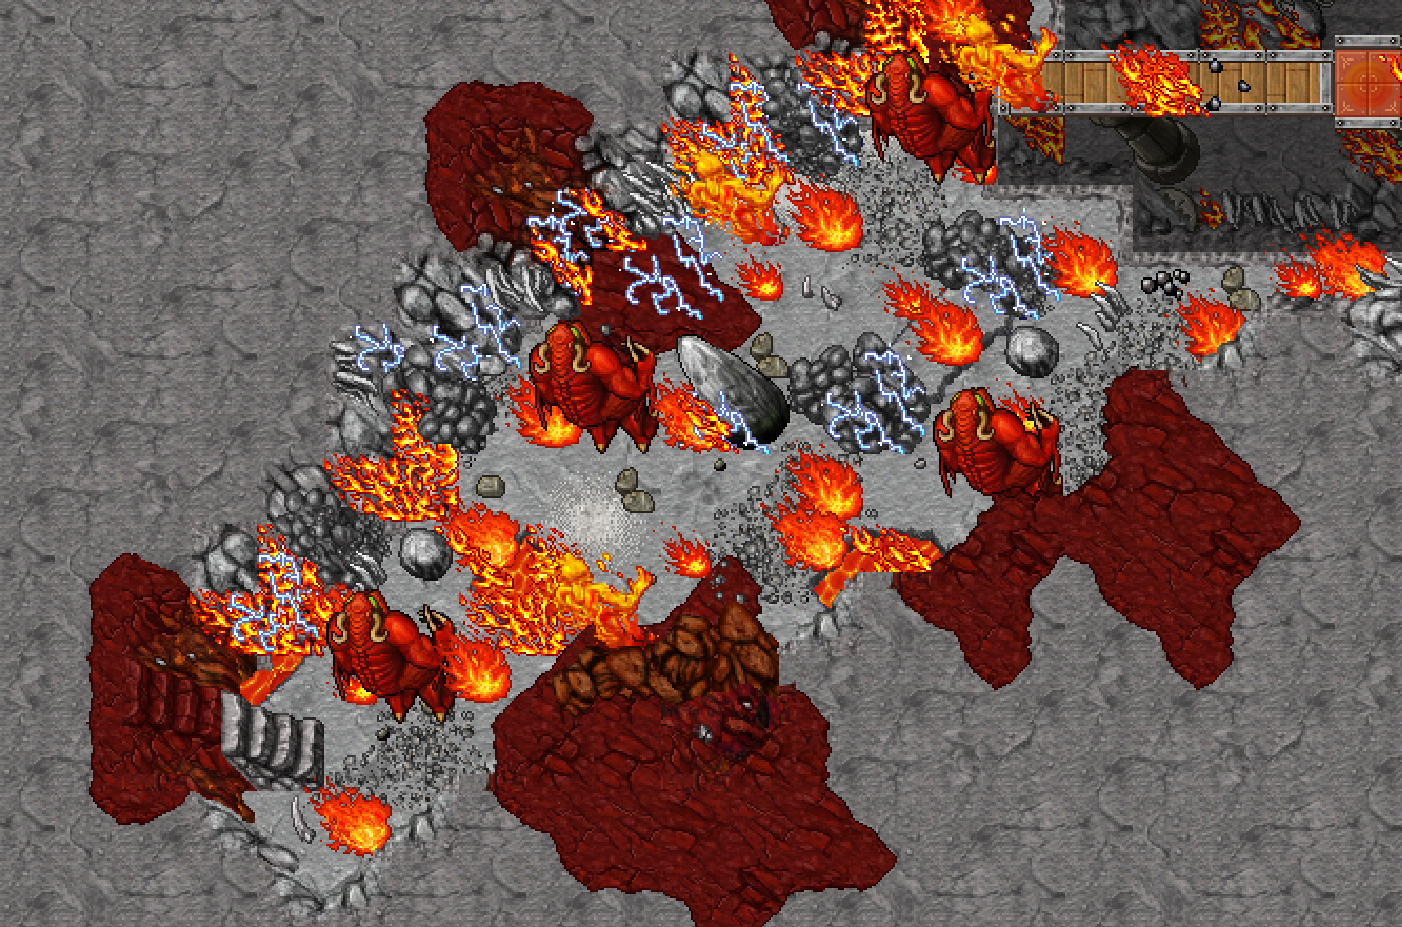

Undead Cavebear
Prismatic Armor Quest
Undead Cavebear can be found during the Prismatic Armor quest.
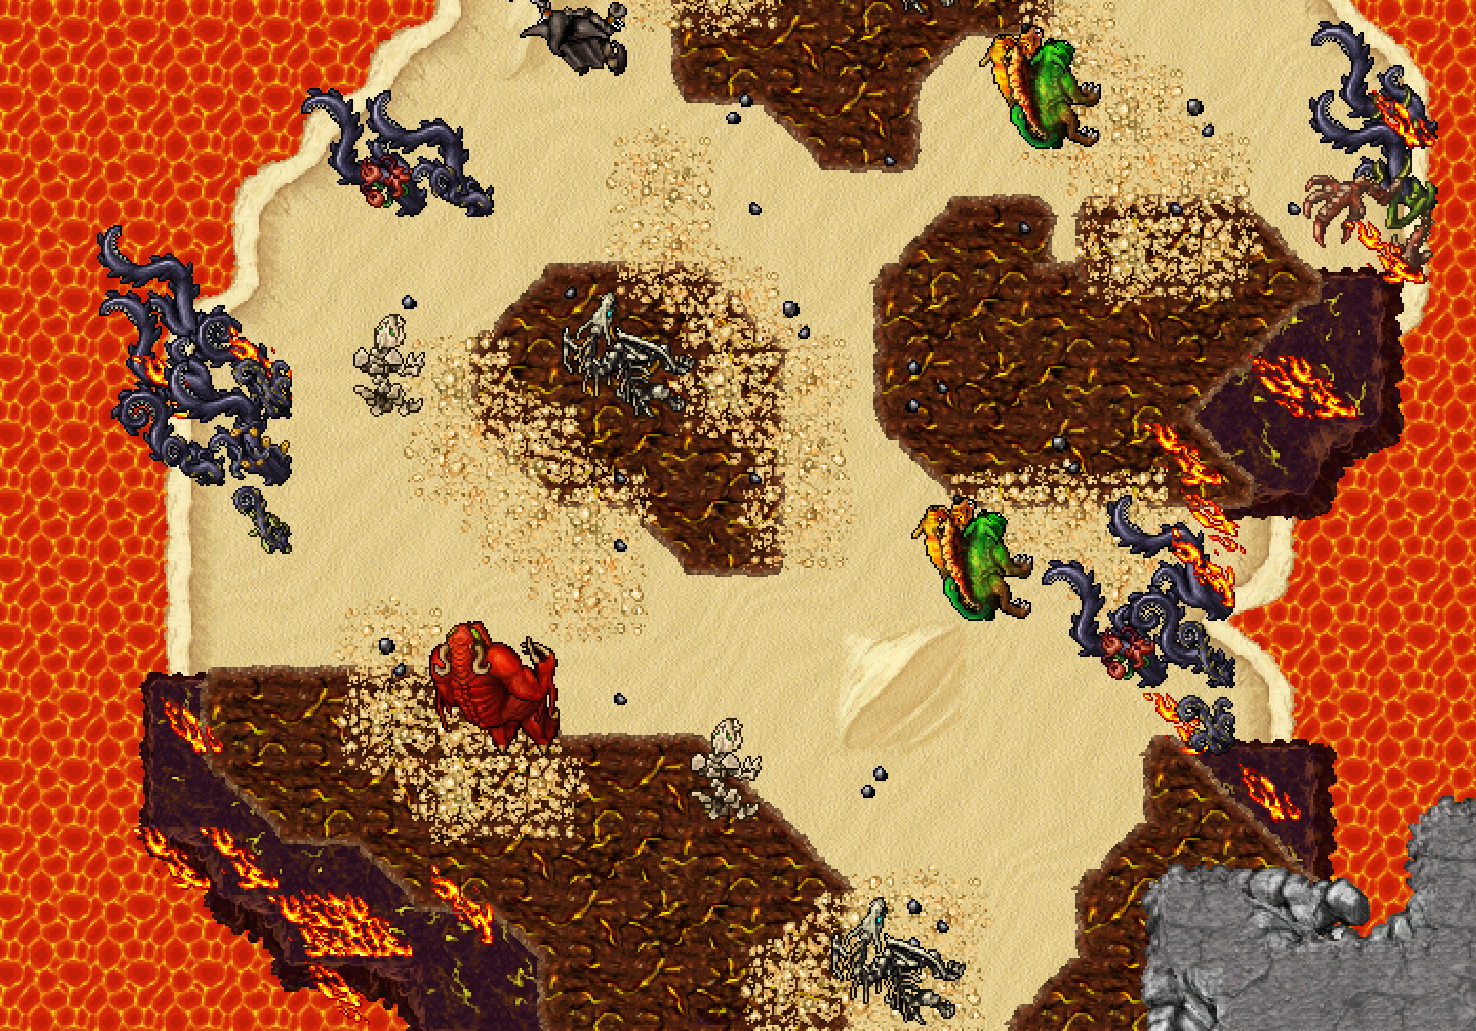

Yeti
Frost Dragons
Yeti can be found on the Frost Dragon route. Check the full route carefully, because the respawn is rare.
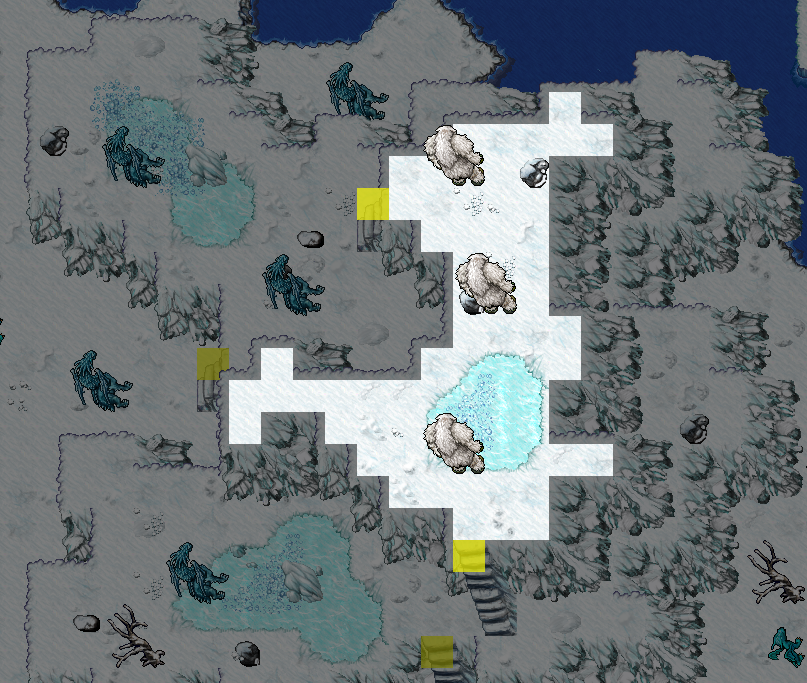

Acolyte of Darkness
Ice Library
Acolyte of Darkness can be found in the Ice Library area.
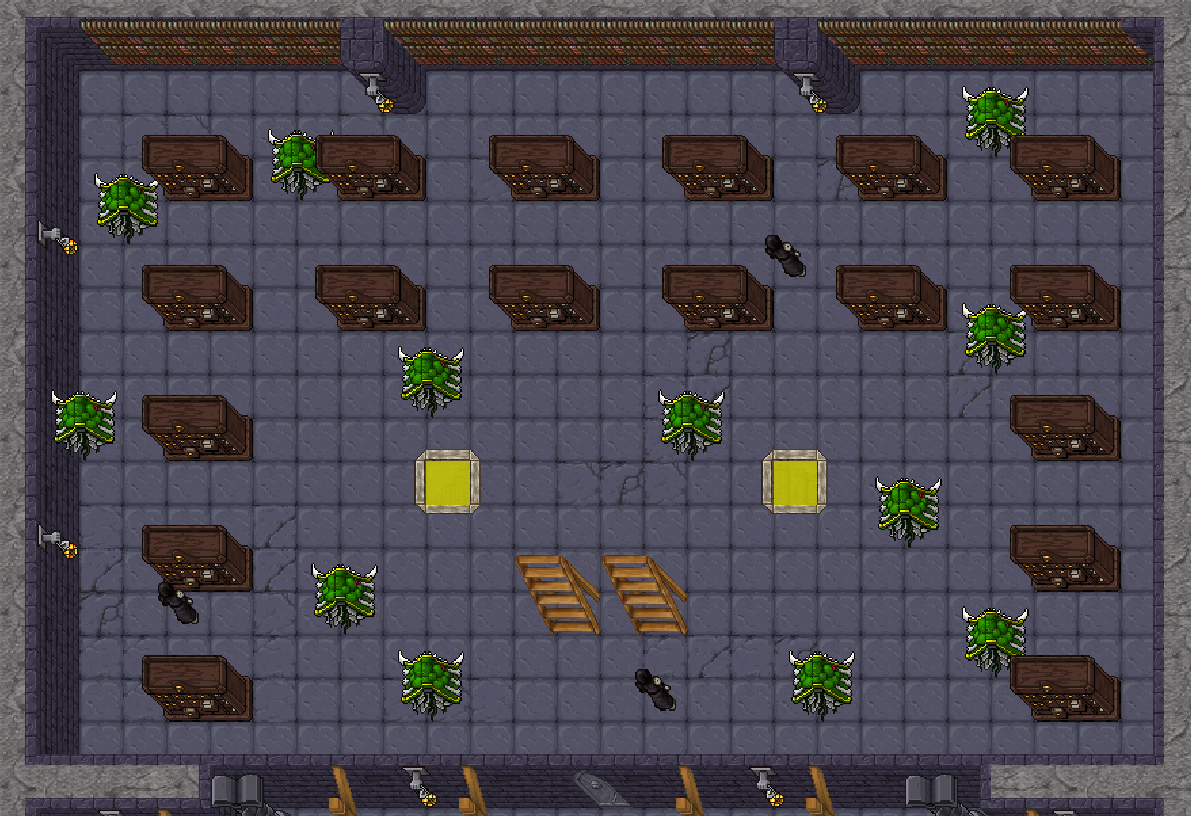
Crystal Wolf
Burster Spectre
Crystal Wolf can be found on the Burster Spectre hunting spot.
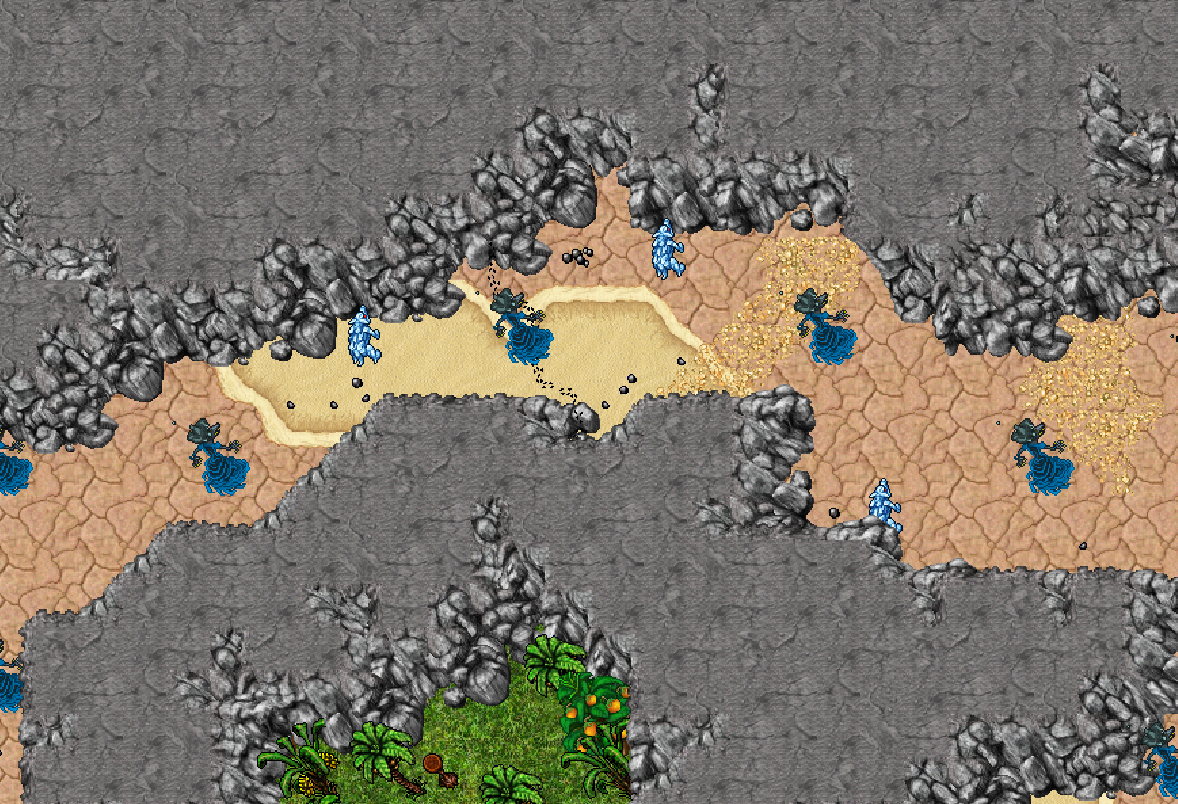
Thornfire Wolf
Red Elves
Thornfire Wolf can be found around the Red Elves spot.
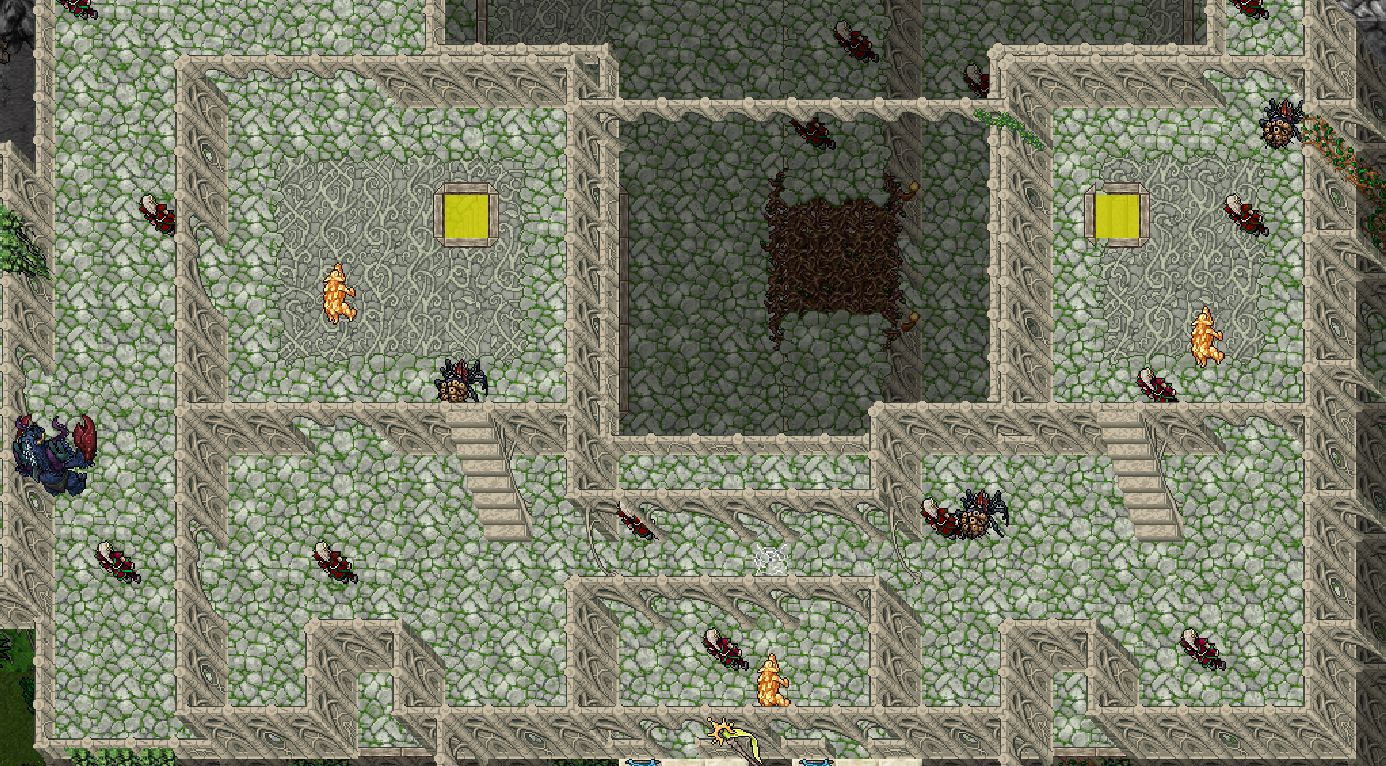

Draptor
Venerable Girtablilu
Draptor can be found on the Venerable Girtablilu hunting spot.
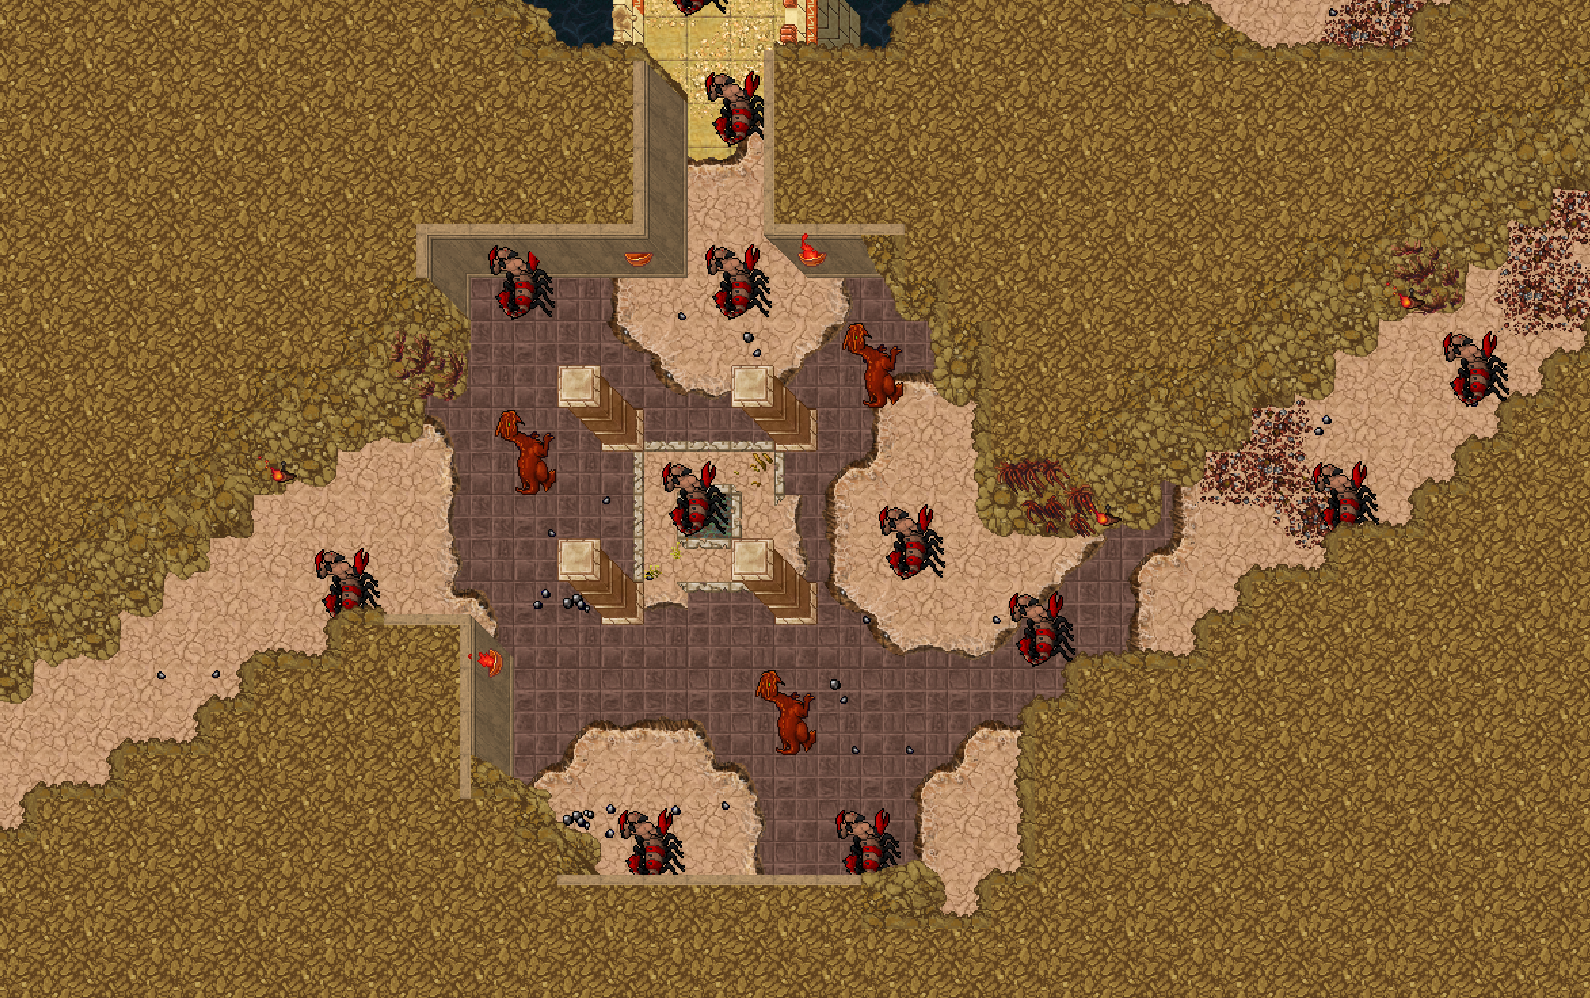

Herald of Gloom
Furies
Herald of Gloom can be found on the Furies hunting spot.
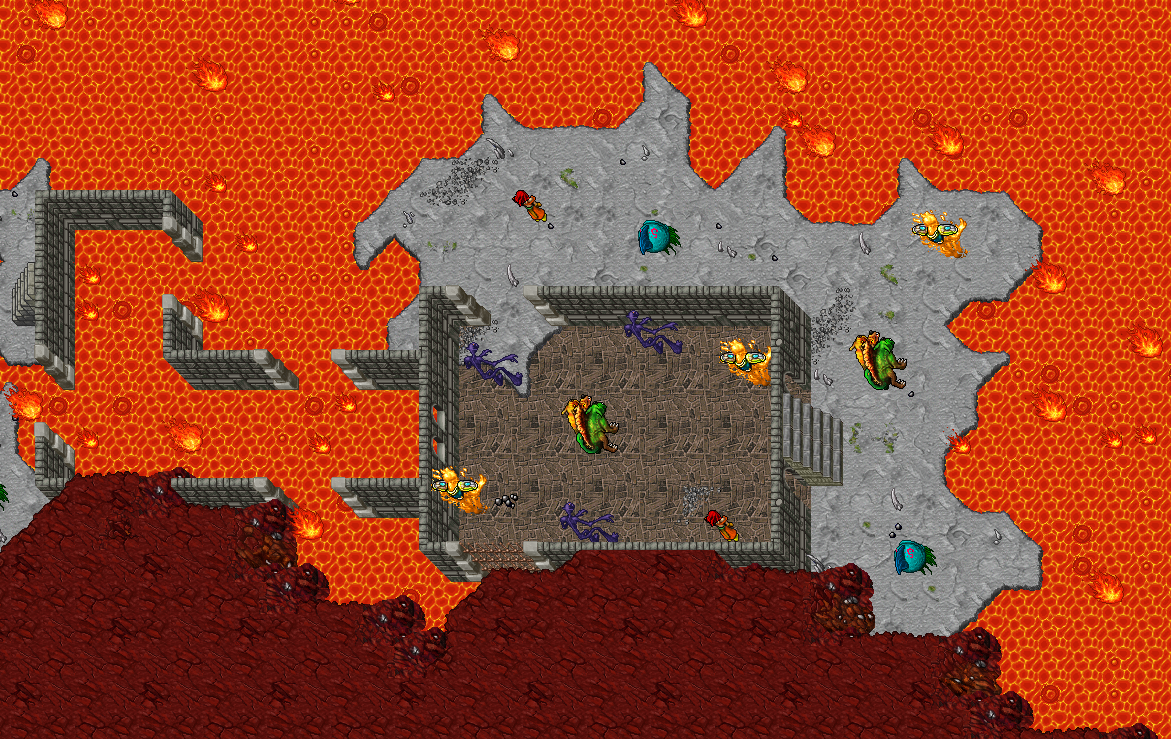

Bane Bringer
Cultists
Bane Bringer can be found around Cultist spots.
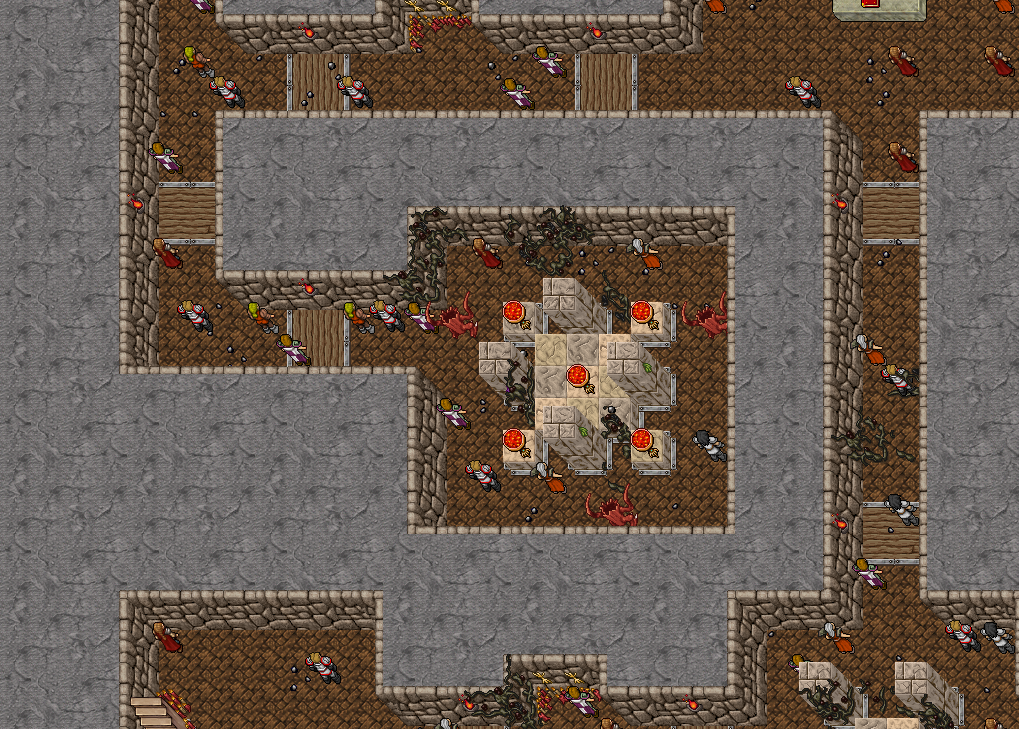

Midnight Panther
Vexclaw
Midnight Panther can be found on the Vexclaw hunting spot.

Troll Guard
Rotworms
Troll Guard can be found on Rotworm spots.
Vicious Manbat
Weretigers
Vicious Manbat can be found on the Weretiger hunting spot.

Goblin Leader
Amazons
Goblin Leader can be found around Amazon spots.
Water Buffalo
Retching Horror
Water Buffalo can be found on the Retching Horror hunting spot.

Iron Servant
Hellflayer
Iron Servant/Diamond Servant can be found on the Hellflayer hunting spot.
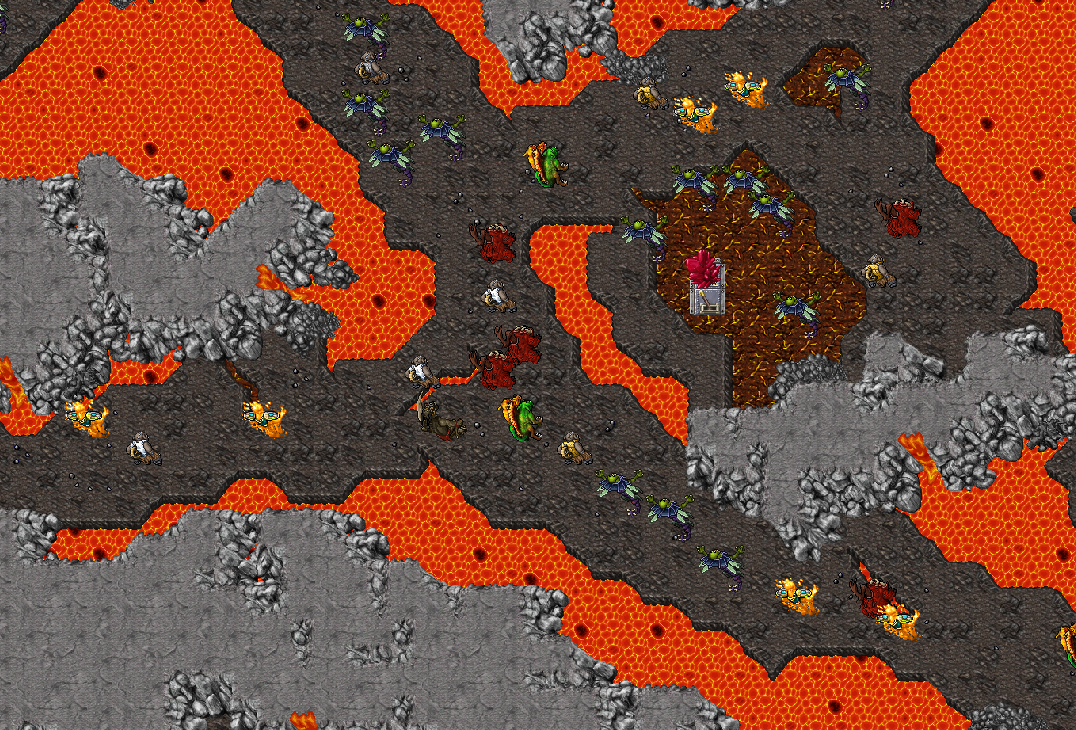

Golden Servant
Hellflayer
Golden Servant can be found on the Hellflayer hunting spot.
Passive Charms
Passive charms work globally on every unlocked creature.
Passive Charm System
These charms are passive.
You only need to assign any monster to the charm. After that, the charm will work on every monster that you have fully unlocked in your Bestiary.
You only need to assign any monster to the charm. After that, the charm will work on every monster that you have fully unlocked in your Bestiary.

Dodge
A defensive charm that gives a chance to avoid incoming creature damage.

Bless
Reduces the death penalty, helping protect experience and progress after death.

Scavenge
Improves the chance to obtain additional or better creature products while hunting.

Gut
Improves creature product drop-rate, useful for farming materials and addon items.

Low Blow
Increases your critical hit chance against creatures.

Vampiric Embrace
Adds life leech/vampirism effect to your attacks.

Void's Call
Adds mana leech effect to your attacks.

Savage Blow
Improves your critical damage against monsters.

Fatal Hold
Gives a chance to prevent low-health creatures from fleeing.

Void Inversion
A passive charm connected with void/mana sustain mechanics.
Tip: Passive charms are great for everyday hunting, because you do not need to constantly swap them for every spawn.
Meronthar Mission
Complete the Meronthar storyline.
Task Missions
Complete these long-term missions to earn Task Tokens and Crystal Coins. These tasks track multiple species within the same family.
| Category | Target Monsters | Kills | Reward |
|---|---|---|---|
| Dragons | Dragon Dragon Lord Frost Dragon Wyrm Elder Wyrm | 200 | 100x Crystal Coins |
| Asuras | Midnight Asura Dawnfire Asura | 600 | 5x Task Tokens |
| Spectres | Gazer Spectre Burster Spectre Ripper Spectre Arachnophobica | 1000 | 5x Task Tokens |
| Guzzlemaws | Guzzlemaw Silencer Frazzlemaw | 1300 | 5x Task Tokens |
| Elfs | Crazed Summer Rearguard/Vanguard Thanatursus Crazed Winter Vanguard/Rearguard | 1800 | 10x Task Tokens |
| Bulltaurs | Bulltaur Alchemist Bulltaur Forgepriest Bulltaur Brute | 2200 | 10x Task Tokens |
| Books | Burning Book Rage Squid Icecold Book Squid Warden Cursed Book Ink Blob Energetic Book Dark Knowledge Death Squid | 2800 | 20x Task Tokens |
| Soulwars | Infernal Demon/Phantom Brachiodemon Mirror Image Many Faces Cloak of Terror Rotten Golem Apparitions (All) | 3000 | 35x Task Tokens |
| Gorgers | Gorger Inferniarch Broodrider Inferniarch Sineater Inferniarch Lion Hydra Bluebeak | 3000 | 35x Task Tokens |
| Gnompronas | Hulking Prehemoth Sabretooth Gore Horn Emerald Tortoise Shrieking Cry-stal Undertaker Sulphur Spouter Noxious Ripptor | 3000 | 35x Task Tokens |
Golden Mission
Gather rare materials.
Golden Mission
| Mission Title | Golden Mission |
|---|---|
| NPC | Golden |
| Location | Main city |
| Description | Ah, greetings, traveler! It's always exciting to meet someone with the courage to seek adventure in these troubled lands. I have for you mission. I can assist you, but I need the following items to proceed: 1. 100 spider fang 2. 20 crystal coins - gold is not cheap!. Do you have them? |
|
|
Preyson Mission
Hunt dangerous creatures.
Preyson Mission
| Mission Title | Preyson Mission |
|---|---|
| NPC | Preyson |
| Location | Main city |
| Description | Ah, greetings, traveler! It's always exciting to meet someone with the courage to seek adventure in these troubled lands. I have for you mission. I can assist you, but I need the following items to proceed: 1. 100 green dragon leather - skin the dragon and deliver the green dragon leather to me Do you have them? |
|
|
Staminer Mission
Endurance and hunting.
Staminer Mission
| Mission Title | Staminer Mission |
|---|---|
| NPC | Staminer |
| Location | Main city |
| Description | I can assist you, but I need the following items to proceed: 1. 50 tremendous tyrant head - find the terrible face of the tremendous tyrant and deliver it. 2. 100 carnisylvan finger - A broken finger from a dead carnisylvan. Do you have them? |
|
|
Mythar Mission
Unravel the myths.
Mythar Mission
| Mission Title | Mythar Mission |
|---|---|
| NPC | Mythar |
| Location | Mystic Grove near the ancient ruins |
| Description | I can assist you, but I need the following items to proceed: 1. 30 Lumps of Dirt - Small chunks of earth used in various magical rituals. 2. 40 Cluster of Solace - A group of crystals radiating calming energy. 3. 30 Lion's Mane - A symbol of strength and courage, used for powerful potions. 4. 50 Lost Souls - Lost souls trapped between worlds, often used for summoning. 5. 60 Nimmersatt's Seals - Peculiar seals related to the mysterious being, Nimmersatt. 6. 100 Dark Chocolate Coins - Dark chocolate coins used for magical exchanges. 7. 100 Darklight Cores - Cores that emit dark light, essential for creating artifacts. 8. 1 Sanguine Rod - A dark magic rod used by powerful wizards. 9. 1 Sanguine Bow - A bow made from darkwood, infused with the blood of powerful beings. 10. 1 Sanguine Hatchet - A mighty axe used to cut through both matter and souls. 11. 1 Sanguine Greaves - Legs made from absorbing blood, offering great durability. Do you have them? |
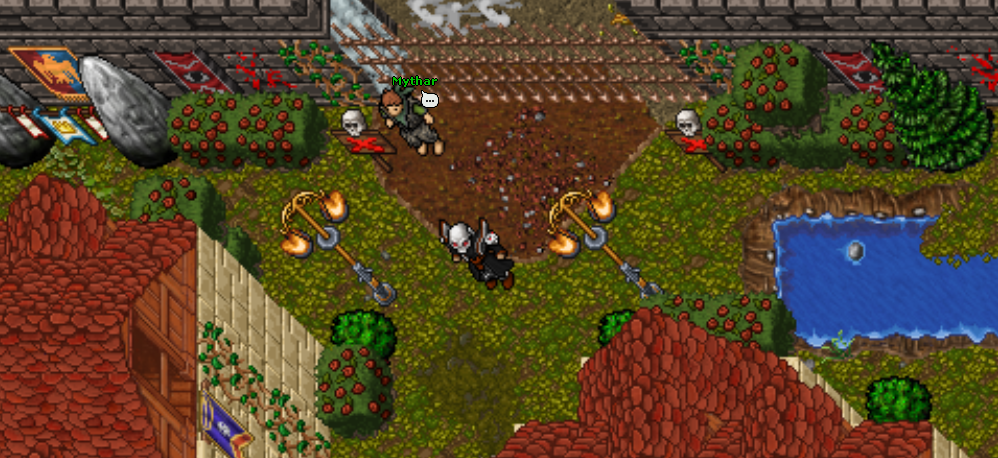
|
|
Ottokar Mission
Strategic hunting missions.
Bag You Covet
| Mission Title | Bag You Covet |
|---|---|
| NPC | Ottokar |
| Location | Darklight Caverns near the ancient altar |
| Description | Ah, greetings, traveler! It's always exciting to meet someone with the courage to seek adventure in these troubled lands. I have for you Bag You Covet. You don't have the required items: 1. Darklight Core (500) 2. Darklight Basalt Chunk (100) Please come back when you have them. |
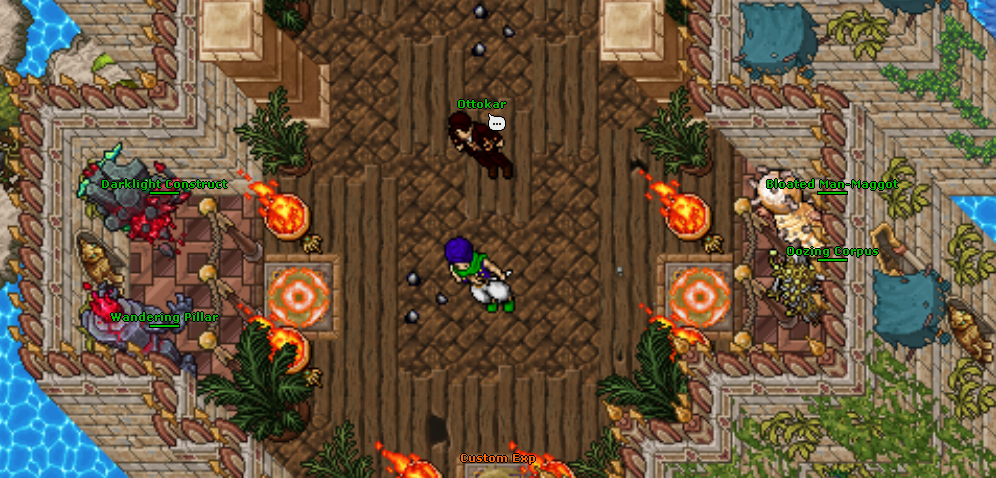
|
|
Soul War Mechanics
Complete Vantoria guide to the five seals and Goshnar's Megalomania.
6 bossesFive seals and the final Megalomania encounter.
20 hSeal boss cooldown for normal characters.
72 hMegalomania entrance cooldown.
1–5 playersEvery encounter supports a full lever team.
Vantoria version: the values below describe mechanics currently configured on this server. They may differ from generic Tibia guides. Mechanical warnings are shown mainly through Monster Say/Yell.
 Hateful Soulcreates Sorrow
 Sorrowextends the fire timer
 Soul CageMalice objective
 Weeping Soulleaves a pool
 Mortal EssenceCruelty resistanceSpirit Vortexconsumes Greed souls
 Aspect of Powerunlocks GREEN phase
 Cleansed Sanityreduces Madness
Goshnar's Hatred
Keep Burning Hatred under control and cleanse each player's Torment.
Burning Hatred
- The central fire starts with 180 seconds and changes through Ashes, Spark, Flame and Blaze as the timer falls.
- Hateful Souls spawn every 7–11 seconds, up to four. Their death creates a Sorrow lasting 20 seconds.
- Use Sorrow on the central Burning Hatred to add 10 seconds, up to the 180-second cap.
- If the timer reaches zero, Hatred gains one failure stack: +10% outgoing damage and −5% damage received, up to 10 stacks. The fire cycle then restarts.
Torment and Symbols
- Torment increases every 3 seconds, up to 30 stacks, and deals rising Death damage that bypasses Magic Shield.
- A Symbol of Hatred alternates between the west and east side. After death it returns on the opposite side after 3 seconds.
- Each Symbol drops Condensed Remorse for 15 seconds. Step on two Remorse fields to reset your personal Torment.
- Dreadful Harvesters spawn every 10–15 seconds, up to three alive.
Team plan: assign players to kill Hateful Souls and feed every Sorrow into the center. Kill Symbols continuously and let high-Torment players take two Remorse fields first.
Goshnar's Malice
Destroy Soul Cages before they permanently empower the boss and survive the white-tile blast.
Soul Cage and reflection
- Malice reflects 100% of incoming damage and heals for 12% of the real HP removed by its own attacks.
- A Soul Cage appears every 23 seconds. The team has 14 seconds to destroy it; the Cage itself reflects 10%.
- Each failed Cage adds one permanent stack for the fight: +10% boss damage, −10% damage received and +100% reflection, up to five stacks.
- Malicious Souls and Dreadful Harvesters begin early in the fight and respawn while the encounter is active.
White safe tiles
- The cycle begins every 40 seconds: 3-second warning, then 11 white safe tiles appear for 3 seconds.
- Stand on a white tile when the arena detonates. Anyone outside takes 8% maximum HP as Death damage.
- The full-arena Mort Area effect is the detonation; red smoke marks players who were hit.
- All changed ground tiles are restored after the event and on reset.
Team plan: control reflected damage, switch immediately to each Soul Cage and reserve nearby white tiles before the final three-second activation.
Goshnar's Spite
Extinguish Searing Fire, manage personal cooldowns and use Weeping Pools carefully.
Searing Fire
- A new Searing Fire is created about every 12 seconds. The boss announces its direction.
- Any participant can extinguish it simply by stepping onto it. There is no vocation order.
- The player who extinguishes a fire receives a personal 45-second cooldown, so rotate the duty through the team.
- Every missed fire adds one resistance stack. Each stack reduces damage received by 10%; at 5/5 Spite receives only 50% damage.
Weeping Pools and pressure
- Weeping Souls leave a pool after death. Entering it transforms the player into a Water Elemental.
- The transformed player is especially vulnerable to Energy damage. The boss can also feed on corrupted pools and heal.
- Fear forces temporary uncontrolled movement; stay away from walls and dangerous fields.
- Dreadful Harvesters, Spiteful Spitters and Weeping Souls add continuous pressure.
Team plan: call the fire direction and maintain a five-player rotation. Never let the same player waste time trying to extinguish during their cooldown.
Goshnar's Cruelty
Make A Greedy Eye kill Poor Souls and feed their Mortal Essence to the Greedy Maw.
Eye, Soul and Maw
- A Greedy Eye fires south along its line every 2 seconds. Its beam deals 3% maximum HP to players.
- Poor Souls spawn every 8–12 seconds, up to two, and normal player damage cannot finish them.
- Lure a Poor Soul into the Eye beam. Its special death creates Some Mortal Essence for 30 seconds.
- Use the Essence on the Greedy Maw at the south side. It removes one resistance stack; each player has a 30-second Maw cooldown.
Growing power and explosions
- Cruelty gains one stack every 15 seconds, up to 10. Each gives −5% damage received and +6% damage dealt; the boss always receives at least 35%.
- Every 12–18 seconds a player is marked and transforms after a 5-second warning. Move away: the explosion has radius 4 and deals 6% maximum HP.
- A room-wide explosion occurs every 60–70 seconds after a 6-second warning and deals 5% maximum HP.
- Mean Maws and Dreadful Harvesters spawn throughout the fight, up to three of each.
Team plan: keep Poor Souls close to the Eye line, collect the Essence immediately and feed the Maw often enough to stop resistance growth.
Goshnar's Greed
Open a damage window with Greedbeasts, destroy the approaching Soul Sphere and feed souls into active vortexes.
Greedbeasts and Soul Sphere
- Greed begins immune. Kill 5 Greedbeasts to start a vulnerable phase lasting up to 40 seconds.
- The boss is teleported to the west side and a Soul Sphere appears on the east side.
- The Sphere moves one tile west every 3 seconds. Kill it to end the phase while preserving the boss's current HP.
- If the Sphere reaches Greed, it heals the boss to full before the boss returns to the center.
Vortexes and souls
- Each fight creates 3–4 random Spirit Vortexes. Active state lasts 15 seconds; inactive state lasts 25 seconds.
- Soul waves arrive every 24 seconds. Weak Soul becomes Strong after 8 seconds, then Powerful after another 8 seconds.
- Lead every soul and Soulsnatcher into an active blue vortex. Inactive vortexes do nothing.
- An expired Powerful Soul or Soulsnatcher adds one failure stack: +8% boss damage per stack, up to 10. Greed also heals for 10% of real damage dealt, capped at 20,000 per hit.
Team plan: one group handles Greedbeasts, another watches soul evolution and vortex state. During vulnerability, damage the boss while a ranged player destroys the Sphere.
Goshnar's Megalomania
Final three-form encounter combining Aspects, Madness, Torment, safe tiles and Annihilation.
Three boss forms
- PURPLE: the boss is immune. Kill four Aspects of Power to enter GREEN.
- GREEN: the boss is vulnerable for 70 seconds. Madness rises every 15 seconds, reducing damage received and increasing damage dealt by 4% per stack.
- BLUE: the first time GREEN reaches 60% HP, Megalomania locks at the center and warns for 6 seconds before a wide cross-shaped Annihilation.
- Annihilation deals 12% maximum HP inside the cross. The boss remains damageable and returns to PURPLE after the one-time phase.
Madness, Torment and cleansing
- Aspect corpses create Phantasmal Ooze. A player can consume one to reset Torment, but becomes 2.5× more vulnerable to phantasmal attacks for 12 seconds.
- Guide Splinters onto an Ooze to cleanse them. The resulting Cleansed Sanity can be used on the Greedy Maw to remove one Madness stack.
- Uncleansed Splinters evolve from Lesser to Greater to Mighty every 120 seconds; a failed Mighty Splinter empowers Madness.
- Torment rises every 10 seconds up to 36. Necromantic Focus leaves Remains that remove 5 Torment; expired Remains add Madness.
Arena cycles
- White safe tiles cycle every 40 seconds: 2-second warning, then survive 8 seconds on ground 409. Outside players take 8% maximum HP as Death damage.
- Painful Energy triggers every 30 seconds and punishes players standing close together.
- Marked players can transform into Massive Fire Elementals and explode after a 6-second warning. Move away from the team.
- Fear temporarily forces movement. Dreadful Harvesters continue spawning during the fight.
Recommended priorities
- Kill four Aspects quickly and preserve Ooze for Torment/Splinter control.
- Use Cleansed Sanity regularly so Madness does not make GREEN phases ineffective.
- Claim white tiles early, spread for Painful Energy and transformation warnings.
- At 60%, leave the cross during BLUE while continuing safe damage on the boss.
Boss and mechanic preview images are loaded from Tibiopedia.pl. If an image is unavailable, its text label remains visible.
Magma Bubble Mechanics
Three-stage volcanic encounter: shields, objective crystals, End of Days and the final boss.
Level 400Minimum normal entrance level.
20 minTotal encounter time limit.
20 hNormal character cooldown.
3 stagesMagma Crystals → End of Days → Magma Bubble.
 Magma Crystaldestroy all three
 The End of Daysstage objectives
 Lava Creaturedrops Charged Flame
 Charged Flameuse on a green crystalCooled Crystalgreen — active targetHeated Crystalred — wait for it to coolUnchained Firebeam and eruption
Critical rule: the three overheated arms deal 60% of maximum HP every second without a Volcanic Shield charge. Prepare protection before attacking their Magma Crystals.
Magma Bubble Encounter
Complete stage-by-stage route through the Vantoria implementation.
Stage 1 — create protection
- Three first-stage The End of Days stand in the arena. At 50% HP they restore health and summon up to eight Lava Creatures.
- Kill Lava Creatures. Each real death creates one Charged Flame for 10 seconds.
- Use the Flame on a green Cooled Crystal. It does not work on a red Heated Crystal.
- A protective field appears next to that crystal for 10 seconds. Step into it to gain 5 Volcanic Shield charges, up to 50.
- Crystal polarity cycles every 4 seconds; at least two of the six crystals are kept green.
Stage 1 — destroy Magma Crystals
- There are 3 objective Magma Crystals, one inside each overheated arm.
- A Crystal accepts your damage only while your character is physically inside its matching overheated zone.
- Every second in a hot zone consumes one Shield charge. The last consumed charge still protects that full tick.
- Without charges, the heat deals 60% maximum HP as Agony every second.
- Objective Crystals regenerate 0.5% maximum HP per second, so focus damage. Destroy all three to advance.
Stage 2 — End of Days
- After the third Magma Crystal dies, the first-stage creatures and temporary items are removed.
- 8 The End of Days appear at fixed points across the main arena.
- Kill all eight. The transition is immediate after the final confirmed death; there is no hidden waiting timer.
- The arena announces that the volcano is taking revenge, then Magma Bubble spawns in the center.
Stage 3 — Magma Bubble
- Magma Bubble is stationary in the center with 450,000 HP.
- Five Unchained Fires spawn after 10 seconds; further waves arrive every 45 seconds, up to five waves and ten Fires alive.
- Their 8-tile beam deals 2% maximum HP. If it crosses the boss, Magma Bubble heals for 1–2.5% maximum HP.
- An Unchained Fire can warn for 1 second and erupt in radius 6, dealing 4% maximum HP.
- Keep Fires facing away from the center and finish the boss before healing beams undo your damage.
Fast route: farm Flames from the first End of Days, stack shield charges, destroy each arm's Magma Crystal as a focused group, clear the eight stage-two enemies, then spread around Magma Bubble and turn Unchained Fires away from it.
Boss and item previews use Tibiopedia.pl images when available.
Rotten Blood Mechanics
Four taint bosses and the final Bakragore encounter, documented for Vantoria.
4 TaintsMurcion, Ichgahal, Chagorz and Vemiath.
20 hCooldown for each taint boss.
68 hBakragore entrance cooldown.
15 / 25 minMiniboss / Bakragore time limit.
Access: defeat all four taint bosses to earn their unique Rotten Blood Taints. A normal character needs all four Taints and completed progress to enter Bakragore. The unused fifth/Last Taint is disabled on Vantoria.
Moulddamages players, heals bosses Mushroomproximity explosionVolatile FungiIchgahal evolutionSpore CloudGreater Hex zone
 Elder BloodjawRotten Charge objective
 Dark Pillarbuilds beam chargesRotten Charge90-second team checkDarklight Fielddamage and boss healing
Murcion
Avoid Mould, react to Mushrooms and control the Elder Bloodjaws.
Mould fields
- Murcion creates Mould fields that remain for 6 seconds.
- A player standing on Mould takes 12.5% maximum HP per second as Agony damage.
- If Murcion walks across Mould, the boss heals for 3% maximum HP per second. The field is not consumed, so move him away immediately.
- Do not kite the boss through a trail of fields; keep a clean area available for the blocker.
Mushrooms and Bloodjaws
- One to four Mushrooms can appear per cycle, beginning after 5 seconds and repeating every 5–8 seconds.
- After a short warning they explode in radius 2 for 5% maximum HP as Life Drain.
- Up to eight Mushrooms may be active; each normally disappears after 5–7 seconds.
- Two Elder Bloodjaws pressure the team and return 10 seconds after death.
Team plan: move Murcion away from every Mould field, spread when Mushrooms warn and keep the Elder Bloodjaws away from vulnerable shooters.
Ichgahal
Spore fields evolve into dangerous clouds, reduce healing and restore the boss.
Spore evolution
- Spore: lasts up to 12 seconds, deals 1.5% maximum HP and applies Lesser Hex for 8 seconds.
- After 4 seconds it becomes Volatile Fungi, dealing 4% maximum HP and applying Greater Hex for 15 seconds.
- Player contact turns Volatile Fungi into an 8-second Spore Cloud, which deals 6% maximum HP per second and reapplies Greater Hex.
- Ichgahal consumes a Volatile Fungi or Cloud it reaches, healing 2.5% or 5% maximum HP respectively.
Hex and arena pressure
- Lesser Hex reduces received healing to 75%.
- Greater Hex reduces healing to 60%, outgoing damage to 80% and maximum HP to 80% for 15 seconds.
- One or two Mushrooms spawn every 5–9 seconds, up to eight. Their radius-2 explosion deals 5% maximum HP.
- Two Elder Bloodjaws respawn 10 seconds after death.
Team plan: never drag Ichgahal across evolved fungi. Leave room around Spore Clouds and protect Greater-Hex players until their reduced maximum HP returns.
Chagorz
Manage Darklight, Fire Charges and activate Rotten Charge with an Elder Bloodjaw.
Darklight and Fire Charges
- Darklight rises by 2 per second, up to 21. At maximum it deals 15% maximum HP per second as Agony.
- Every movement step removes one Darklight and leaves a 3-second Darkfield behind. The field deals 3% maximum HP per second and can heal Chagorz for 0.1% maximum HP once.
- Up to eight Dark Energy Pillars spawn. Nearby players gain Fire Charges every 2 seconds, up to 11, and take 0.75% maximum HP per tick.
- The warned Fire beam occurs every 8–12 seconds. It deals 2% maximum HP plus 1% per Fire Charge, capped at 20%.
Rotten Charge
- Rotten Charge appears every 90 seconds and remains active for 15 seconds.
- Lure an Elder Bloodjaw within radius 2 to activate it.
- Failure deals 40% maximum HP as Agony to the team.
- Success removes Bloodjaws for 15 seconds, suppresses nearby player fields, blocks their boss healing and makes Chagorz take 135% damage for 15 seconds.
- Staying inside for 6/12 seconds adds vocation-based punishment: Knight 5/10%, Monk 10/20%, other vocations 20/40%.
Team plan: keep moving enough to control Darklight without filling the arena with overlapping fields. Save a Bloodjaw for Rotten Charge and burst Chagorz during the 135% window.
Vemiath
Movement creates Spark and blue Field phases; pillars build the charges detonated by the arrow beam.
Darklight Spark and Field
- Darklight rises by 2 per second to 21; at maximum it deals 15% maximum HP per second. Every movement step removes one stack.
- Moving leaves a Darklight Spark for 5 seconds. After 3 seconds it becomes the blue Darklight Field for about 2 seconds.
- Both phases deal 3% maximum HP per second to players.
- If Vemiath walks over them, the Spark heals 200 HP and the evolved Field heals 400 HP, once per field.
Pillars and arrow beam
- Up to eight Dark Energy Pillars spawn. Their chain builds Energy Charges, up to 11, and deals 1% maximum HP per tick.
- Every 8–12 seconds the blue arrow marks the direction of Vemiath's Energy beam with a 1-second warning.
- The beam deals 2.5% maximum HP plus 1% per Energy Charge, capped at 20%.
- The beam consumes all Energy Charges after it fires.
- Rotten Charge follows the same 90-second, Bloodjaw-activation and 135%-damage-window rules as Chagorz; failure deals 40% maximum HP.
Team plan: the blue arrow is a one-second beam warning, not a teleport. Leave its line, keep Vemiath off the blue fields and use a Bloodjaw to activate every Rotten Charge.
Bakragore
The final Rotten Blood battle combines fields, Mushrooms, Death Charges, Rotten Charge and optional Burden.
Combined arena mechanics
- Darklight reaches 21 and then deals 15% maximum HP per second. Movement reduces it and leaves a 3-second blue Darkfield dealing 3% per second.
- Bakragore heals 0.15% maximum HP once from each Darkfield and also leaves 6-second Mould that deals 3% maximum HP per second.
- Up to four Mushrooms and four Dark Energy Pillars can be active. Mushroom explosions deal 5% maximum HP.
- Pillars build Death Charges up to 11 and deal 1.25% maximum HP per tick.
- The Death beam deals 3% maximum HP plus 1.25% per charge, capped at 25%.
Final Rotten Charge
- The first Charge appears after 90 seconds and starts with a 1% Death hit. It lasts 15 seconds.
- Activate it with an Elder Bloodjaw inside radius 2. Bakragore starts with four Bloodjaws and can have up to eight.
- Failure deals 80% maximum HP as Agony, regardless of Burden.
- Success removes Bloodjaws for 15 seconds and makes Bakragore take 135% damage for 15 seconds.
- Charge punishment at 6/12 seconds: Knight 5/10%, Monk 20/40%, other vocations 40/80%.
Essences, Echoes and Burden
- Sacrifice the Essence of Murcion, Ichgahal, Vemiath or Chagorz before entry to increase Burden. One of each essence may be used.
- Every sacrificed essence replaces one starting Bloodjaw with that boss's Echo.
- Echoes cannot activate Rotten Charge. Killing an Echo creates a normal Elder Bloodjaw.
- The sacrifice belongs to the snapshotted party for 30 minutes. On expiry or logout, unused essences are returned to the inbox.
Failure and completion
- Entering requires the four taints and progress from all four minibosses.
- If the team fails Bakragore, every member loses two random, distinct Taints and the matching miniboss progress/cooldowns are cleared.
- Victory applies no failure penalty and the normal completion event resets the used Taints.
- Burden changes boss difficulty and rewards but does not add another Taint requirement.
Bakragore Burden scaling
| Burden | Boss damage | Damage received | Loot bonus | XP bonus |
|---|---|---|---|---|
| 0 | 100% | 100% | 0% | 0% |
| 1 | 90% | 125% | +5% | +15% |
| 2 | 80% | 150% | +15% | +45% |
| 3 | 70% | 175% | +35% | +105% |
| 4 | 60% | 200% | +75% | +225% |
Burden trade-off: higher Burden makes Bakragore deal less damage but take substantially more damage, while adding Echoes and increasing loot/experience. Prepare normal Bloodjaws before each Rotten Charge because Echoes do not count.
Boss and mechanic preview images are loaded from Tibiopedia.pl. Labels remain readable if an external item image is unavailable.